Adding Authentication Options
ACTIVATE allows users in your organization to log in via integrations with third-party identity providers. This page explains how to manage these authentication options for your ACTIVATE organization.
Currently, we support:
The steps included on this page can only be completed by users with the org:admin role. For more information, please see About Group Roles.
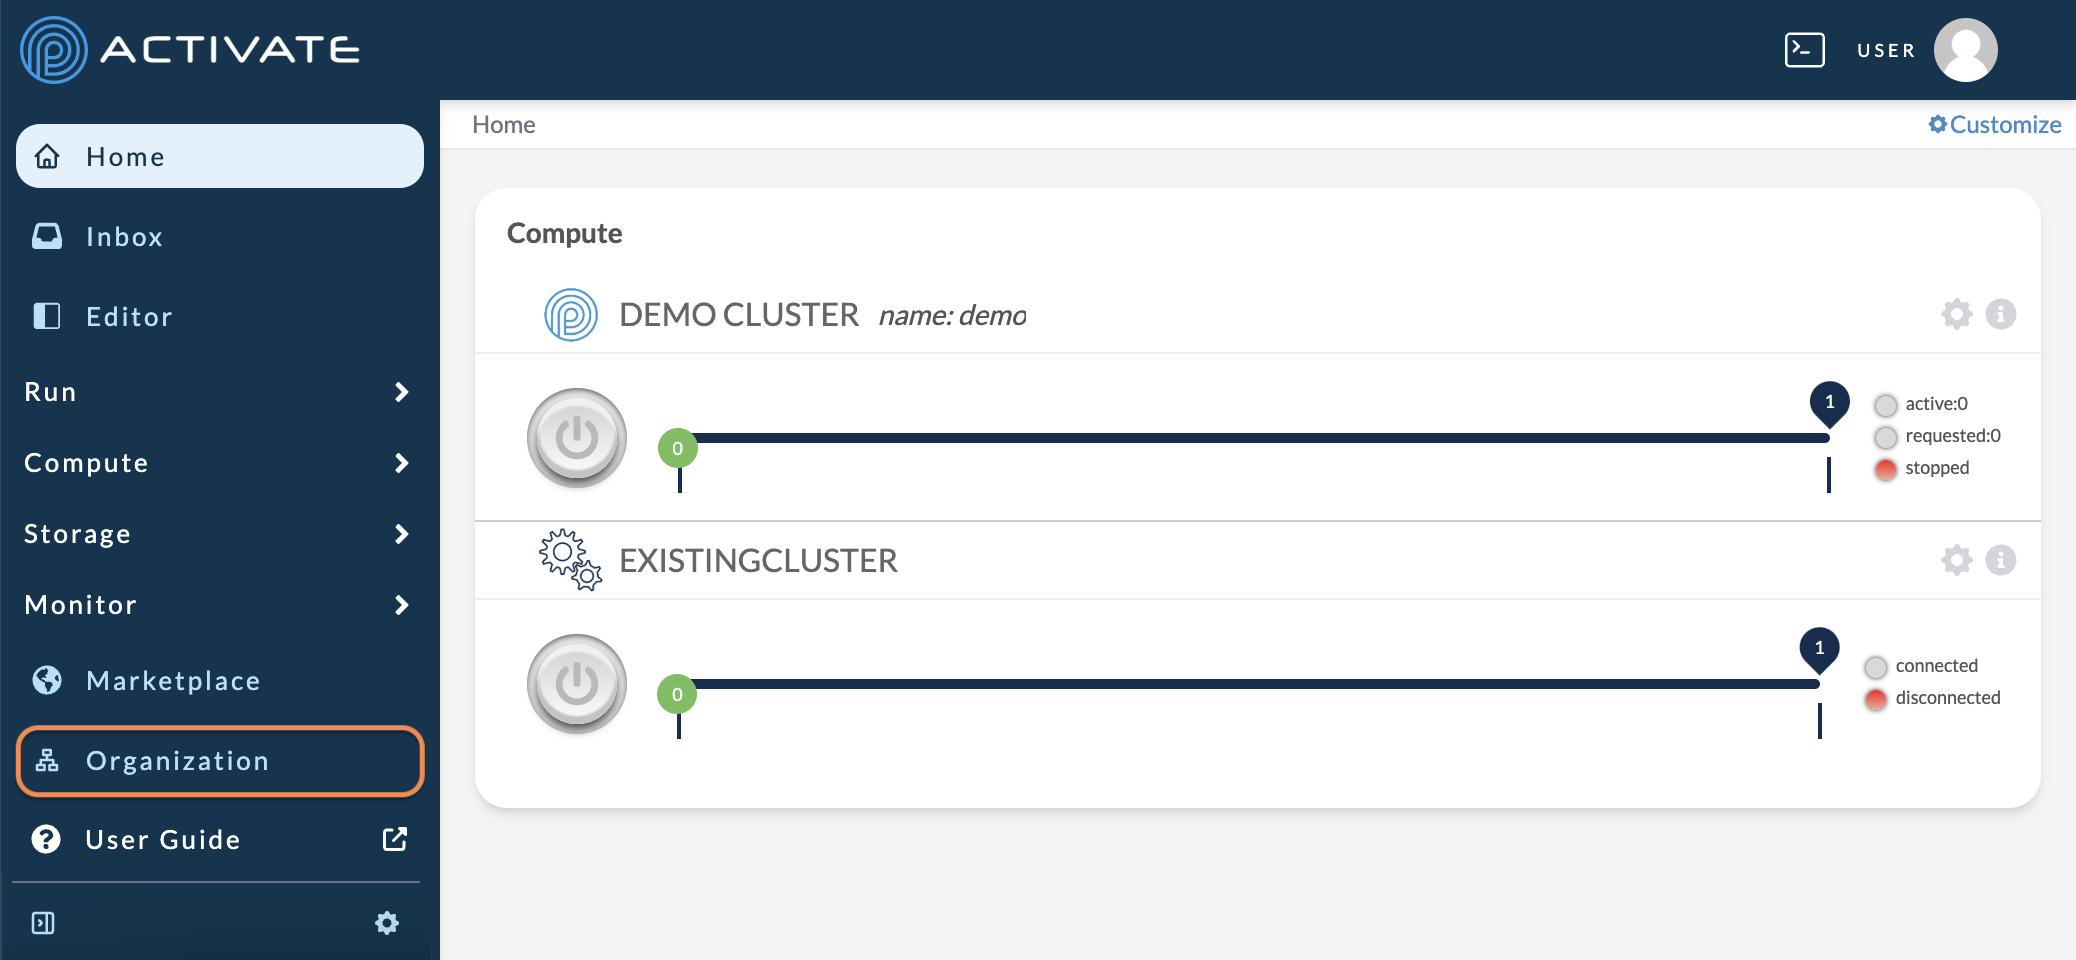
Navigate to your Organization settings.
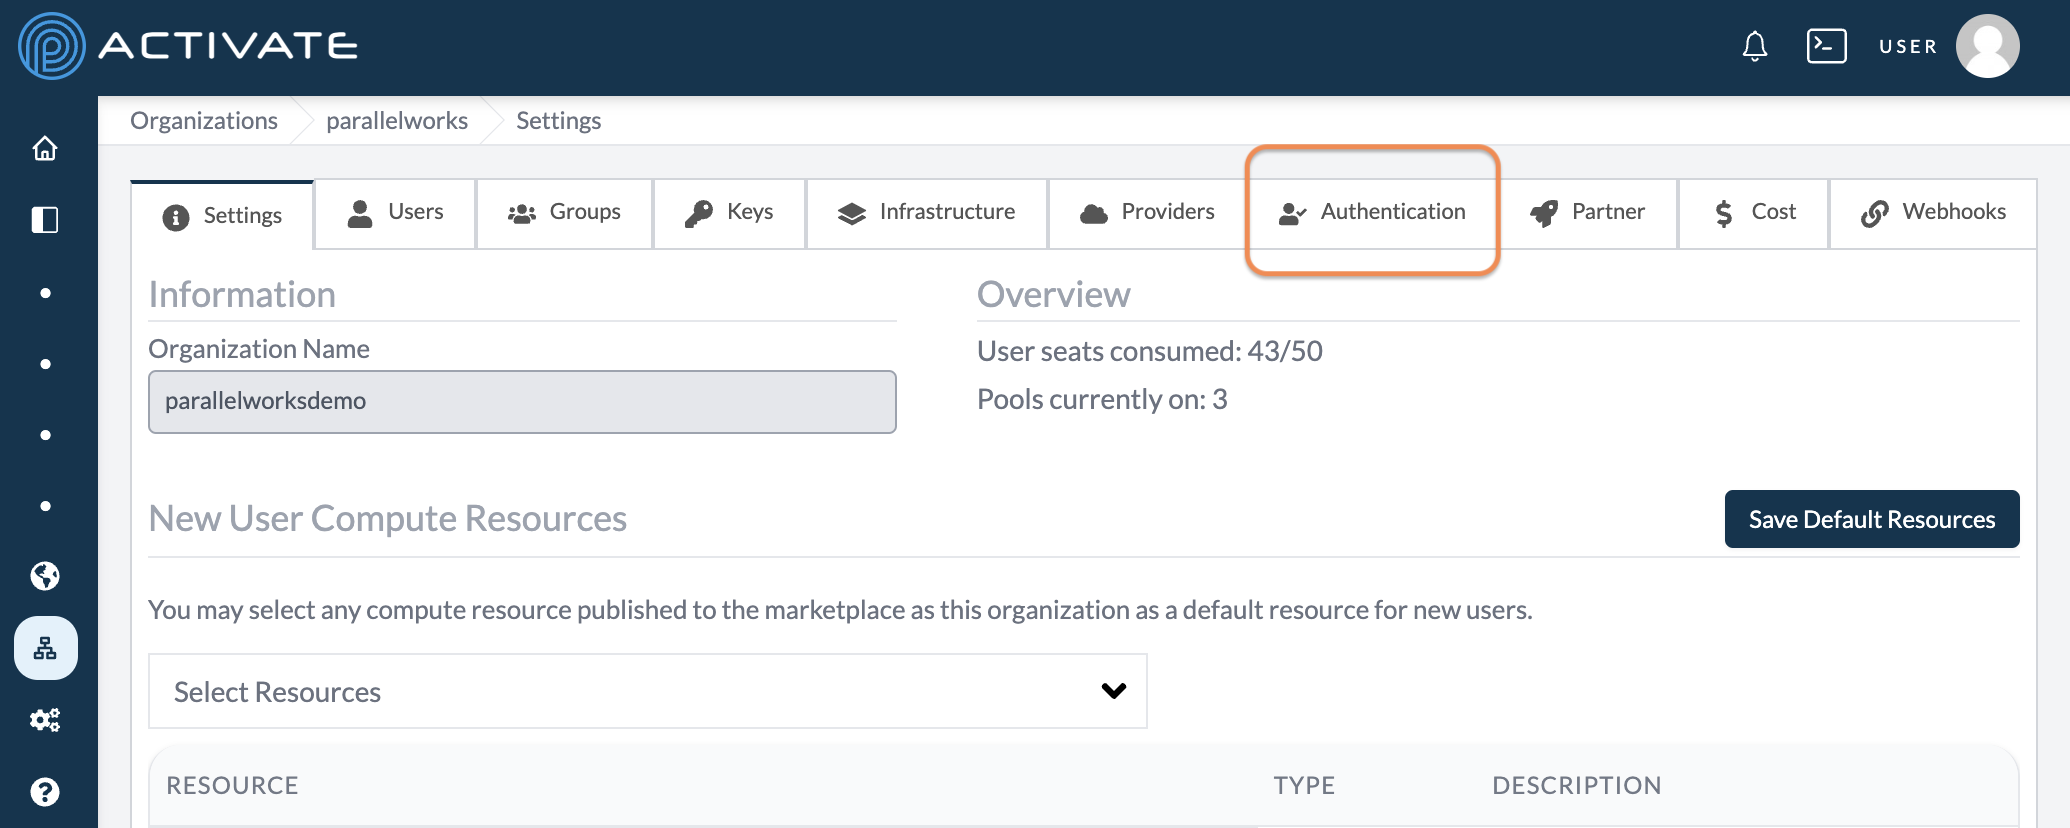
On the next page, click Authentication.
Click Add Authentication Option.

Select the authentication option that best suits your organization's needs. The sections below include more details about configuration.
LDAP
The page will display a configuration form to connect LDAP. Fields marked with an asterisk (*) are required.
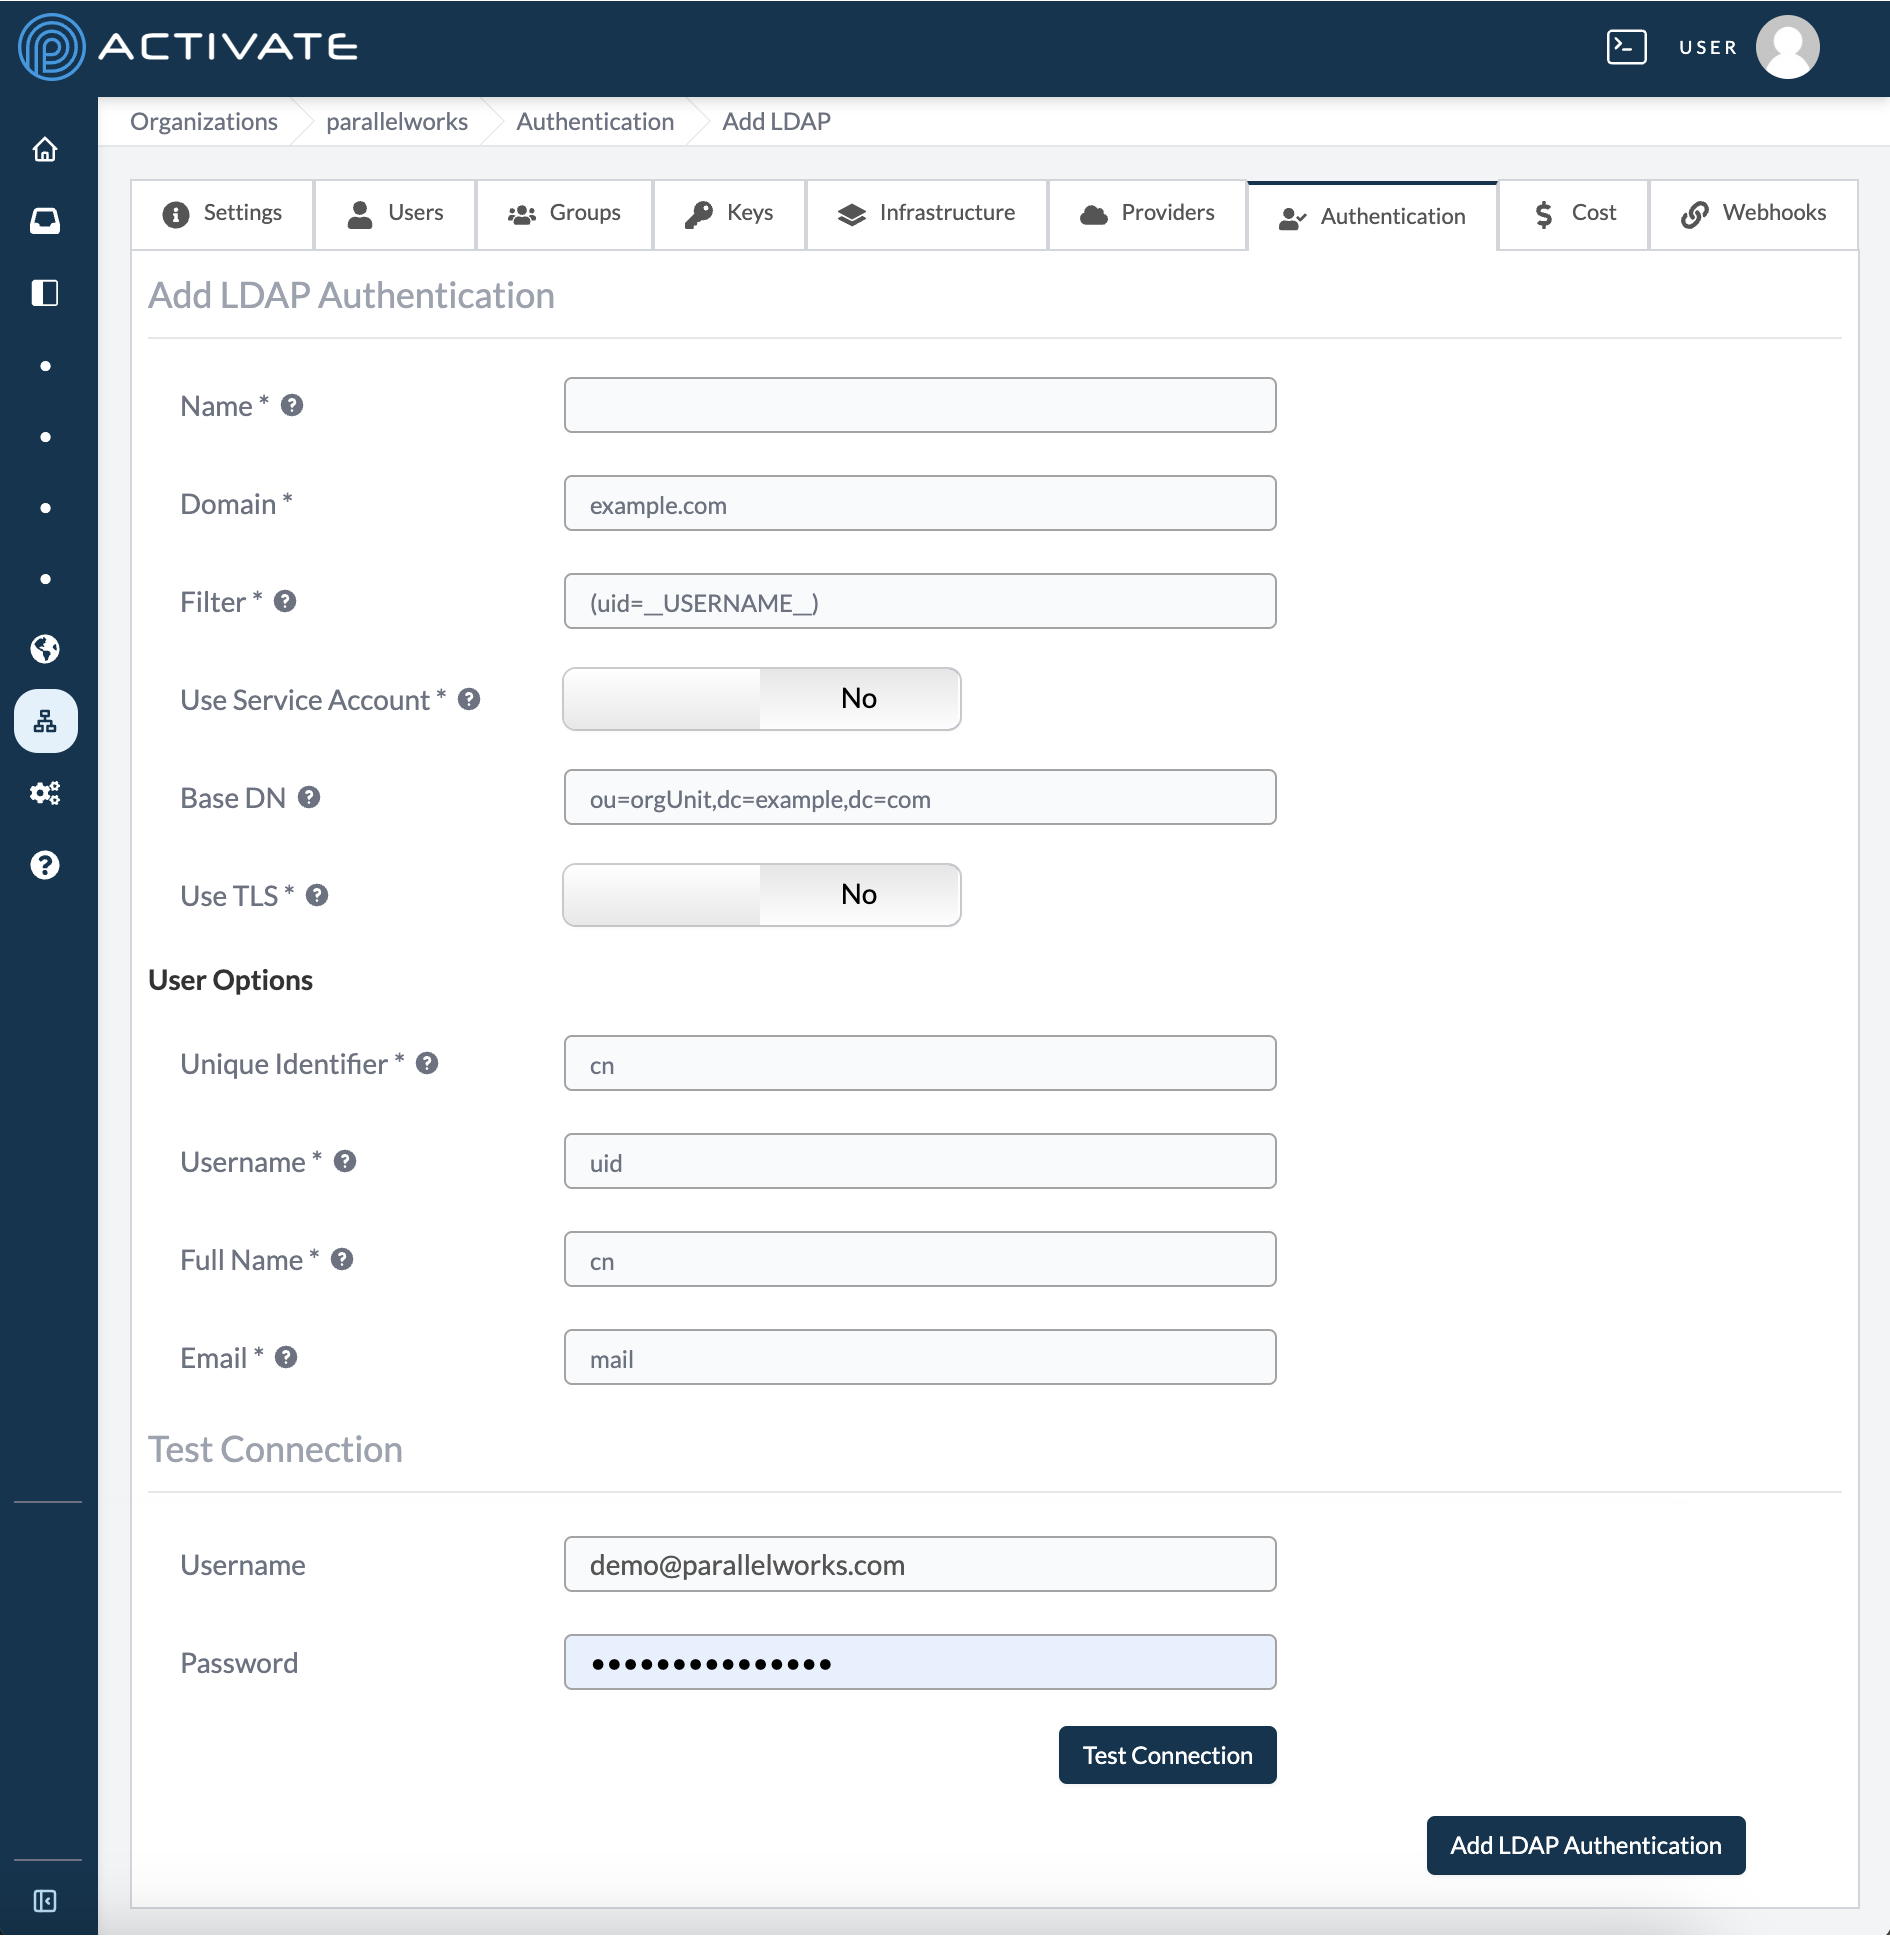
LDAP Authentication
Name
Use this field to name the LDAP connection, which will be displayed on the ACTIVATE login page.
Domain
Use this field enter the host name of the LDAP server you'll be connecting to. You should leave off the protocol.
Filter
This should be a valid LDAP filter. This field will substitute the literal string __USERNAME__ with the username of the user who is signing in. As an example, if your primary key is sAMAccountName you could filter with (sAMAccountName=_USERNAME_).
User Service Account
Toggle this option to Yes to use a service account to search for the dn of users on the LDAP server.
If this option is enabled, required fields for a Service Account Bind and Service Account Password will appear.
Base DN (Optional)
Use this field to indicate where the system will start searching for the user.
For example, dc=parallelworks,dc=com
Use TLS
Toggle this option to Yes to use Transport Layer Security (TLS) when connecting to the LDAP server.
If this option is enabled, fields for the Client Certificate and Client Key will appear. These fields are not required, but they are necessary if you want to use Simple Authentication and Security Layer (SASL) authentication. TLS must be enabled to add SASL.
When Client Certificate and Client Key are provided, we do an external bind, but only if a service account was not provided. If neither a service account or a cert is provided, we try an anonymous bind.
User Options
Unique Identifier
Use this field to enter the attribute of the user object that uniquely identifies the user.
Username
Use this field to enter the attribute of the user object that contains the username.
Full Name
Use this field to enter the attribute of the user object that contains the name.
Email
Use this field to enter the attribute of the user object that contains the user's email.
Test Connection
Username
Use this field to enter the username of the LDAP account you'll use to test the LDAP connection.
Password
Use this field to enter the password of the LDAP account you'll use to test the LDAP connection.
After you've filled out all fields, click Add LDAP Authentication. Your LDAP option will be displayed in the Authentication tab.
Azure Active Directory
You'll be redirected to a Microsoft sign-in screen. Log in to the admin account that has access to Azure AD.
Next, you'll be asked to grant single-sign on (SSO) permissions to Parallel Works. Click Accept.
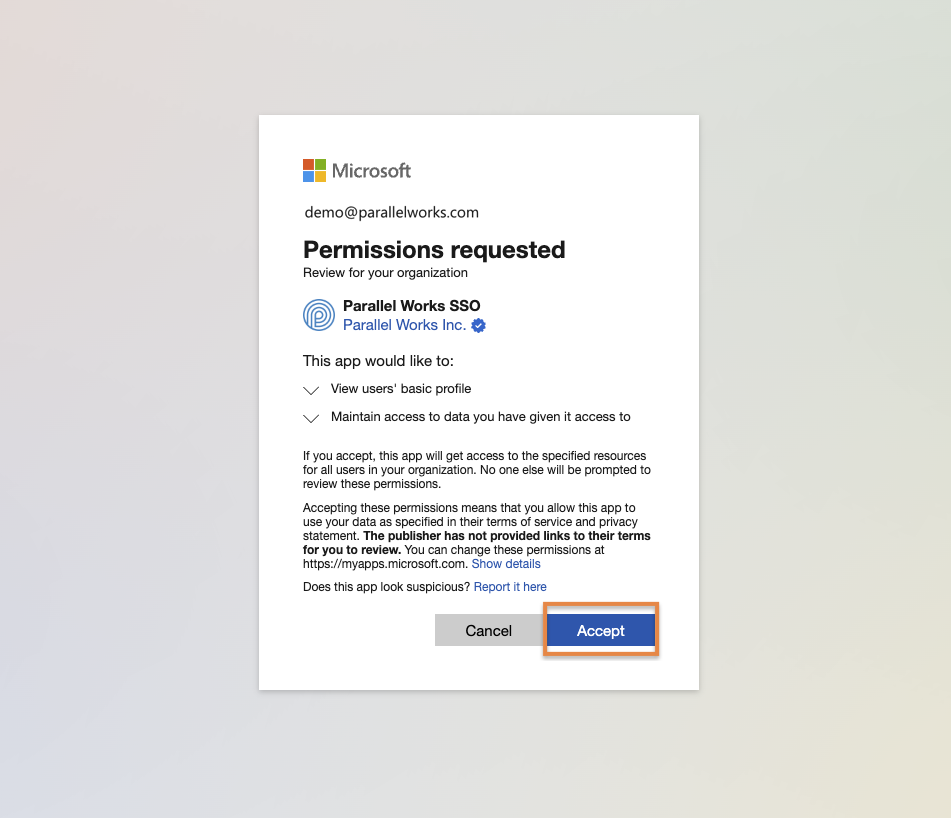
You'll be redirected back to the ACTIVATE Authentication tab, where your Azure AD Connection status will be displayed.
Keycloak
The page will display a configuration form to connect Keycloak. Fields marked with an asterisk (*) are required.
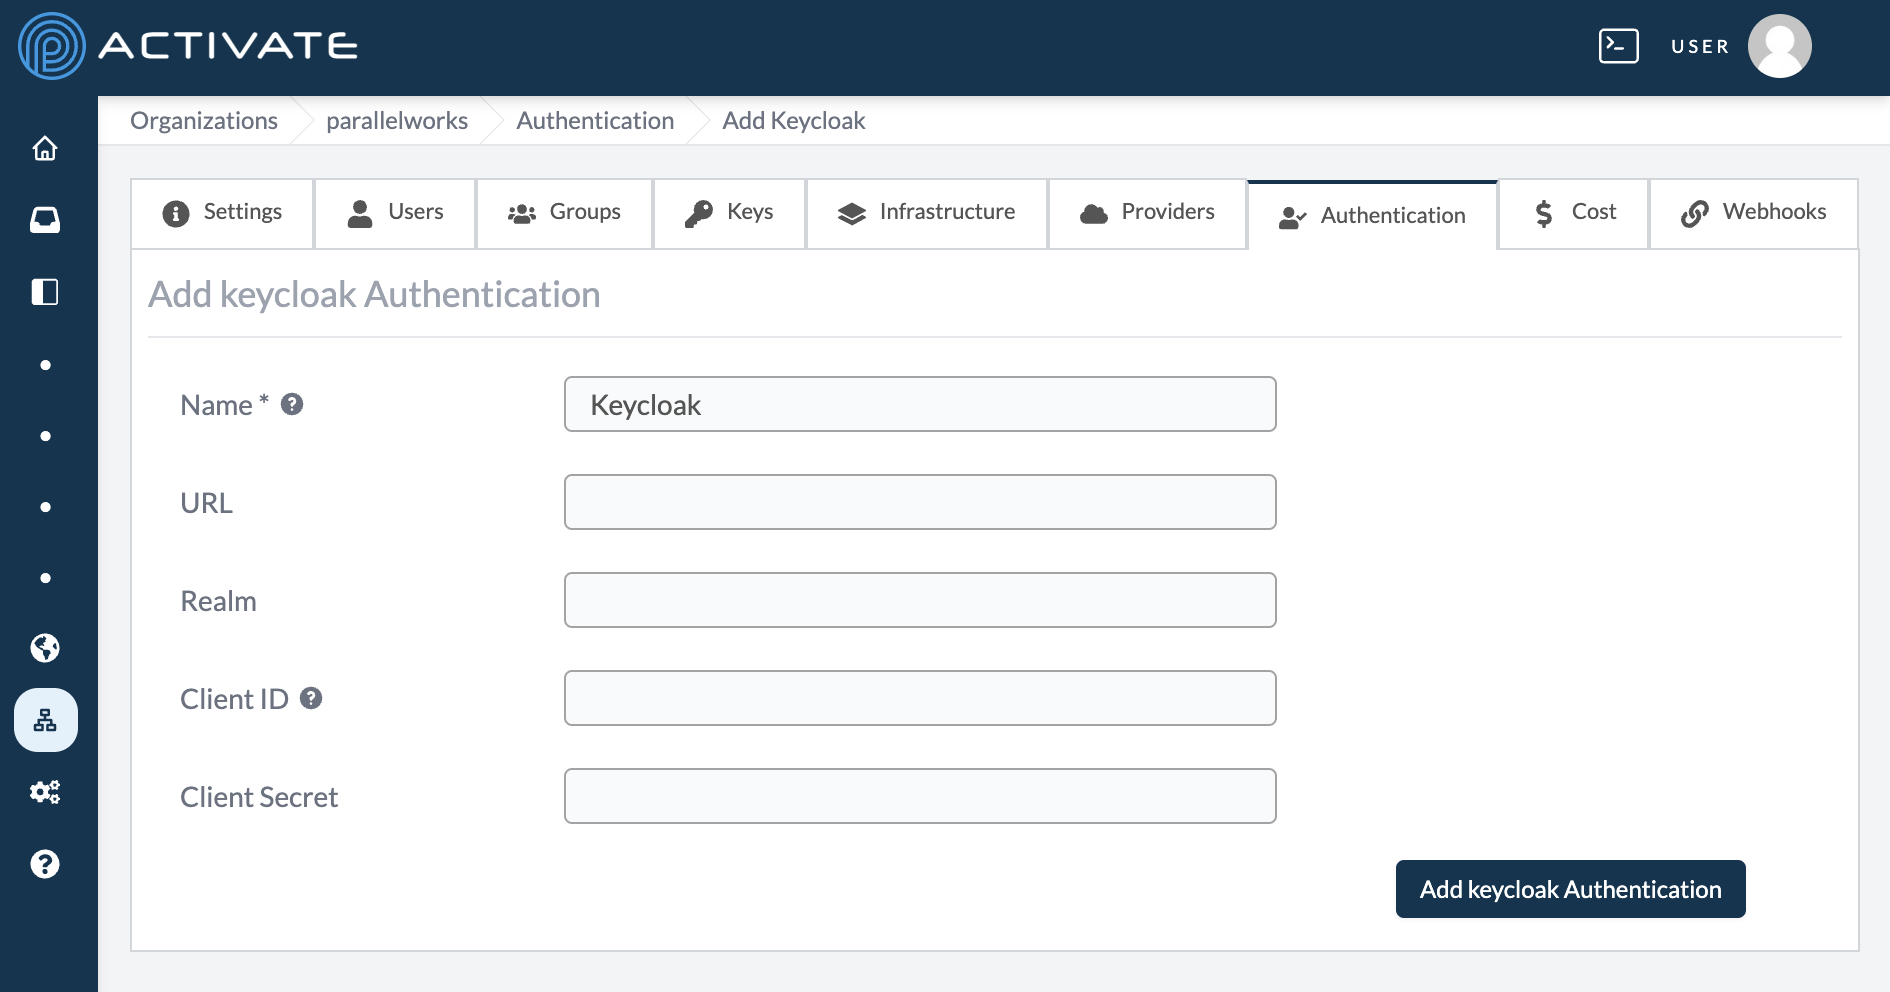
Name
Use this field to name the Keycloak connection, which will be displayed on the ACTIVATE login page.
URL
Use this field to enter the URL where users will log in via Keycloak.
Realm
Use this field to enter the realm for the Keycloak server.
Client ID
Use this field to enter the client ID for the Keycloak server.
Client Secret
Use this field to enter the client secret for the Keycloak server.
After you've filled out all fields, click Add Keycloak Authentication. Your Keycloak option will be displayed in the Authentication tab.
Login.gov
The page will display a configuration form to connect Login.gov. Fields marked with an asterisk (*) are required.
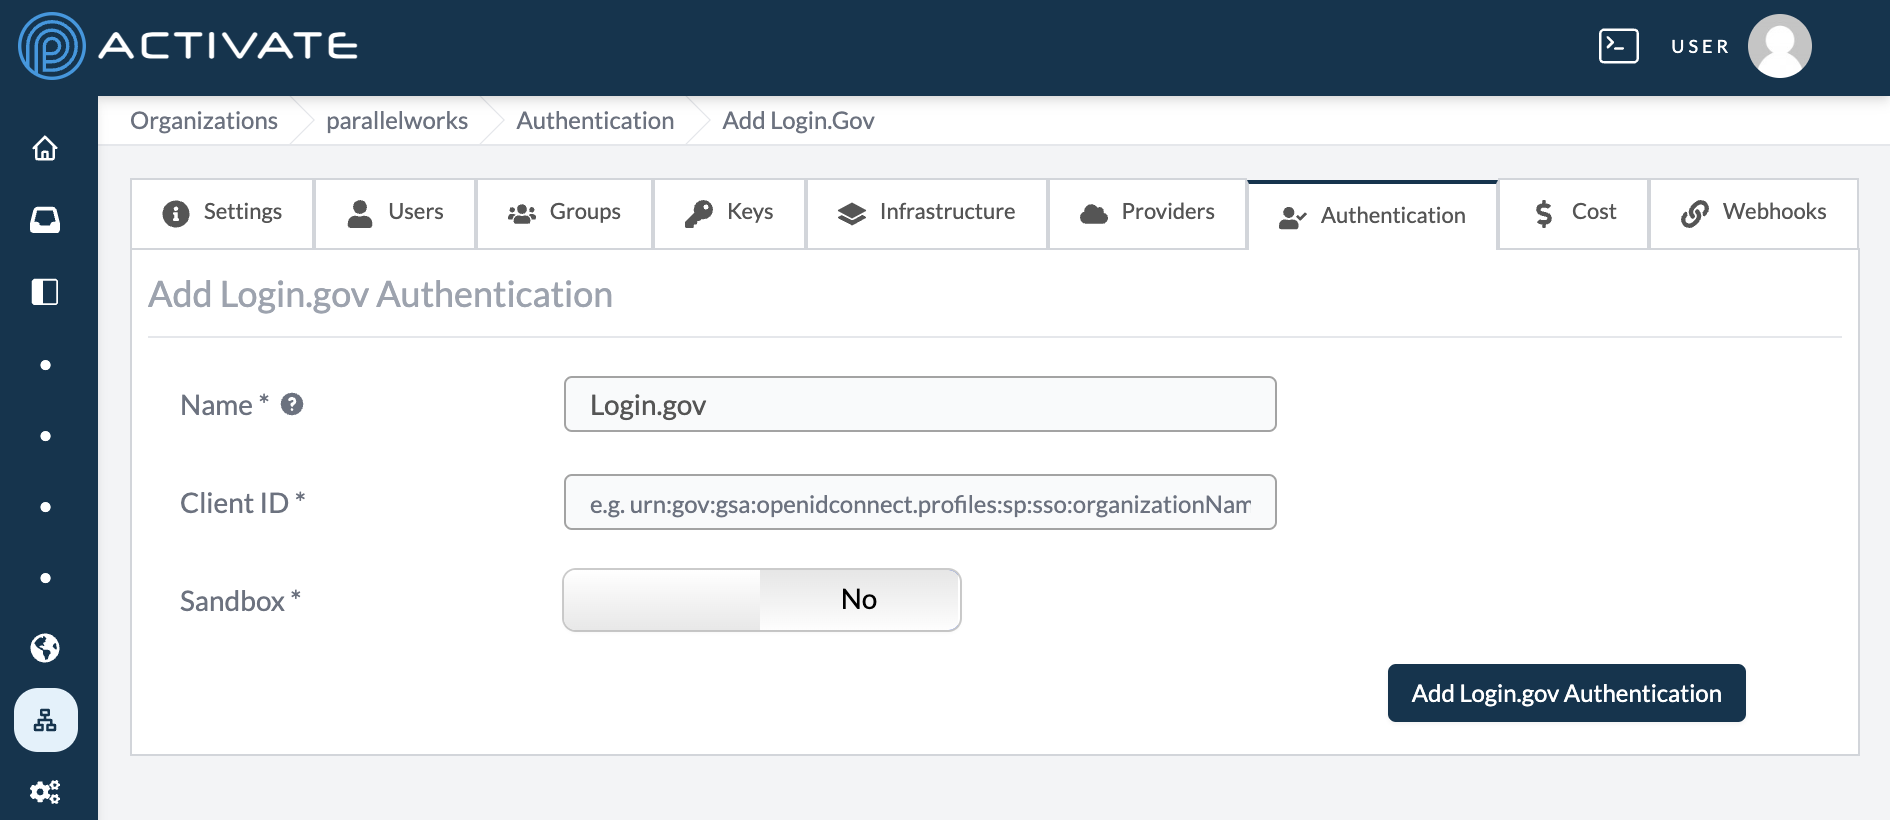
Name
Use this field to name the connection, which will be displayed on the ACTIVATE login page.
Client ID
Use this field to enter the client ID for the Login.gov server.
Sandbox
Use this field to enter the URL of the Login.gov sandbox.
After you've filled out all fields, click Add Login.gov Authentication. Your Login.gov option will be displayed in the Authentication tab.