About the Admin Panel
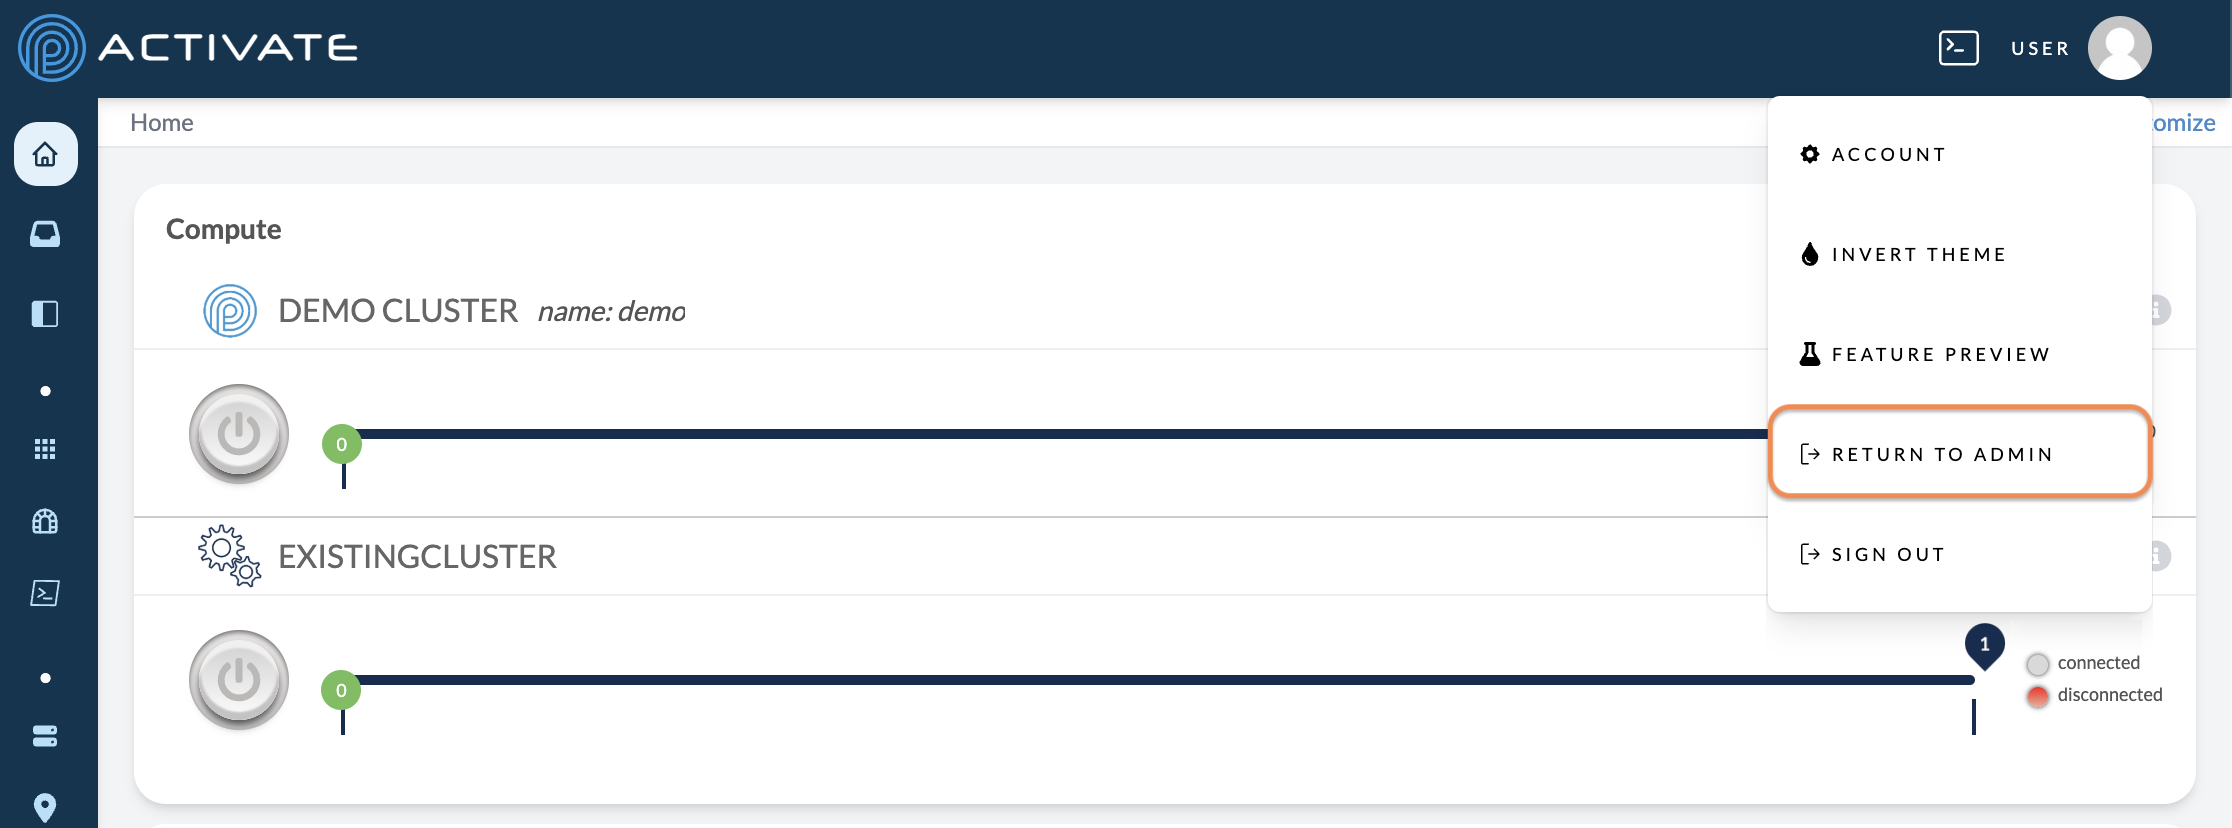
This page explains the features in the Admin Panel, which you can access by clicking your username and selecting Admin.
You’ll only be able to access these features if you’re an ACTIVATE platform administrator.
In much of the user guide, we say “user workspaces” to talk about a user’s account on the ACTIVATE platform. Please note that this term is synonymous with “user container,” which we use on this page.
Platform Settings
When you navigate to the Admin Panel, you’ll see Platform Settings by default. This tab displays essential information about your organization’s version of the platform.
When making changes on this page, click Save platform settings. Your changes will be applied immediately.
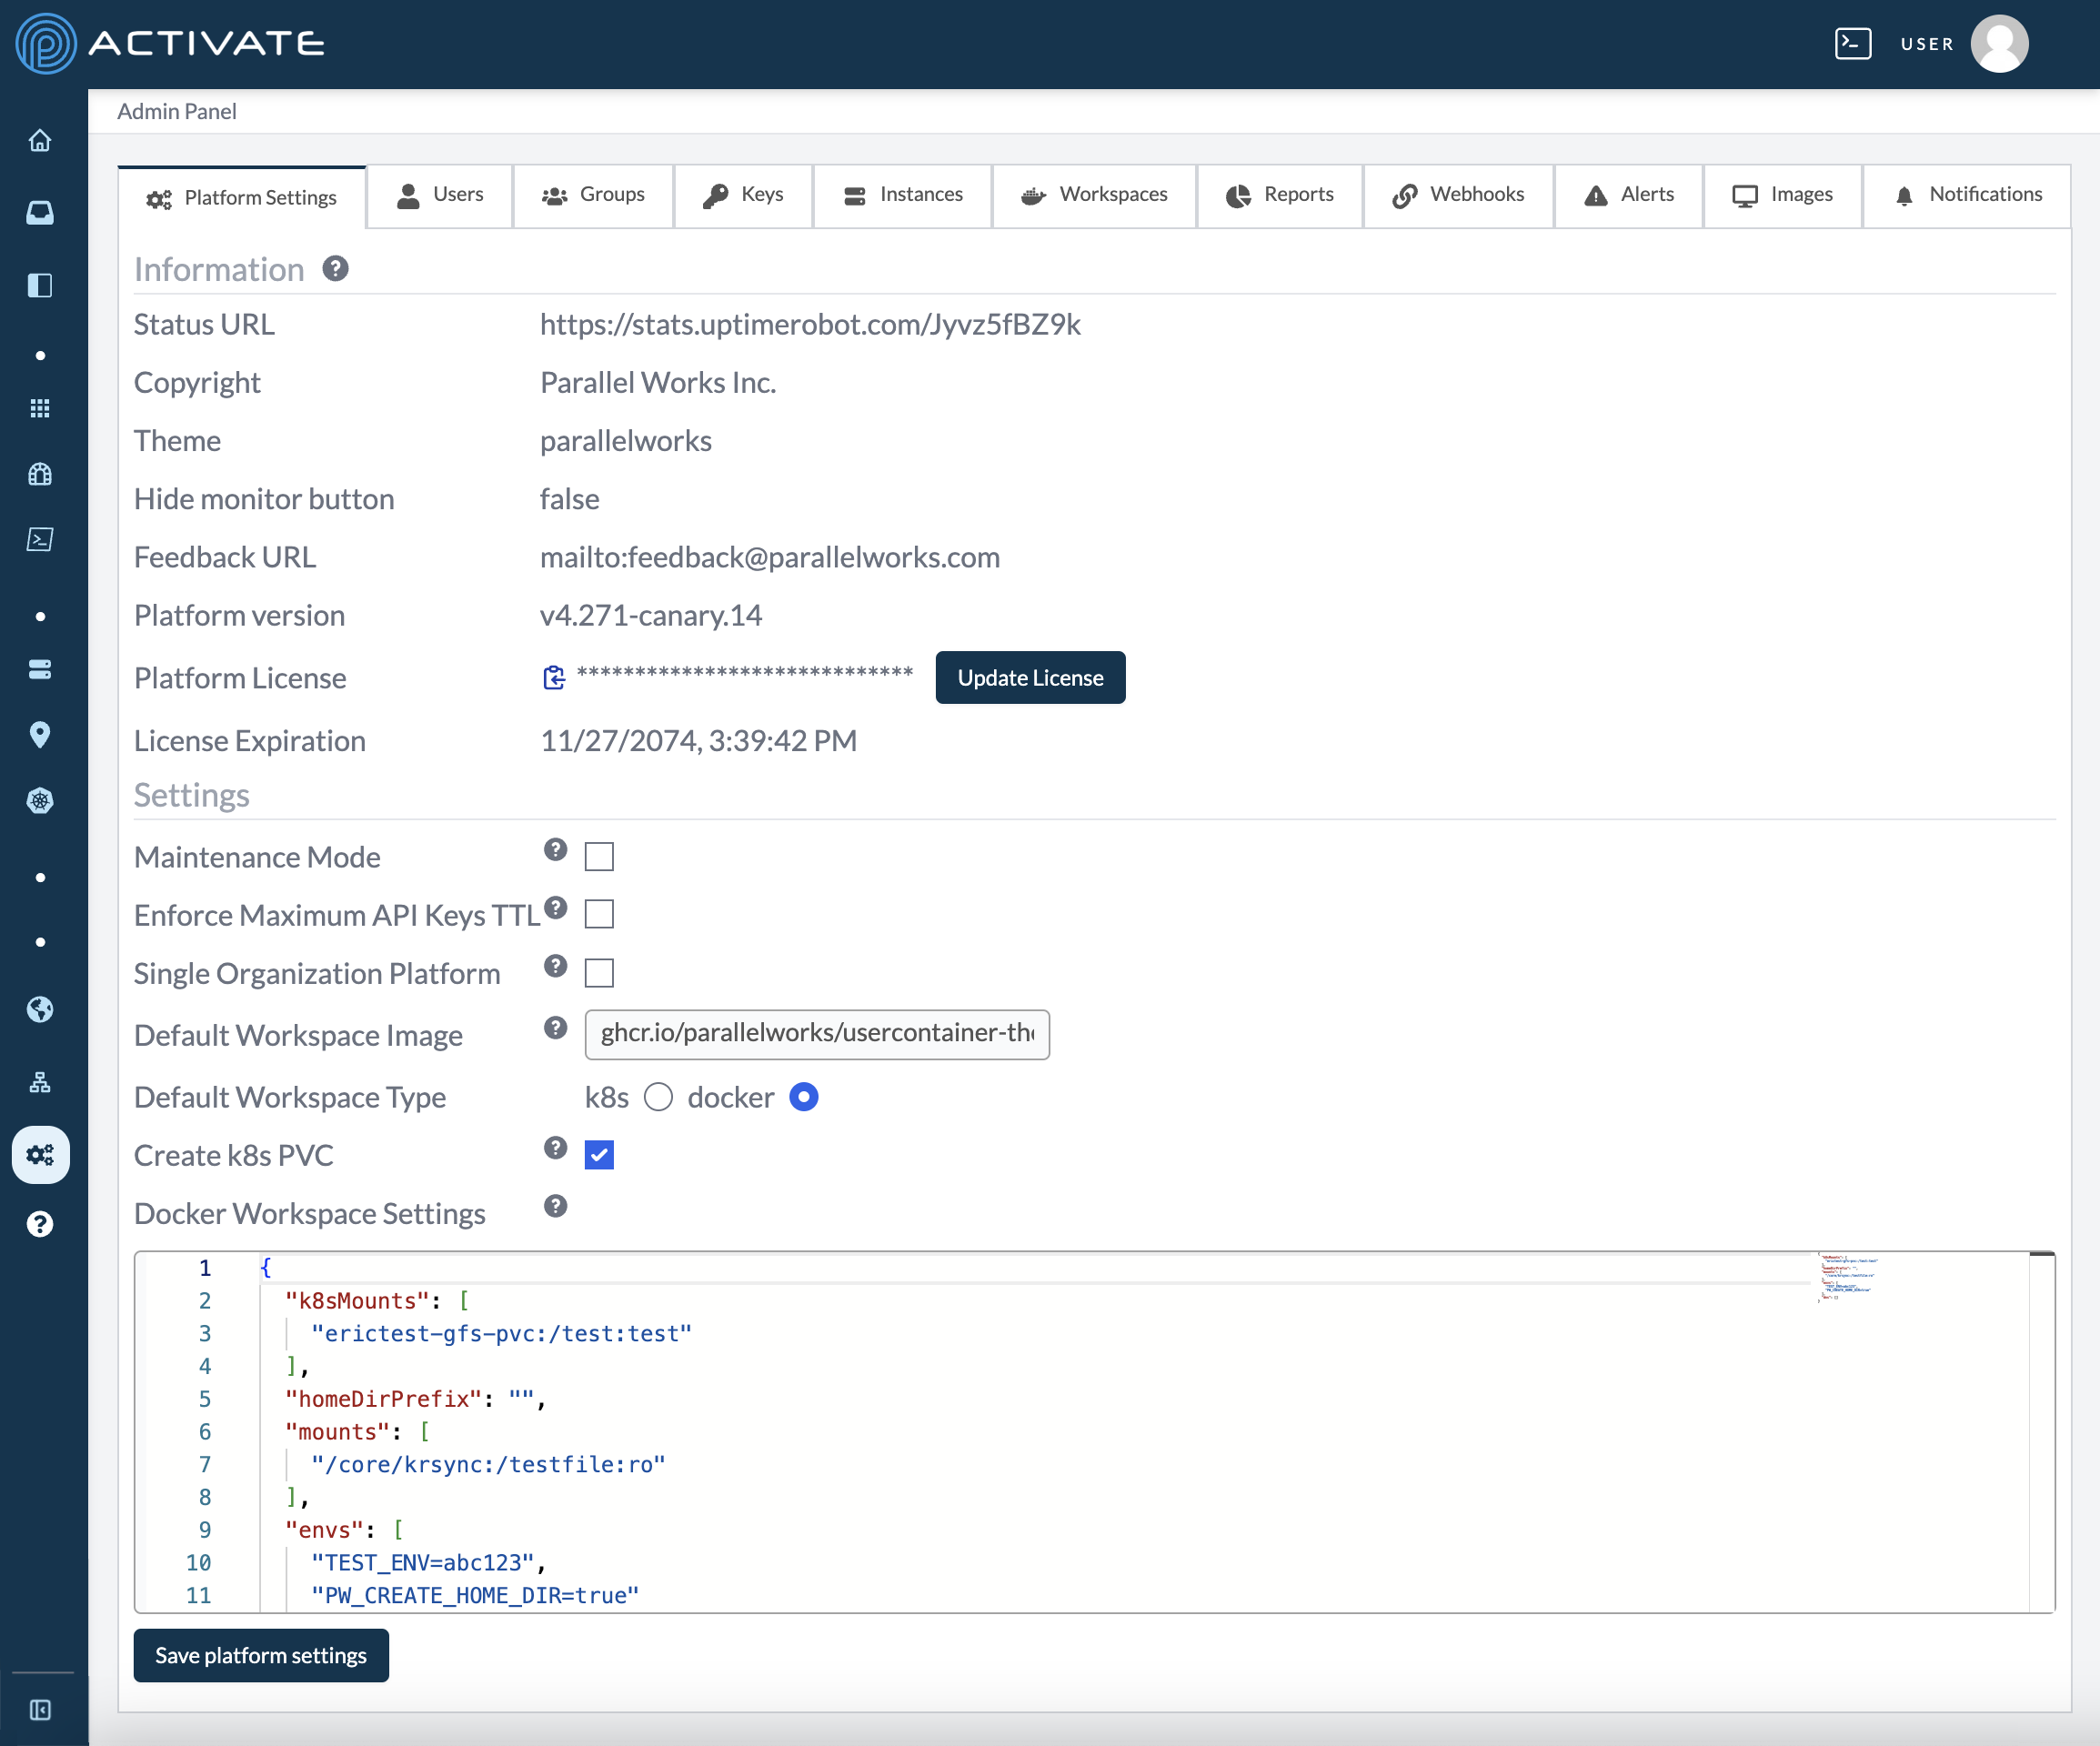
Maintenance Mode
While Maintenance Mode is enabled, only admins will be able to start and stop resources.
To enable Maintenance Mode, click the checkbox next to it.
The platform will remain in maintenance mode until you deactivate it.
API Key Expiration
By default, users can customize the expiration date for their created API keys with no expiration or a date in 7, 30, 60, or 90 days.
You can change the maximum number of days for API keys to expire. For example, if you set this date to 30 days, users may not create a key that expires after 60 days.
To make this change, check the box for Enforce Maximum API Keys TTL (Time to Live) and enter a number in the Days field that appears.
Single Organization Platform
If you check this box, other users will only see login options for the organization your account belong to.
Default Workspace Image
This field contains the URL for the default workspace image that will be assigned to new users' accounts.
Default Workspace Type
This option lets you select how user containers are hosted. Currently, the available workspace types are Kubernetes (k8s) and Docker.
Create k8s PVC
This option creates a PersistentVolumeClaim (PVC) in users' home directories. For more information about PVCs, please see this page of Kubernetes's documentation.
Docker Workspace Settings
Use this field to change Docker workspace settings, such as additional mounts, variables, and Domain Name System (DNS) settings.
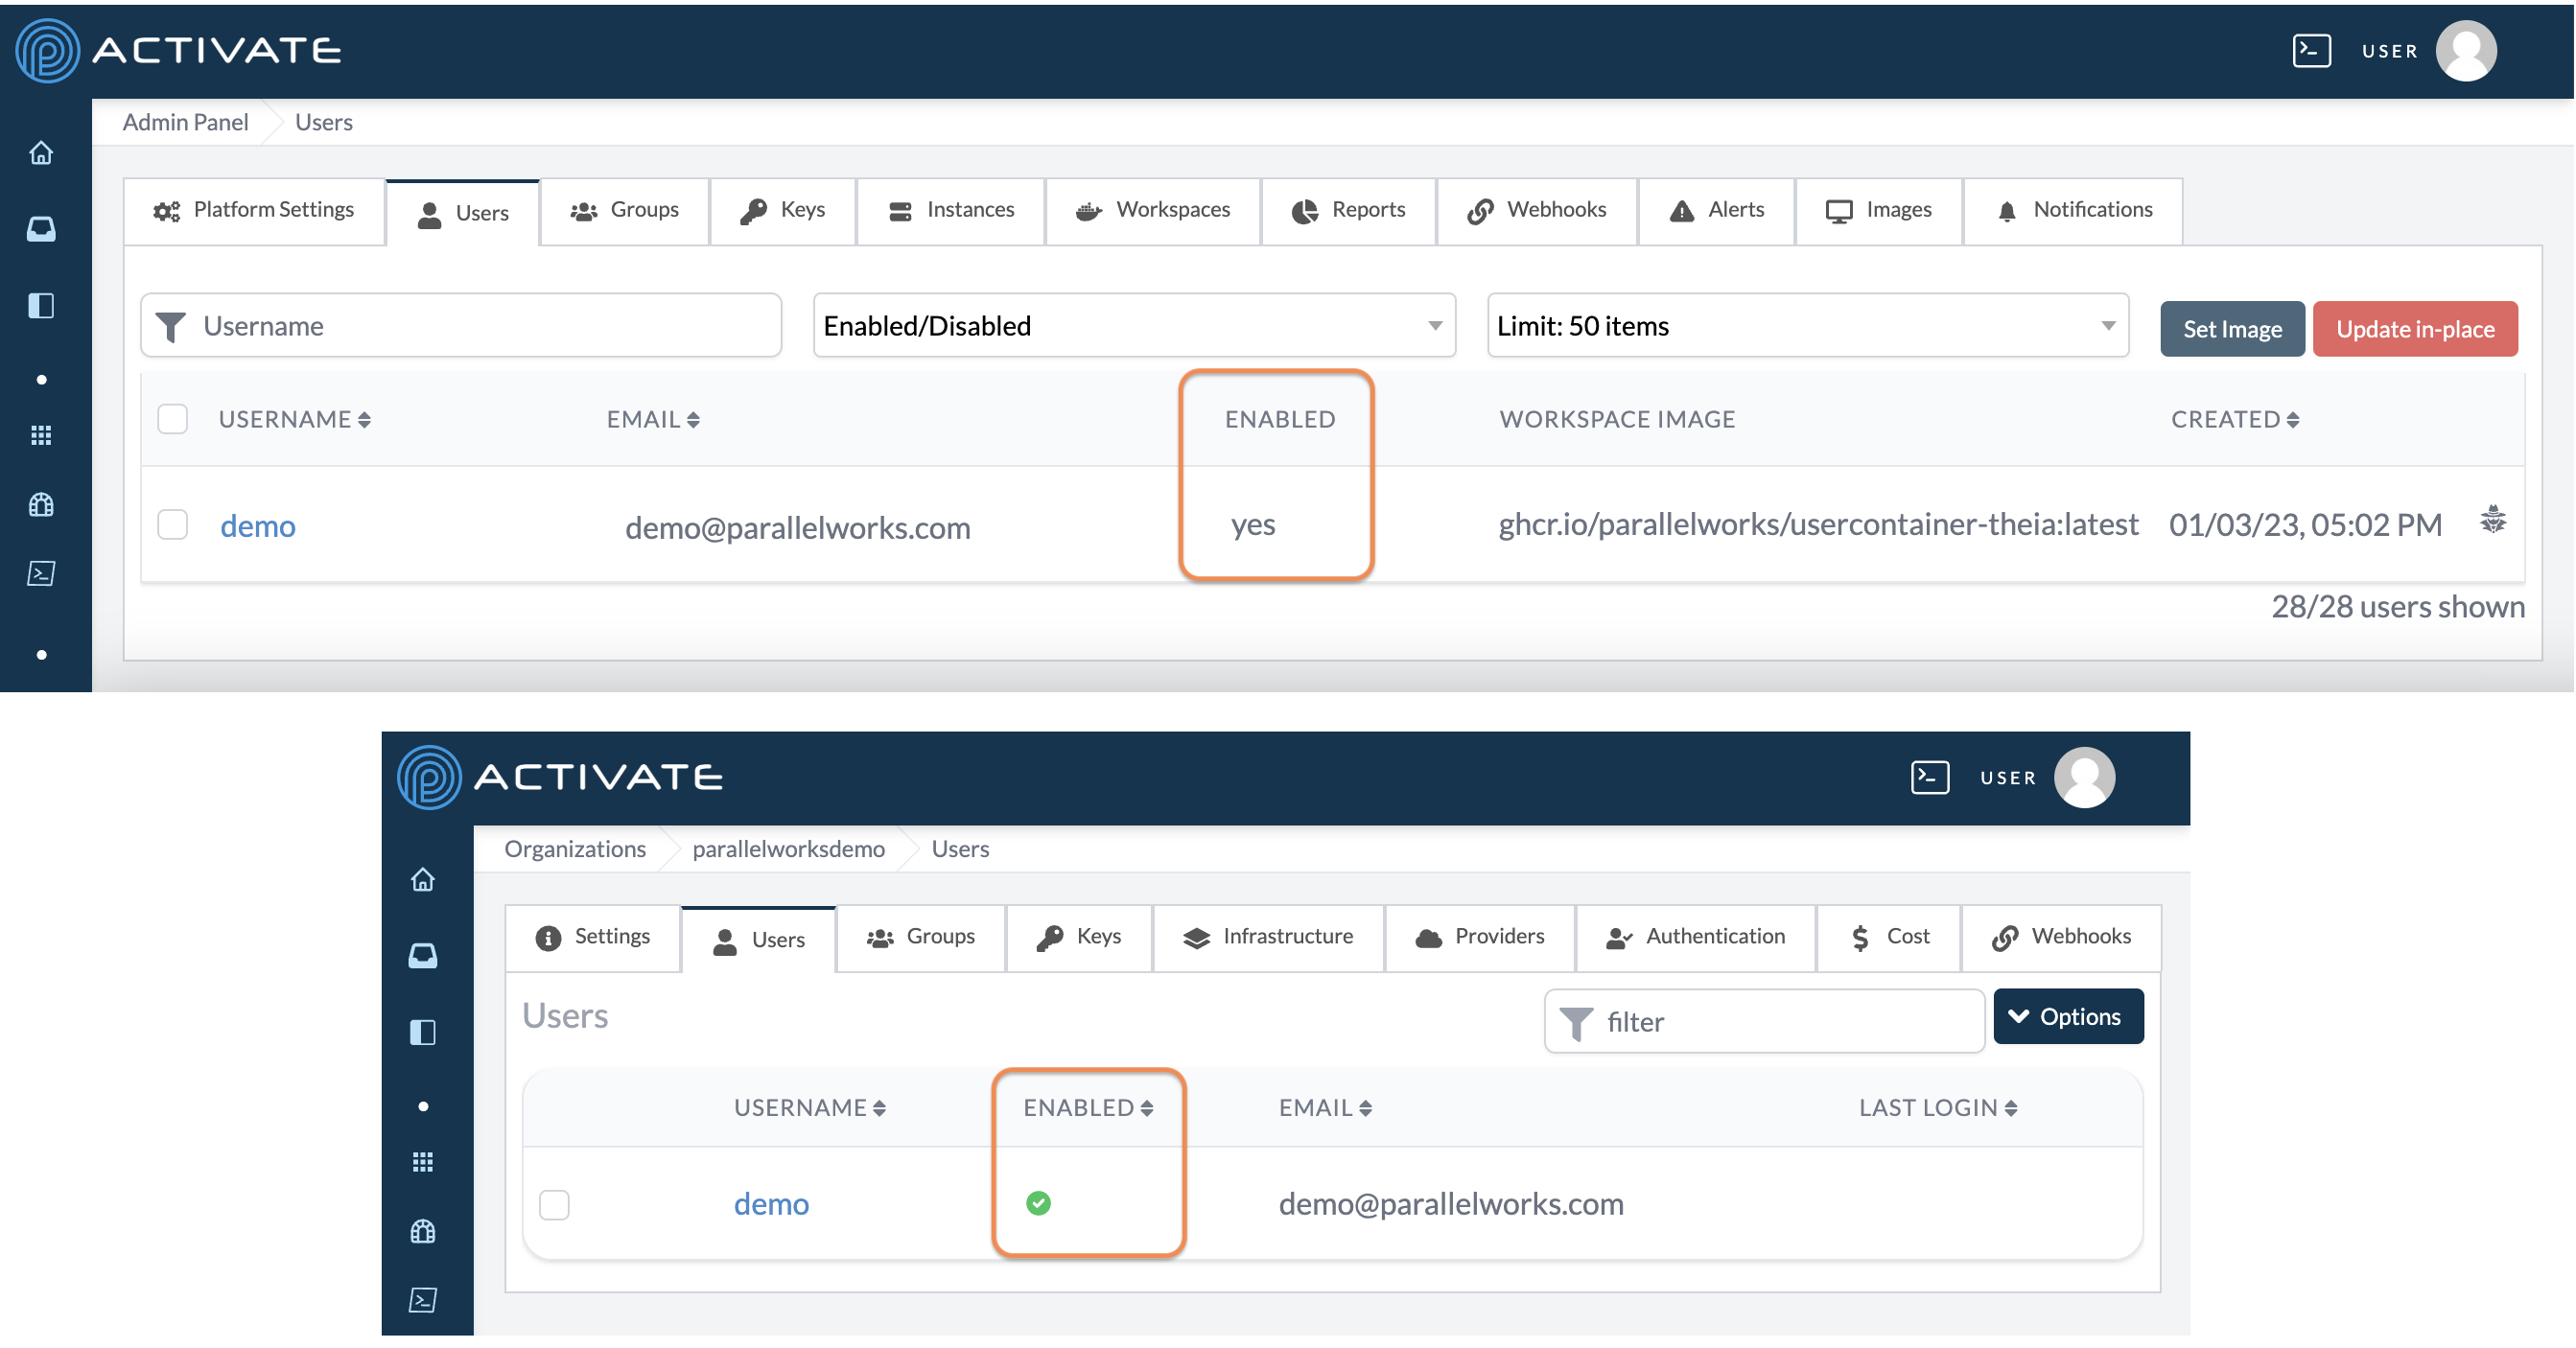
Users
This tab displays all of your users’ information, including:
- username
- email address
- enabled status
- workspace image
- account creation date

Use the Username field to search for users.

Use the Enabled/Disabled dropdown menu to display users that are enabled, disabled, or either. This option is set to Enabled/Disabled by default.
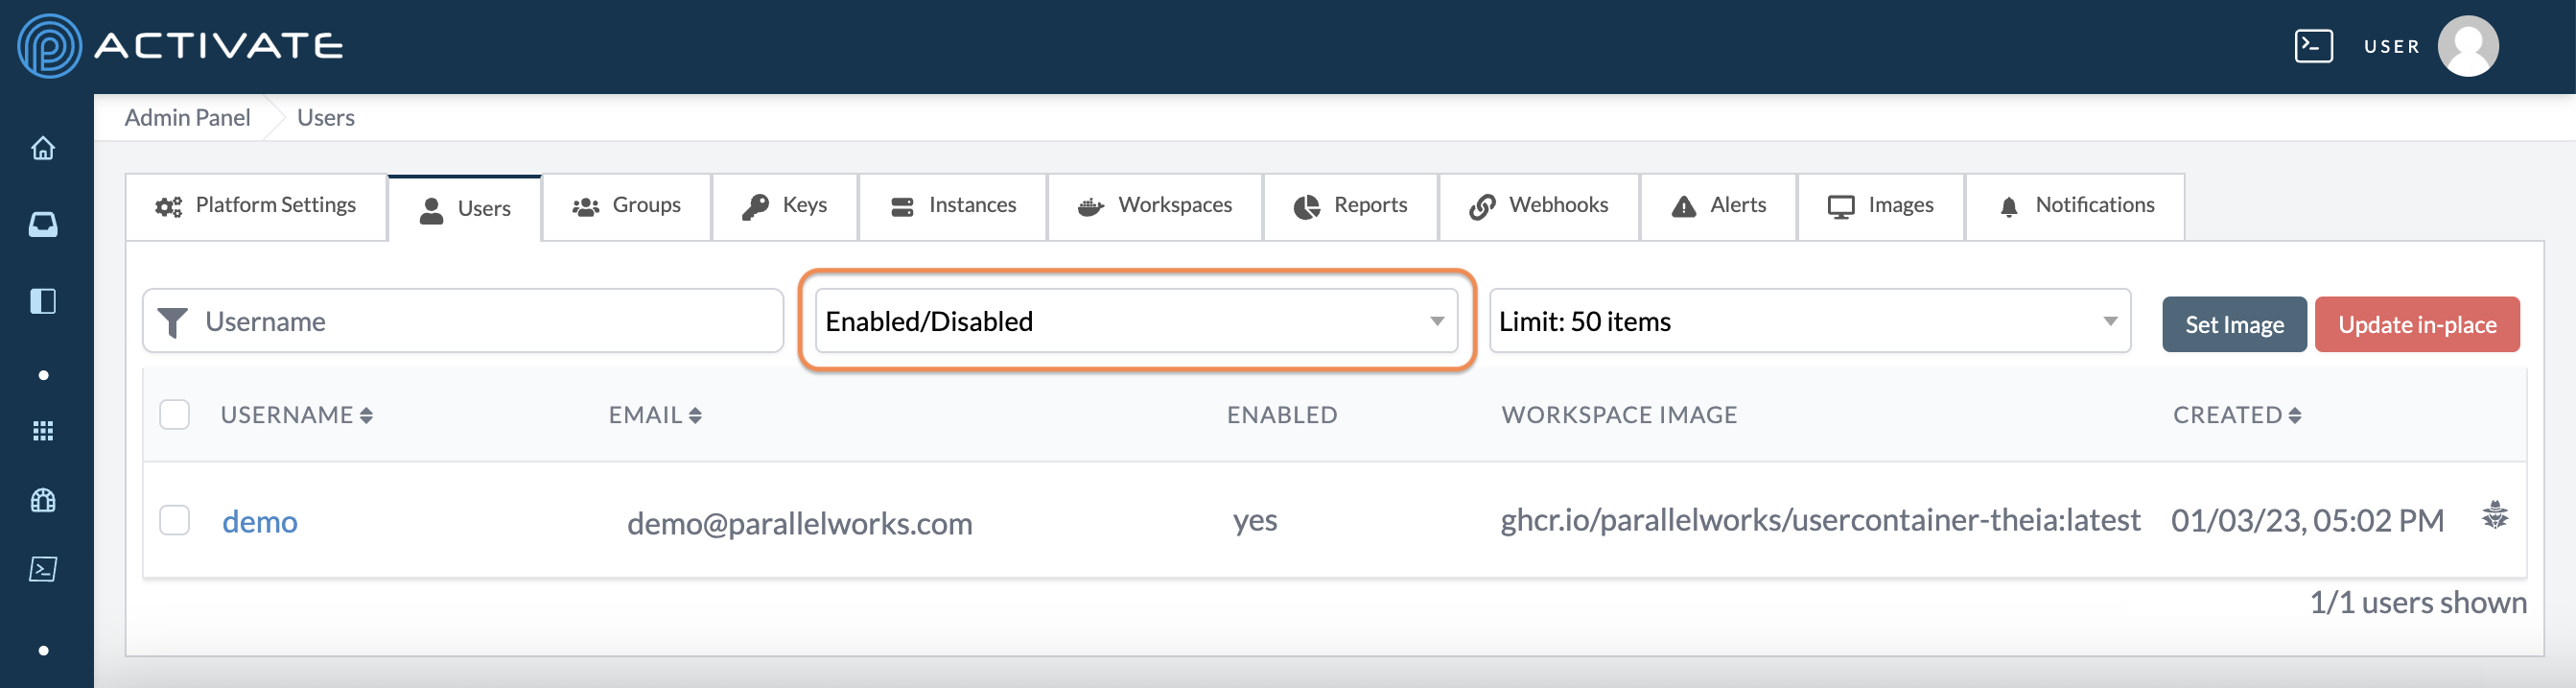
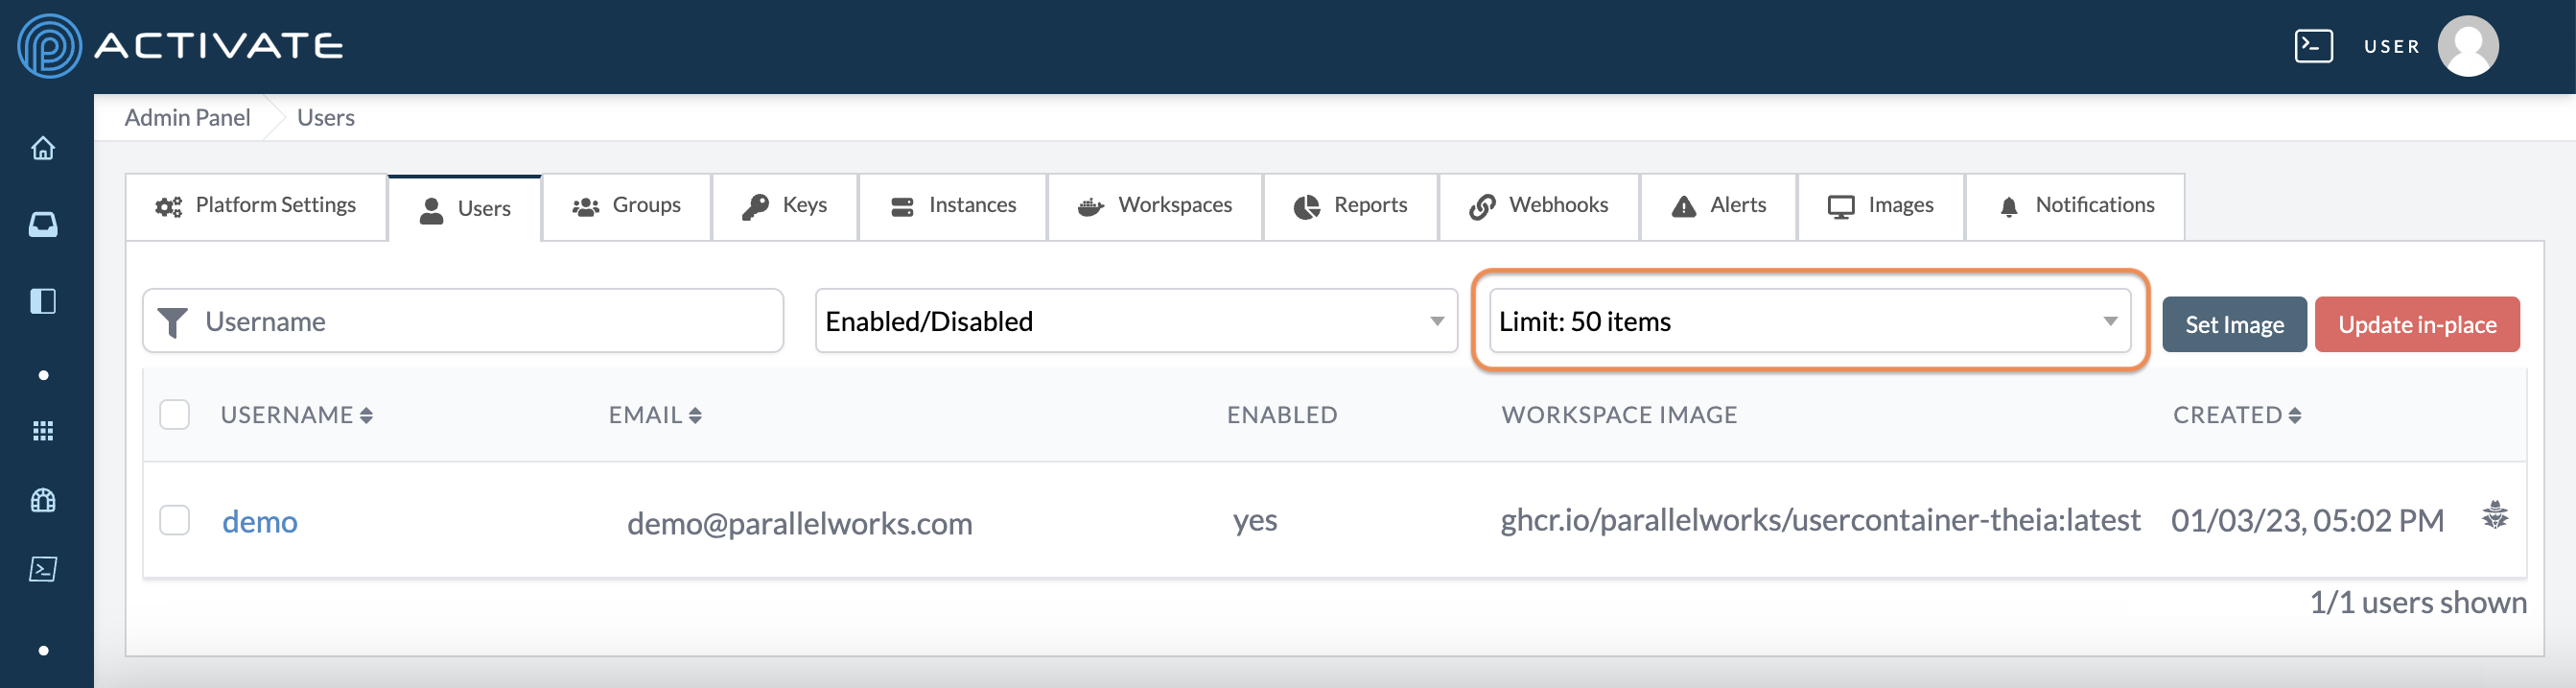
Use the Limit dropdown menu to narrow the listed users to 10, 20, 50, 100, or All. This option is set to 50 by default.
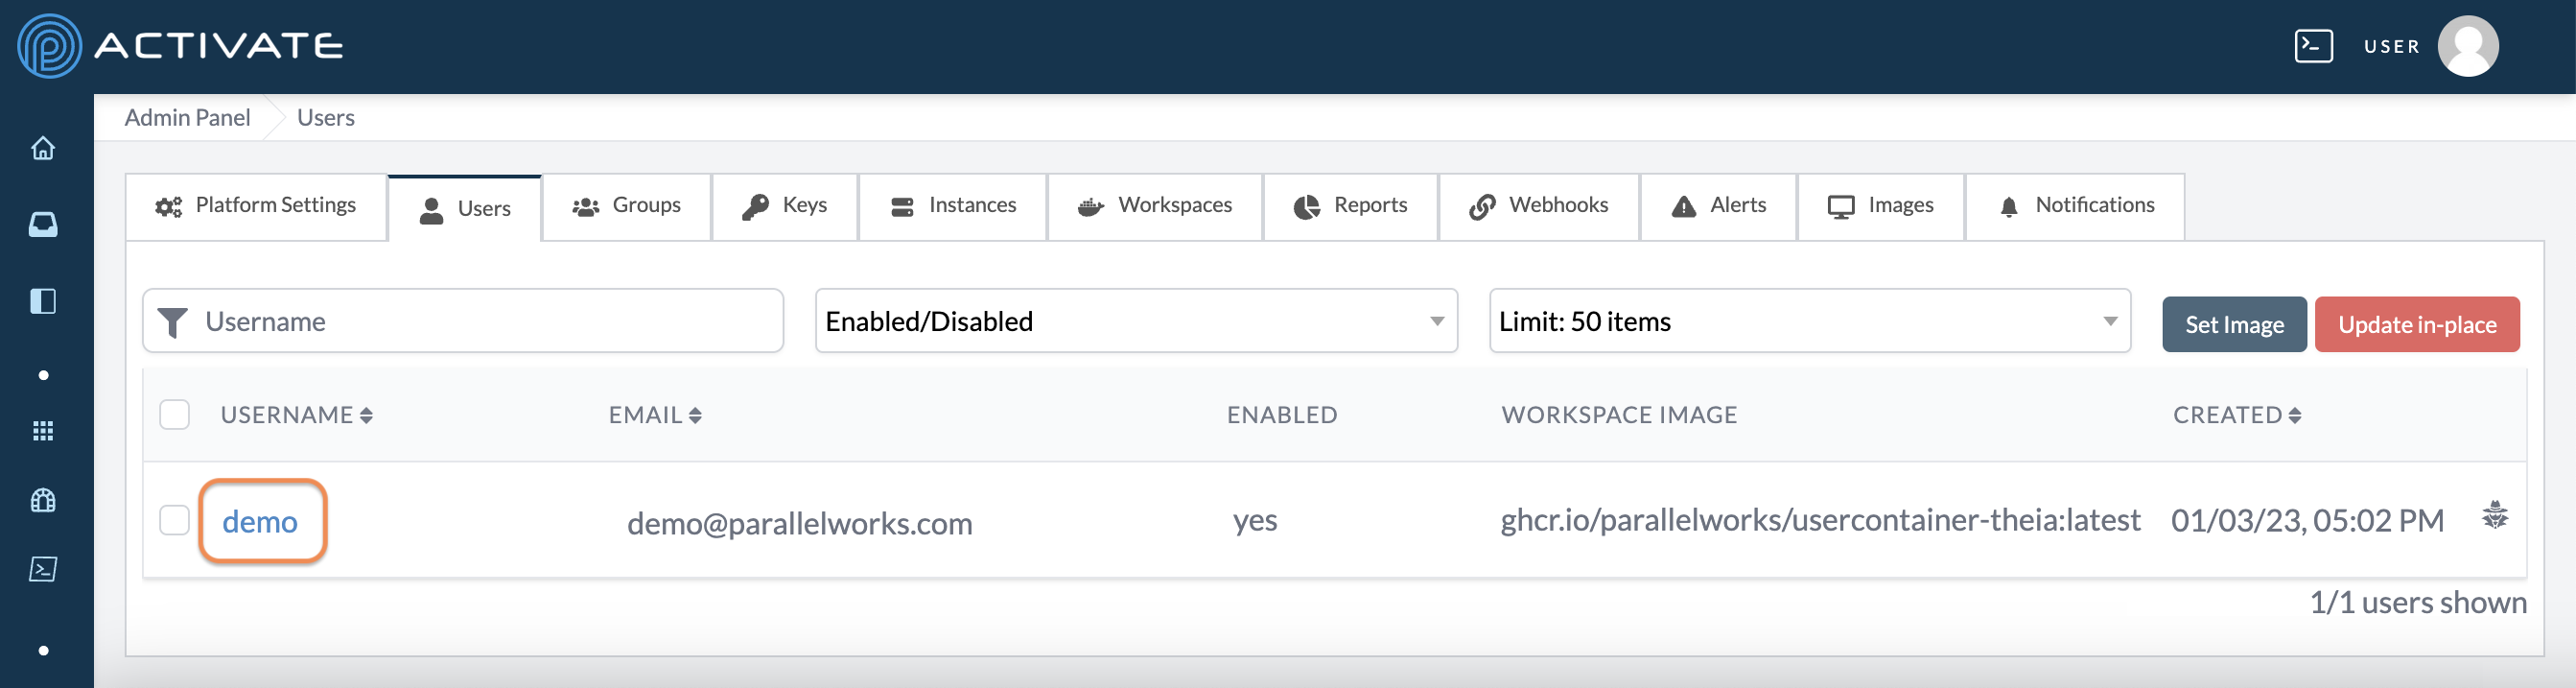
Editing User Information
In the Users tab, click on the username you’d like to edit.
On the next page, you can edit several of the user’s parameters.
The first section contains information about the user’s account, container, and access to the platform.

Identity
Here, you can edit a user’s Username or Email. Altering either of these parameters will change the user’s login credentials.
Settings
Here, you can control a user’s access to the platform.
User Host
This field identifies the user host, which is the part of the platform where account resources are provisioned.
We recommend contacting us before you make changes to this parameter.
User Container
This option identifies which service will be used to deploy a user’s container.
Use the bubbles to select Docker or k8s (Kubernetes).
We recommend contacting us before you make changes to this parameter.
MFA Enabled
Use the bubbles to select whether the user will use multi-factor authentication.
Select No if a user doesn’t need multi-factor authentication.
Select Duo if you work with a company or organization that is not affiliated with the government. Duo is a Cisco service that is more popular with other types of institutions.
Select MyProxy if you work with a governmental agency, such as a public university or a research organization. Generally, MyProxy is preferred for these types of institutions.
We recommend contacting us before you make changes to this parameter.
User Workspace Image
This field identifies which image version a user’s workspace is running.
User Organization
Use this dropdown menu to assign the user to an organization.
Attributes
Here, you can control whether a user is an Admin or Active by selecting their respective checkboxes.
A user with Admin enabled will be able to access the Admin Panel and all of its settings. This option does not affect the group setting org:admin. For more information, please see About Roles.
A user with Active enabled will be able to log in to the platform with their username and password. Unchecking Active will disable a user’s access to the platform.
Users who are Active are marked as Enabled in Admin > Users and Organization > Users.
Actions
Click the Update User container button to migrate a user’s container to the latest image.
Click the Kill user container button to restart a user’s container.
Click the Remove from teams button to remove a user from all of their assigned groups.
If you change any of the parameters above, click Save before leaving the page. Your changes will be applied immediately.
Set Password
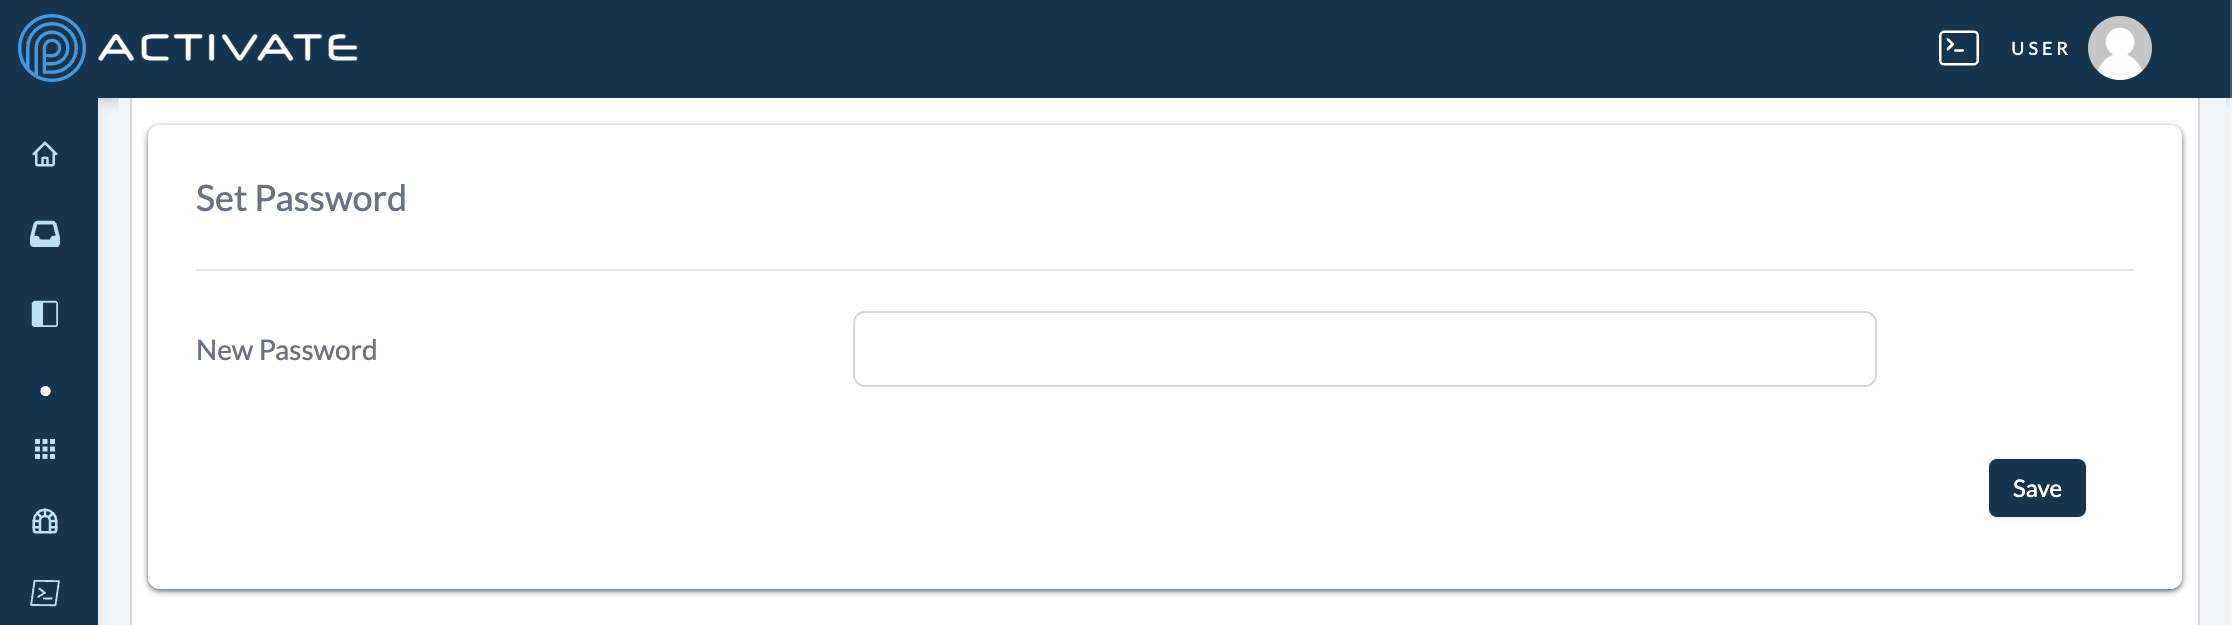
Here, you can reset a user's login credentials.
If you change this parameter, click Save before leaving the page. Your change will be applied immediately.
Contact Info
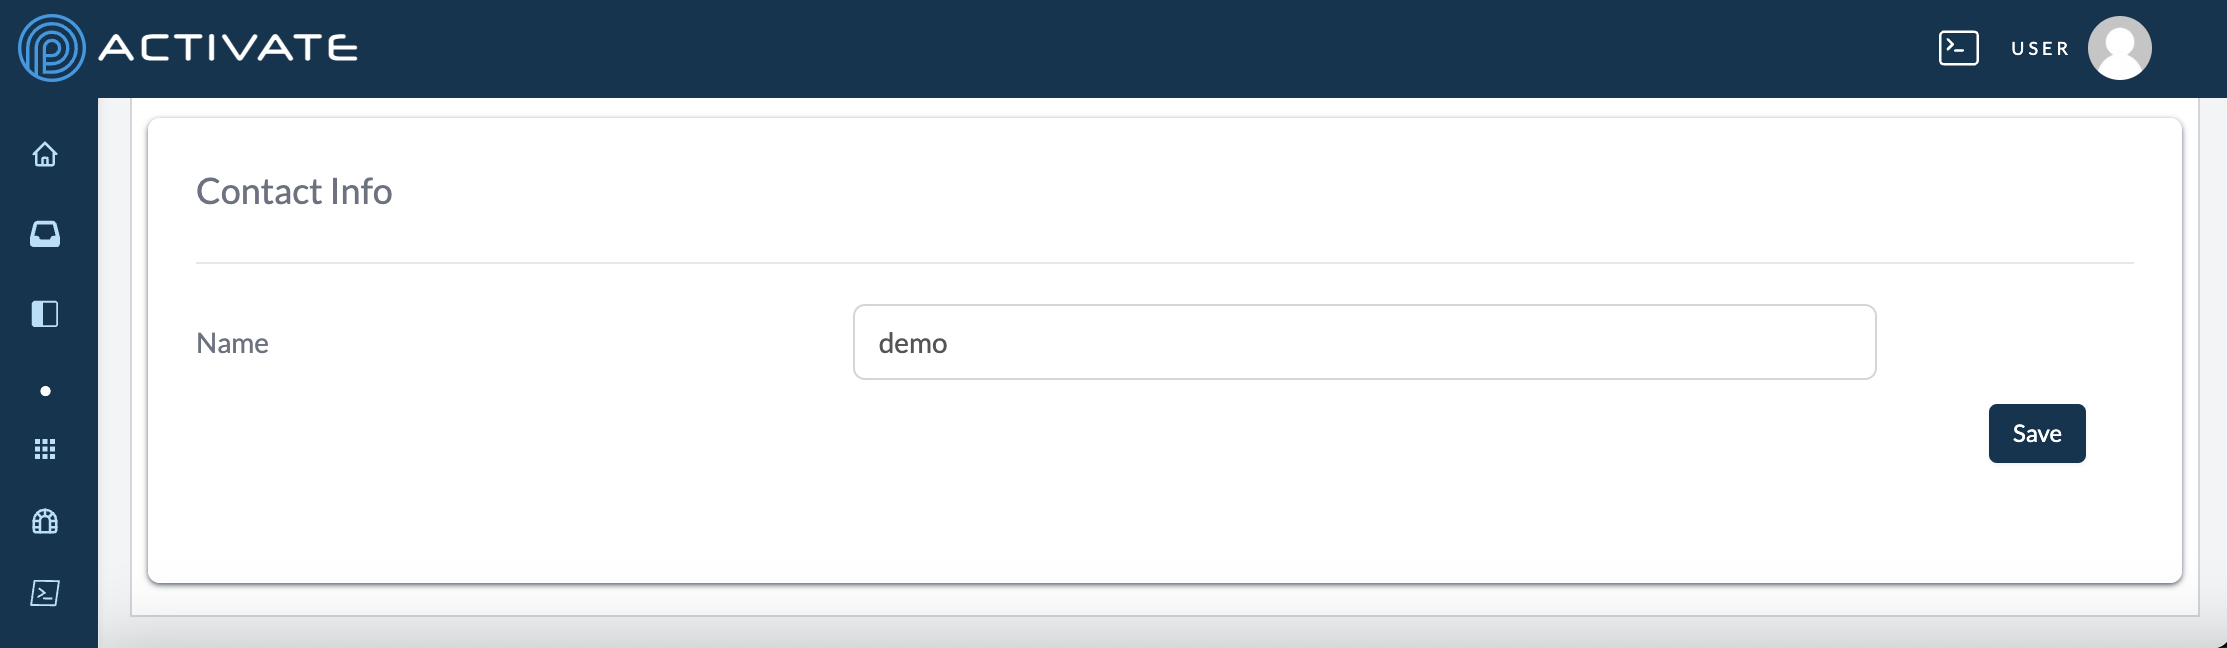
Here, you can change a user’s contact information, including their display name, platform URL, and geographical location.
This information is only visible to platform admins and does not affect a user’s login credentials.
If you change these parameters, click Save before leaving the page. Your changes will be applied immediately.
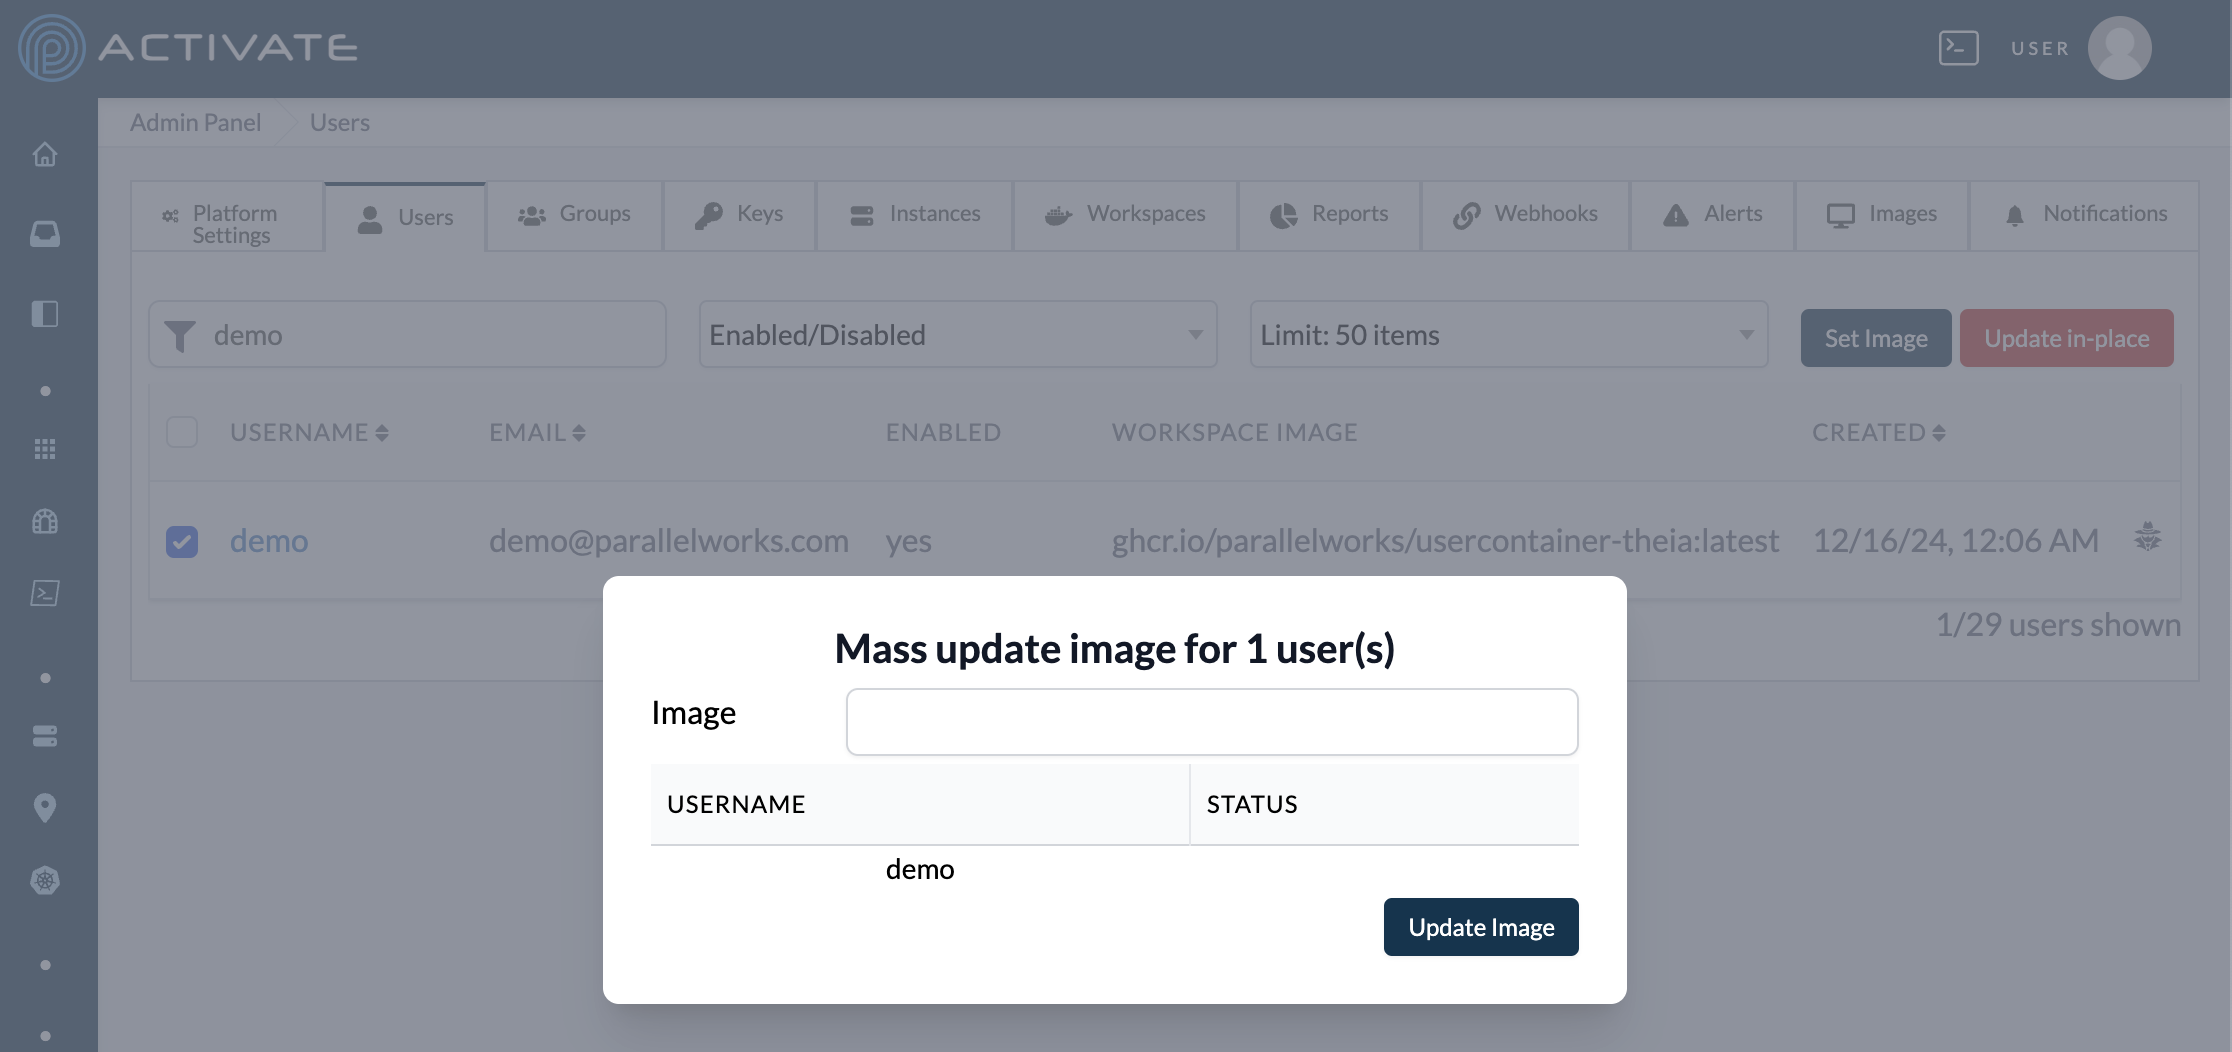
Setting User Images
In the Users tab, select users with their checkboxes. Click Set Image.

A dialog box will appear. Enter the Image Name and the image Version.
Click Update Image. Your changes will be applied immediately.
Updating User Images
In the Users tab, select users with their checkboxes. Click Update in-place.

A dialog box will appear. Confirm that you’ve selected the users you want to update.
Click Apply mass-update. Your changes will be applied immediately.

Using Impersonate
If you want to quickly access another user's account, you can use the impersonate feature to bypass the login/logout process.
In the Users tab, click the impersonate icon for the account you want to access.
![]()
You'll be redirected to the user's Home page. You can navigate and control resources, storage resources, and workflows as if you were logged in to the user's account.
When you're done, click the user's name, then Return to [Your Account].
Groups
This tab displays information for all of your groups, including:
- name
- organization
- number of members
- allocation amount
- percentage of allocation used
- state
- creation date
- ID number
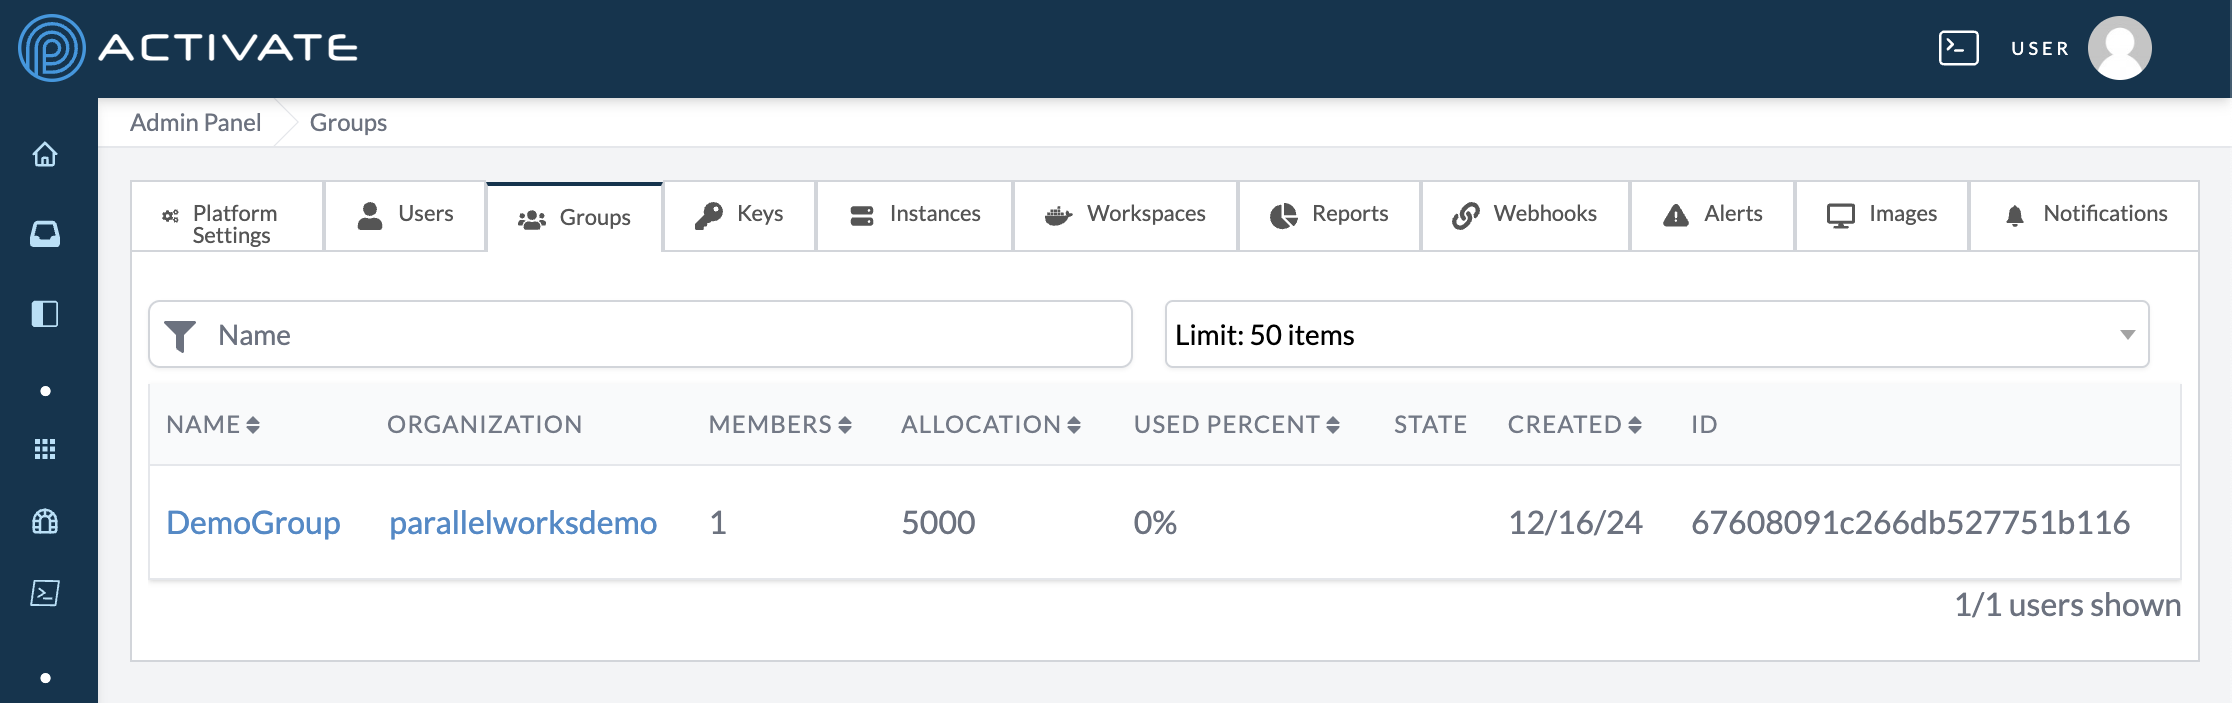
All the functions in Managing Groups can be completed from this tab as well.
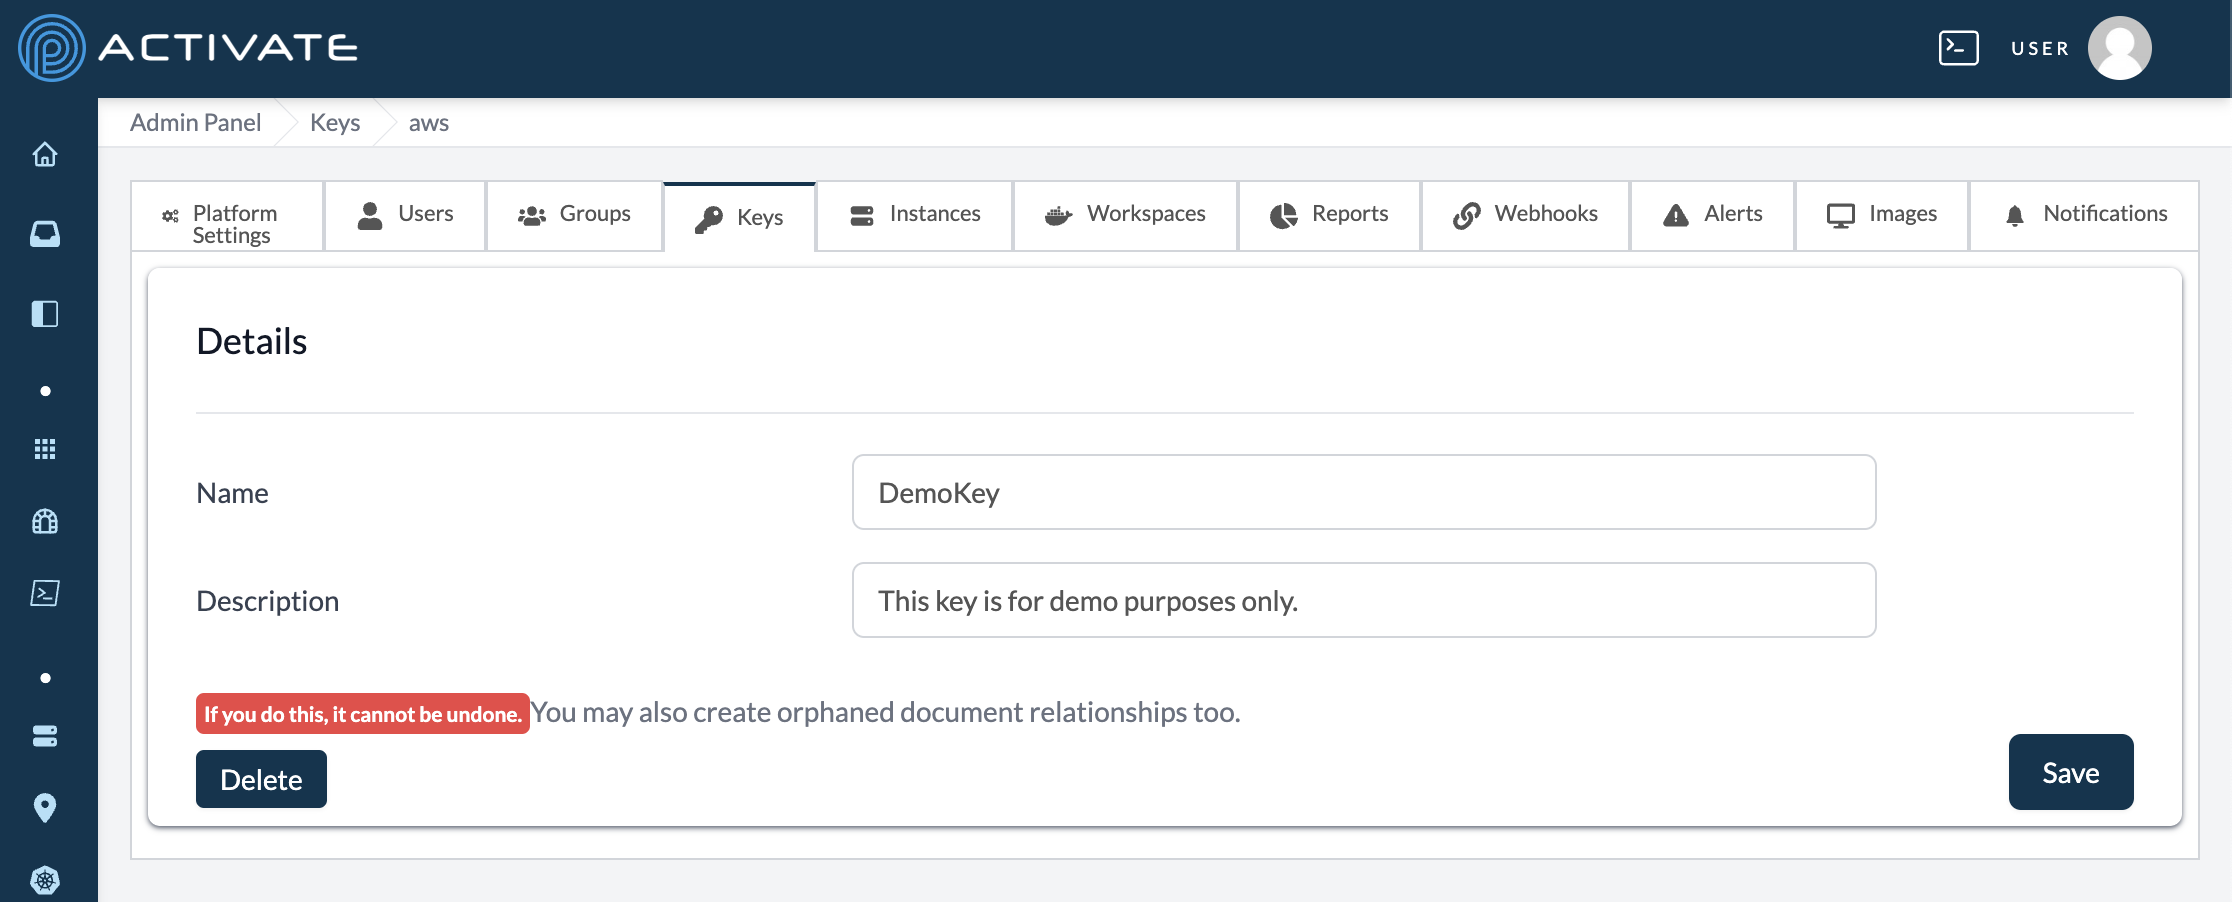
Keys
This tab shows information for all of your cloud account keys, including their name, which organization owns the key, the creation date, and the key ID.
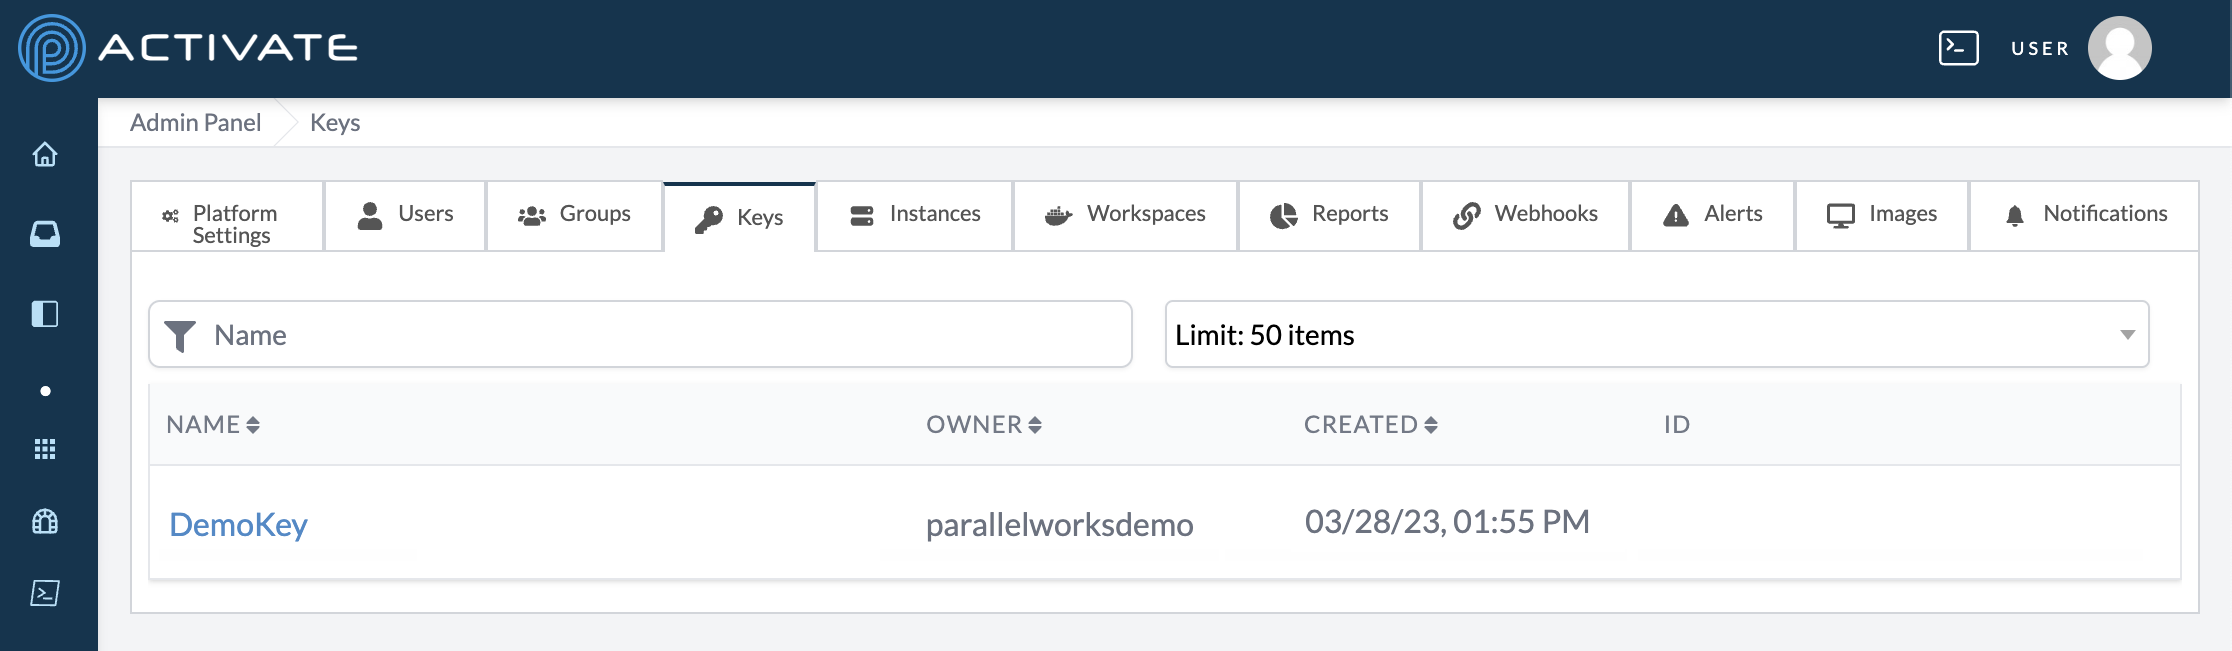
You can manage your cloud account keys in this tab. If you click the name of a key, you can edit its Name and Description on the next page. Click Save after making any changes.
You can also permanently delete the key from the platform by clicking the Delete button. Please note that if you’ve used a key to provision infrastructure, you won’t be able to delete that key until you’ve deprovisioned the infrastructure.
If you need to add a key to the platform, please see Adding a Cloud Account.
Instances
This tab displays information for both running instances and other instances, including:
- CSP
- organization that owns the key
- region
- instance ID
- creation date
- instance name, if any
- instance type
- private IP
- public IP
- cloud state
- estimated cloud state time
- ACTIVATE state
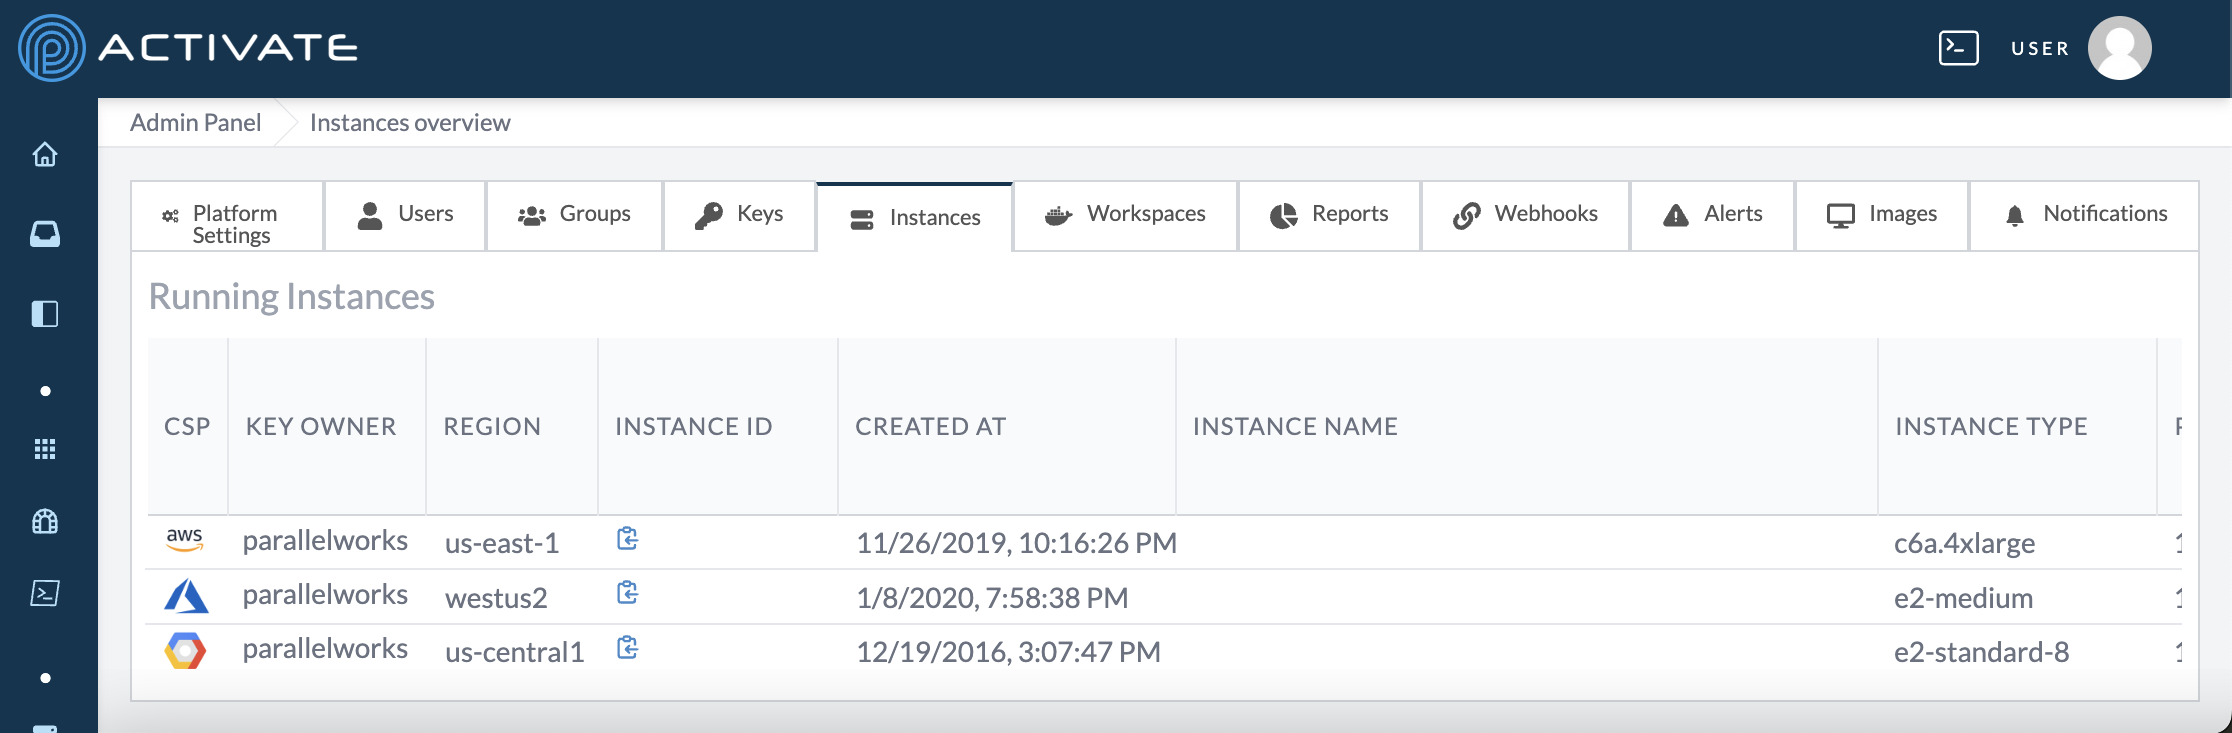
Please note that the instance list is wider than most monitors, so the included screenshot does not show all of the fields listed above. To see more information about your instances, scroll to the bottom of the page and use the horizontal scroll bar to show more columns.
You can configure your instance types on the platform by organization. For more information, please see Configuring Instance Types.
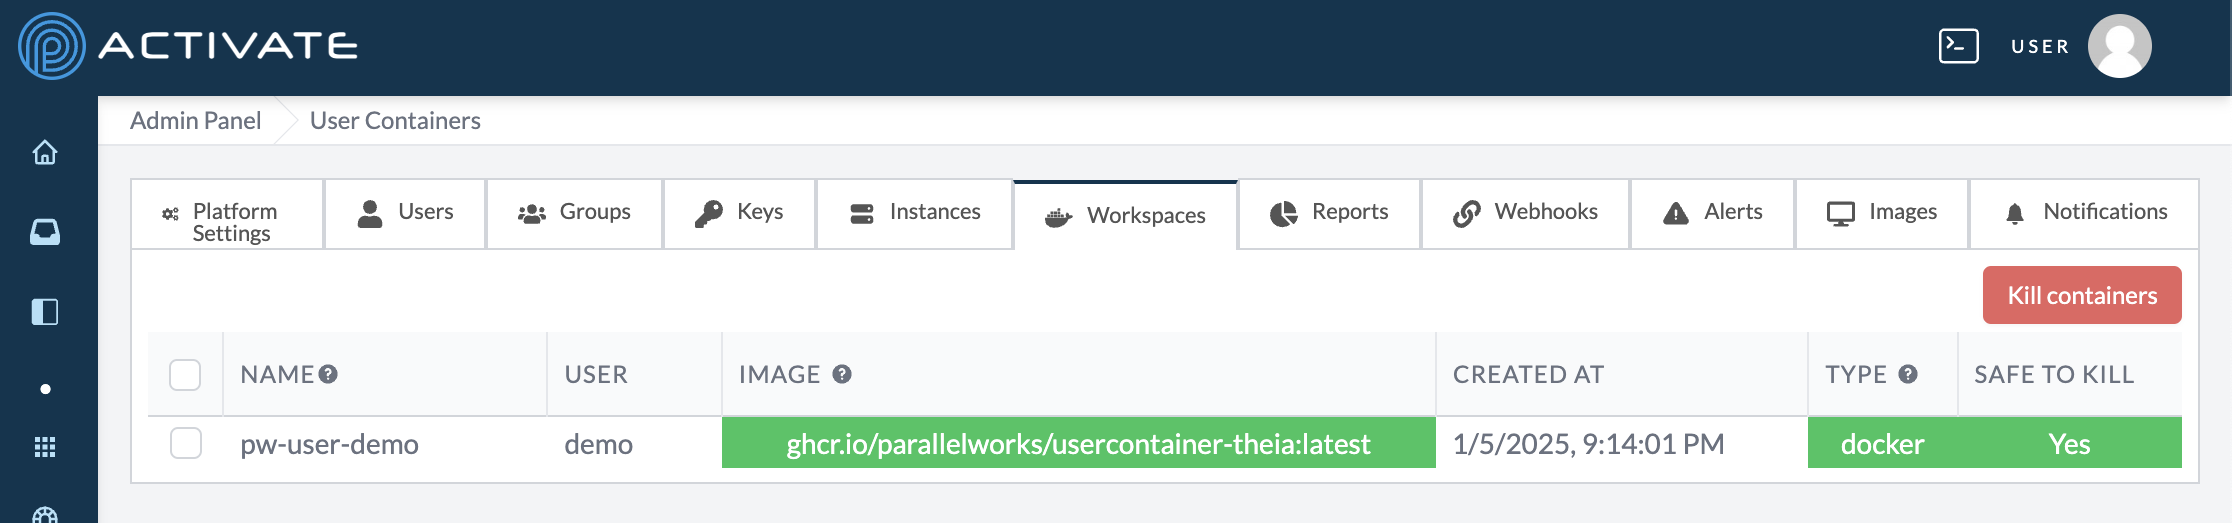
Workspaces
This tab displays information for all of your user containers, including:
- container name
- user
- container image
- creation date
- type (Docker or Kubernetes)
- safe to kill
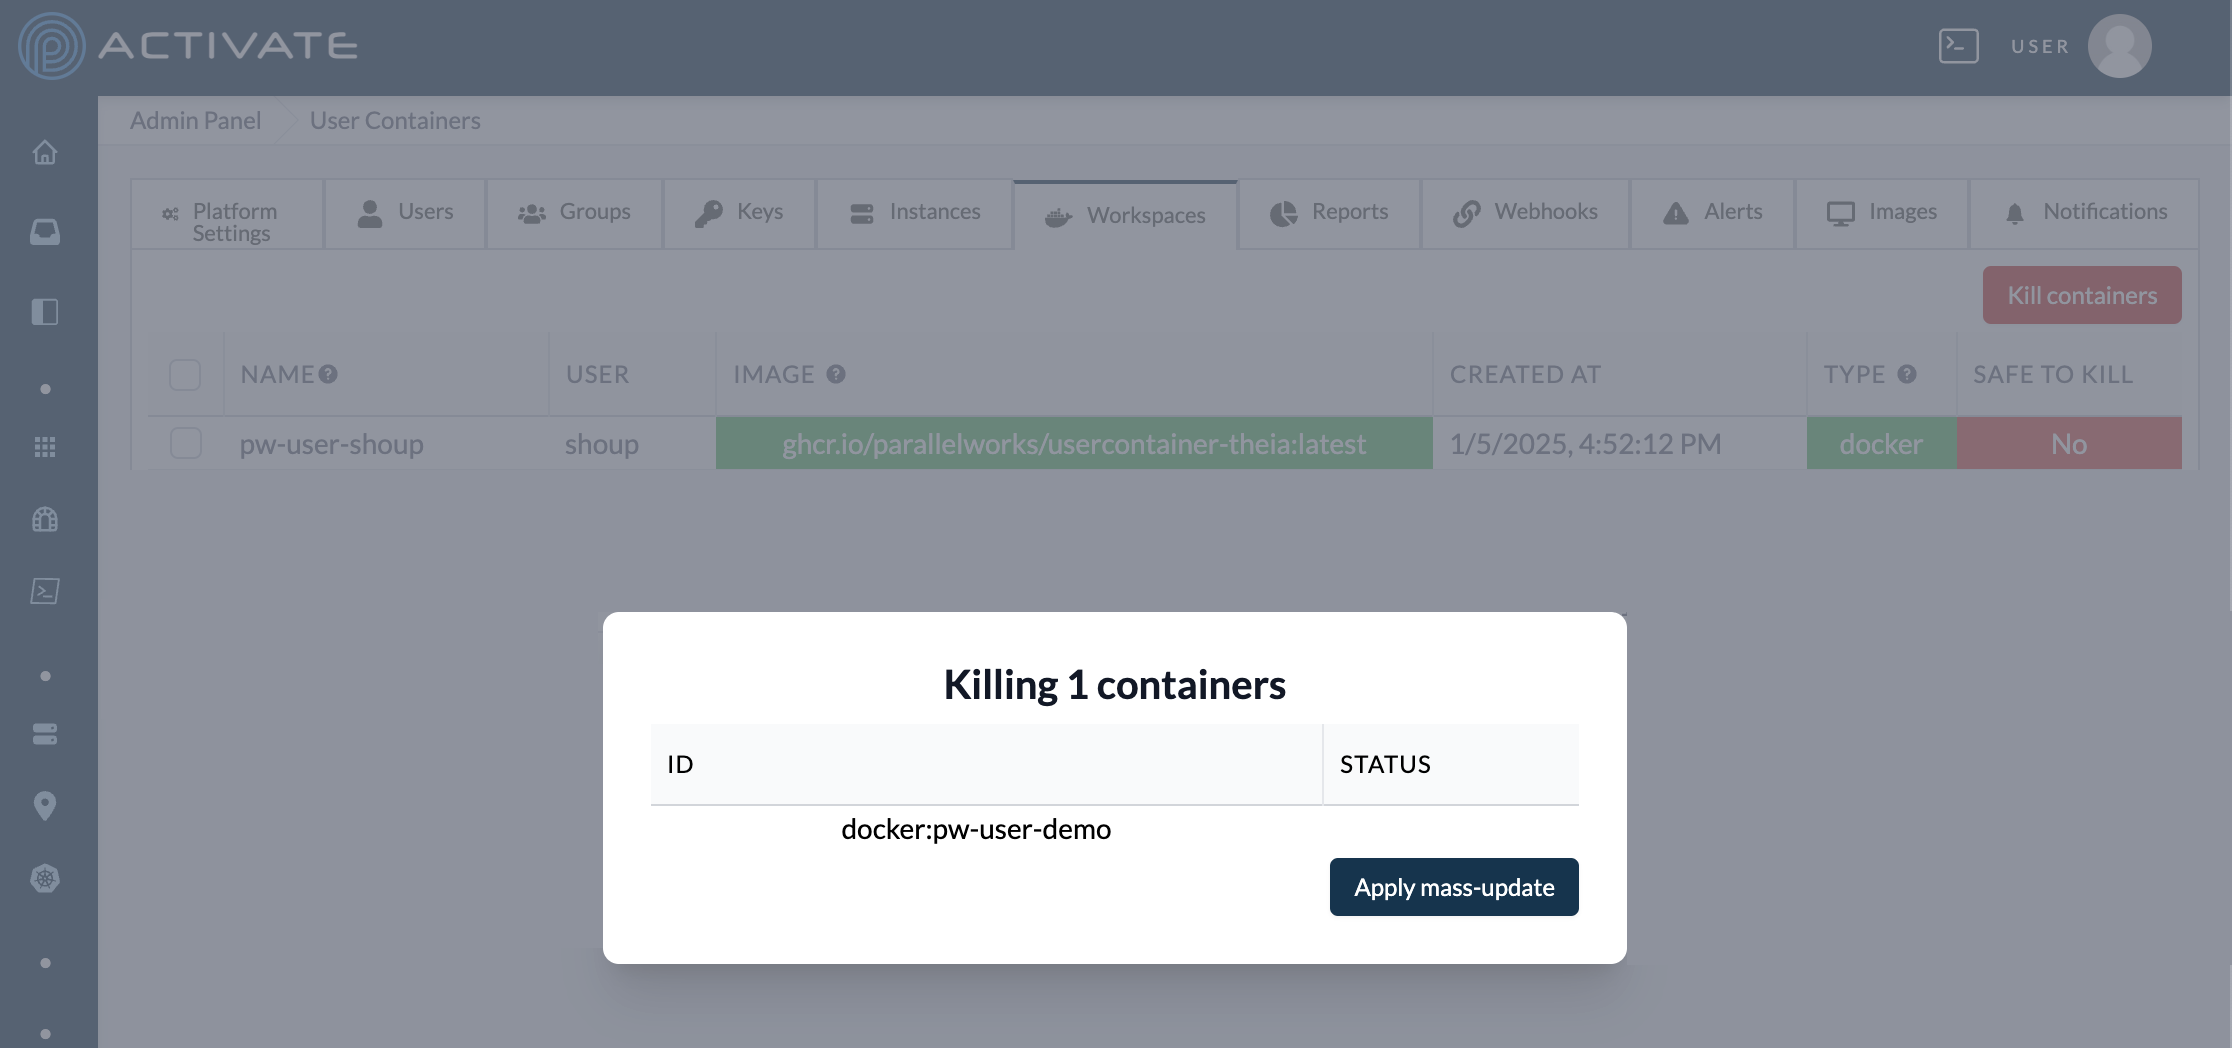
Killing User Containers
In the Containers tab, select users with their checkboxes. Click Kill containers.
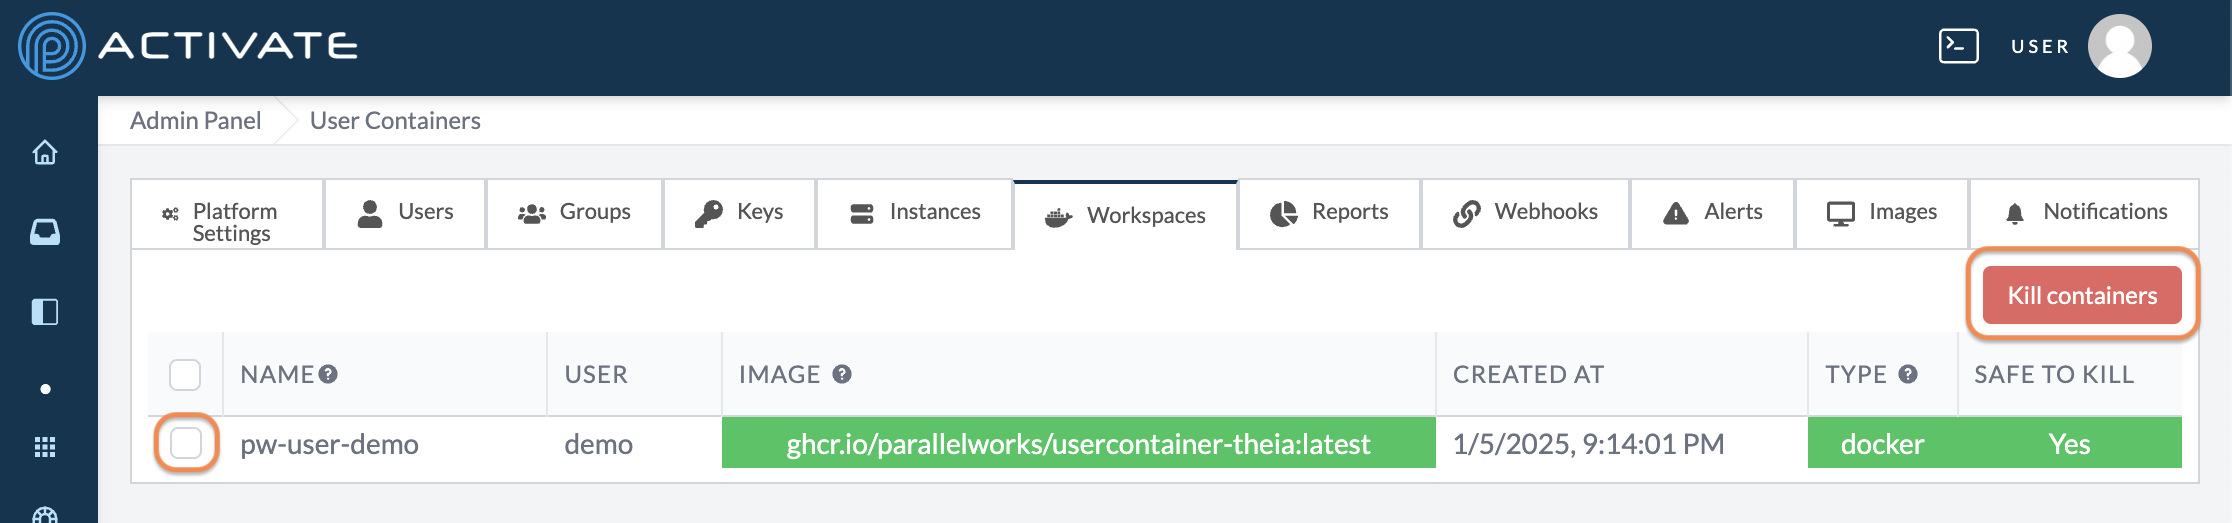
A dialog box will appear. Confirm that you’ve selected the containers you want kill.
Click Apply mass-update. Your changes will be applied immediately.
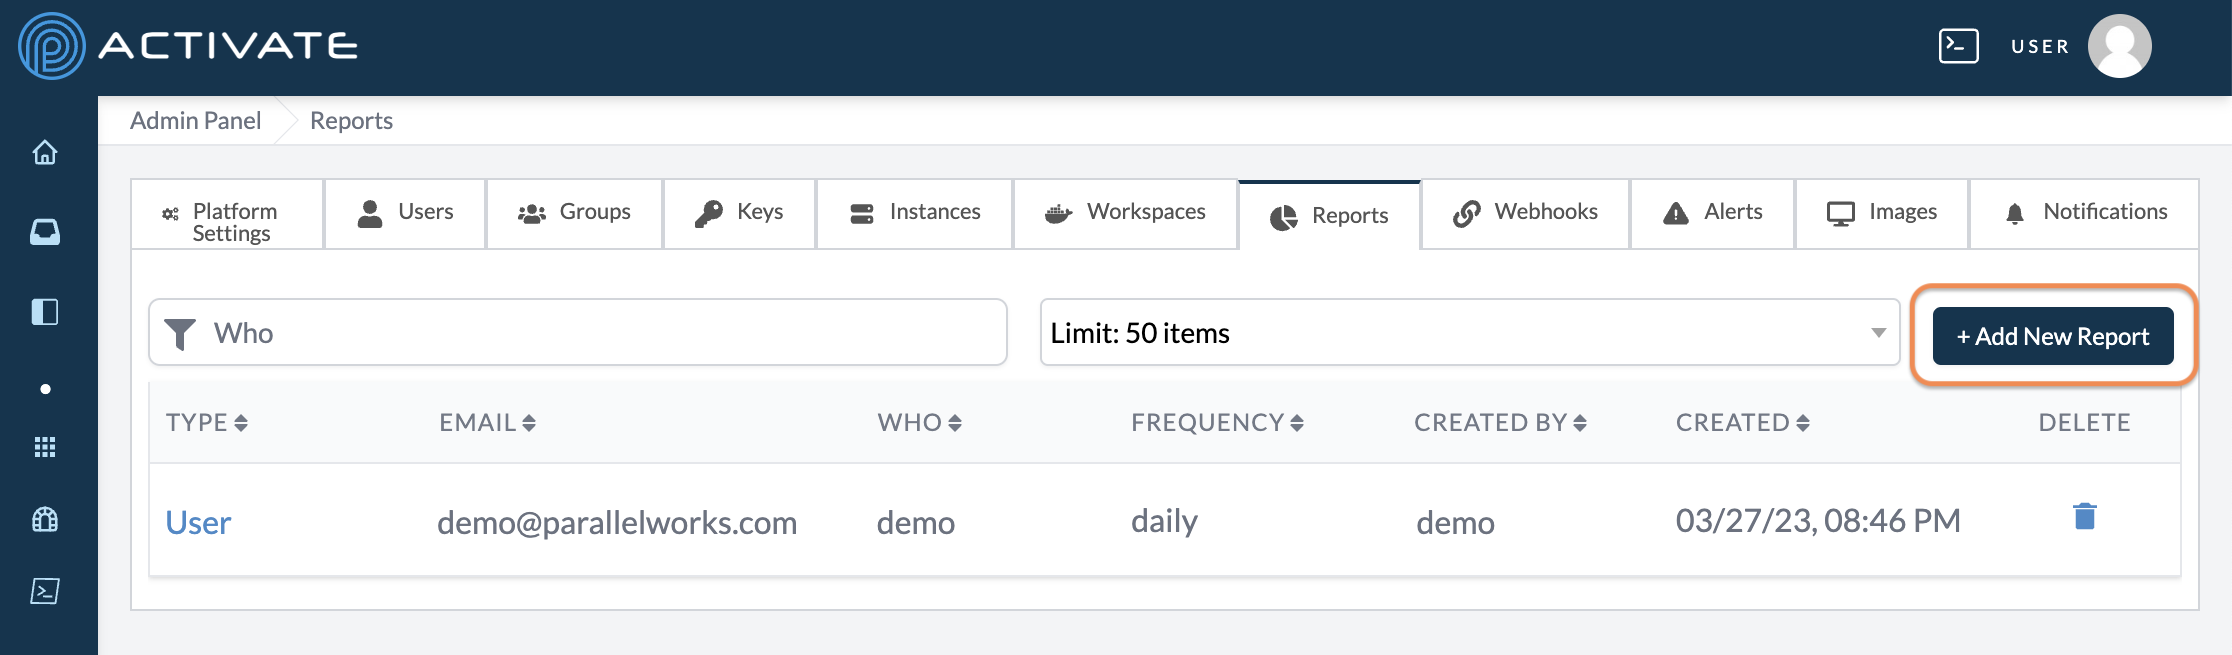
Reports
This tab displays information for your reports, including:
- type of report
- email address that receives reports
- who the report monitors
- frequency
- creator
- creation date

Creating Reports
In the Reports tab, click + Add New Report.
On the next page, you can edit the parameters listed below.
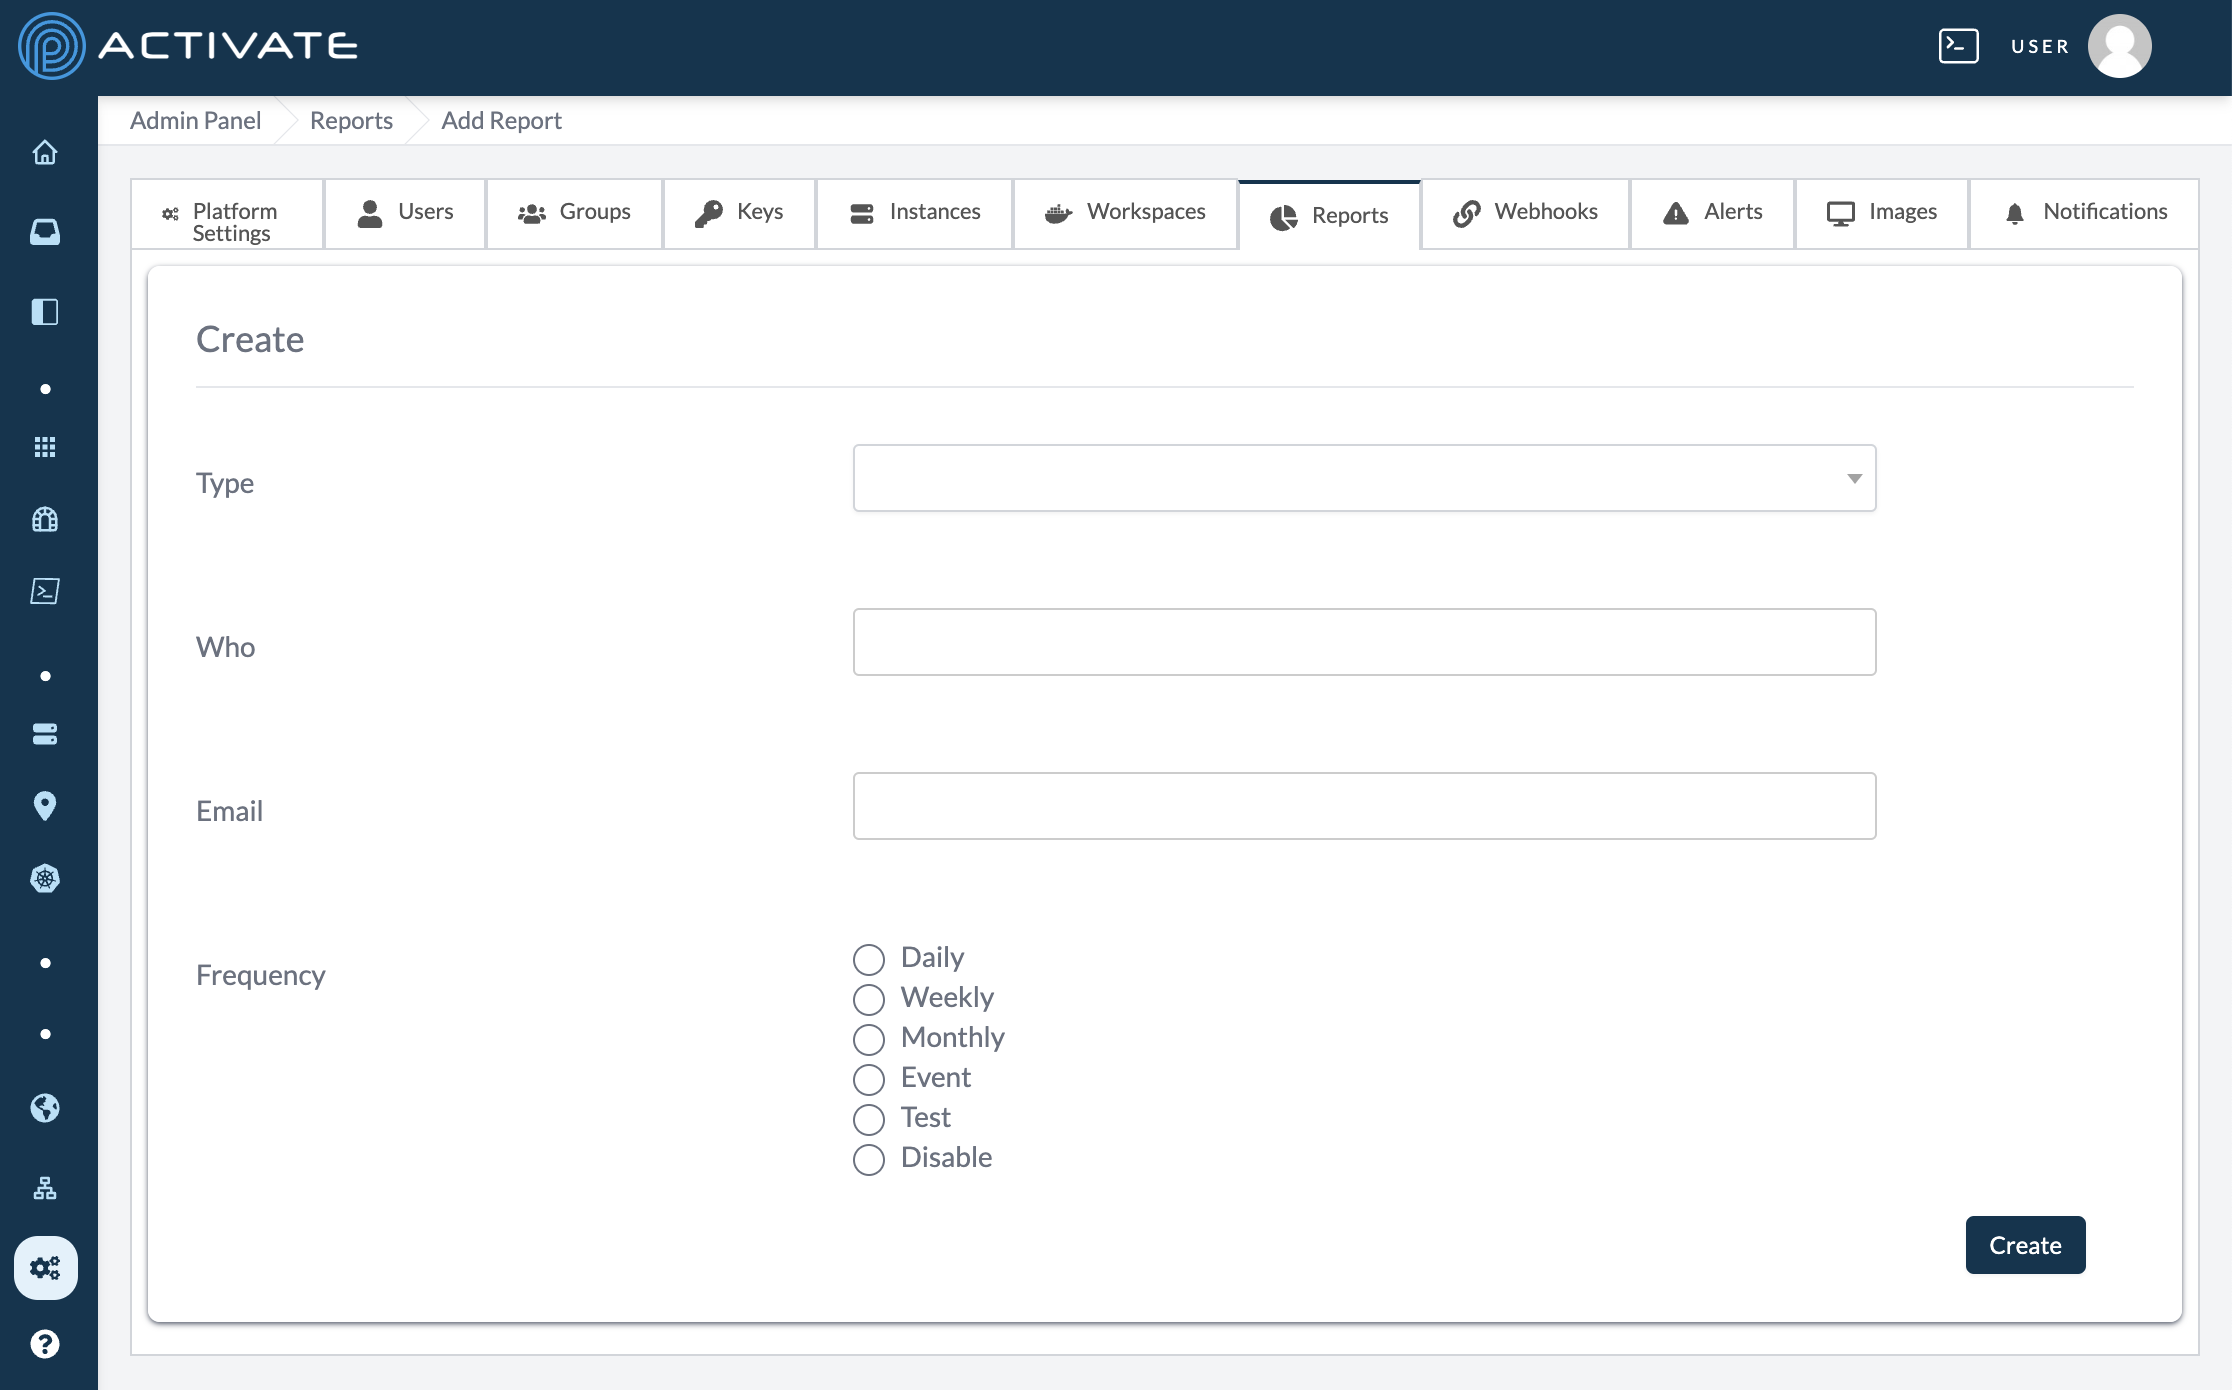
Use the Type dropdown menu to select the type of report you want to generate:
- summary
- project
- monthly
- user
- application
Use the Who field to enter the username who the report will monitor.
Use the Email field to enter the report recipient’s email address.
Use the Frequency bubbles to select how frequently the report will be generated:
- daily
- weekly
- monthly
- event (once, at the time of creation)
- test (once, at the time of creation)
- disable (end reports for the time being)
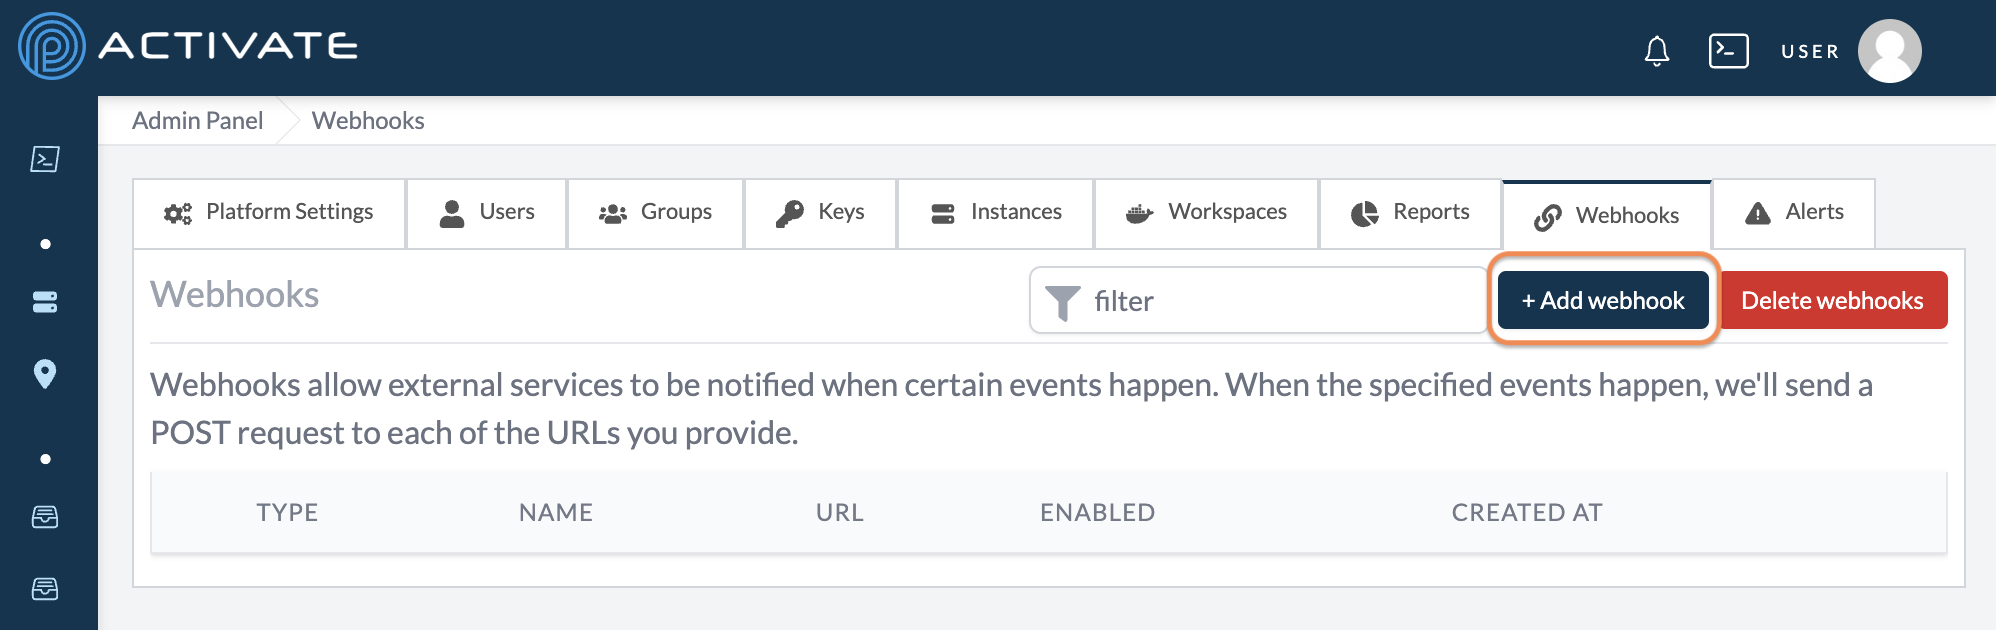
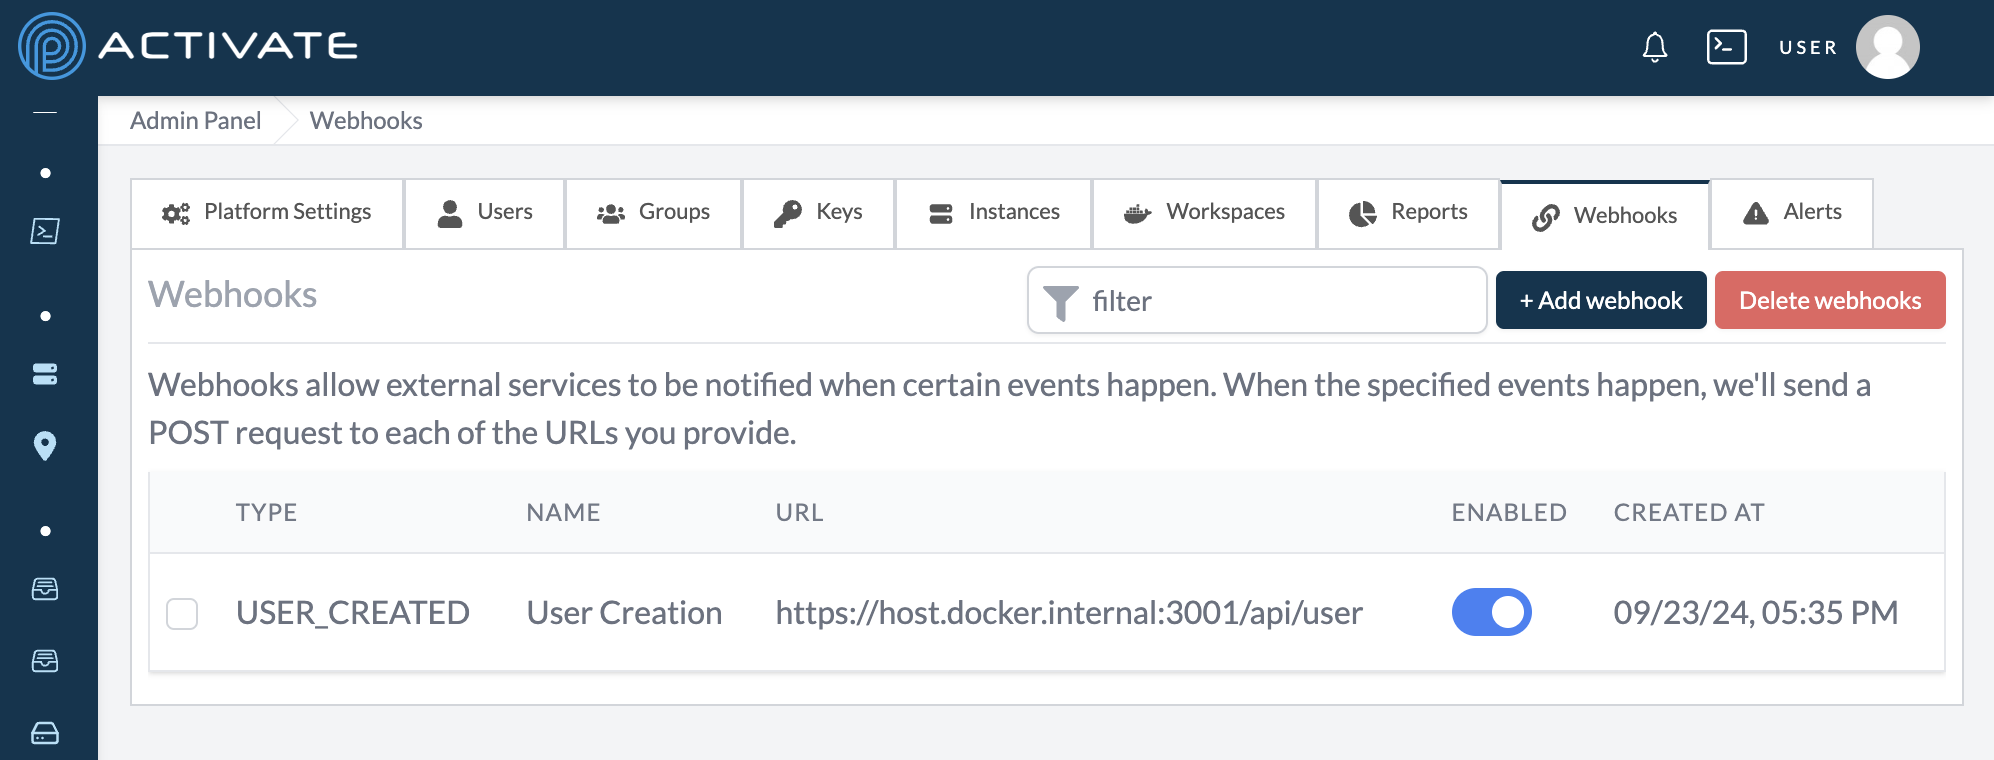
Webhooks
Webhooks allow external services to be notified when certain events happen. When the specified events happen, we'll send a POST request to each of the URLs you provide.
Adding a Webhook
Click + Add Webhook.
On the next page, select a Type. Currently, you can choose from these webhook types:
USER_CREATEDflags when a new user logs in for the first time.USER_DISABLEDflags when a user has been disabled.USER_REMOVED_FROM_GROUPflags when a user has been removed from a group in your organization.
Add a Webhook name and paste the URL that your webhook will be sent to. Description is an optional field.
Choose whether to Enable this webhook.
Click Create webhook.
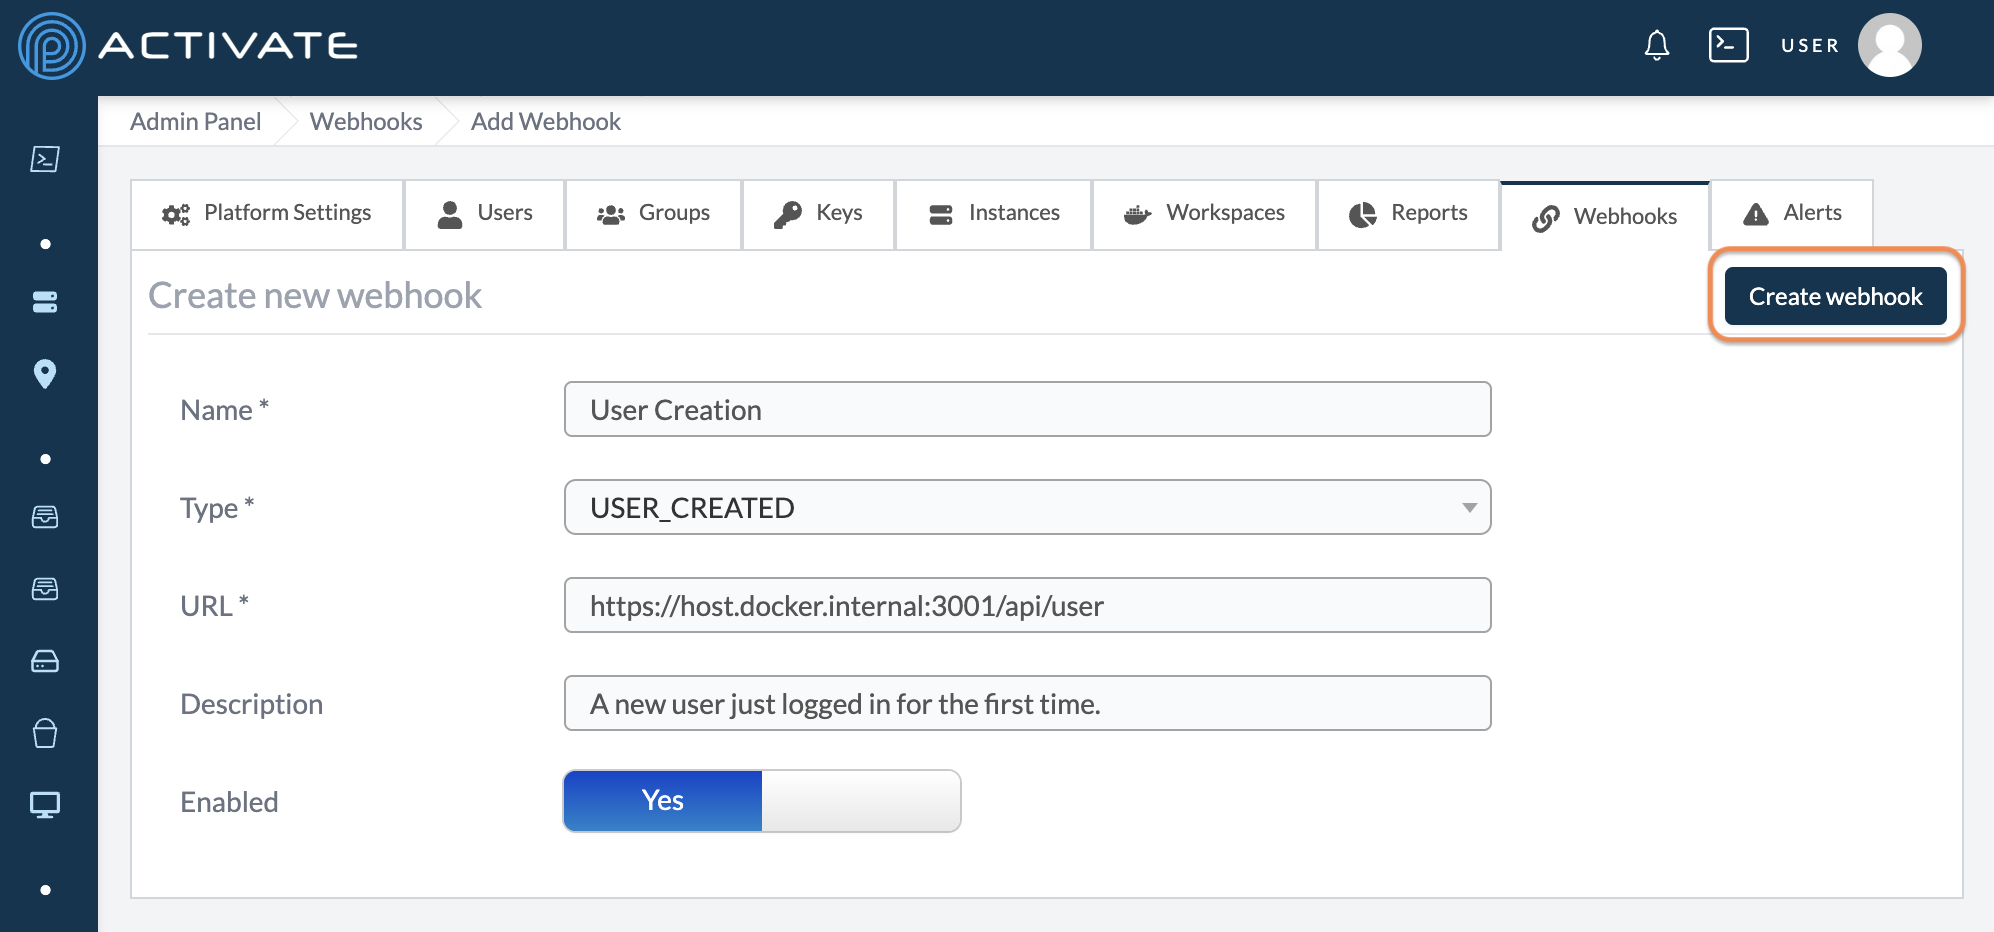
You'll be taken back to the Webhooks tab. A dialog box with the message Webhook created successfully will appear in the bottom right corner of your screen.
Deleting a Webhook
Select the webhook you'd like to delete, then click Delete webhooks.
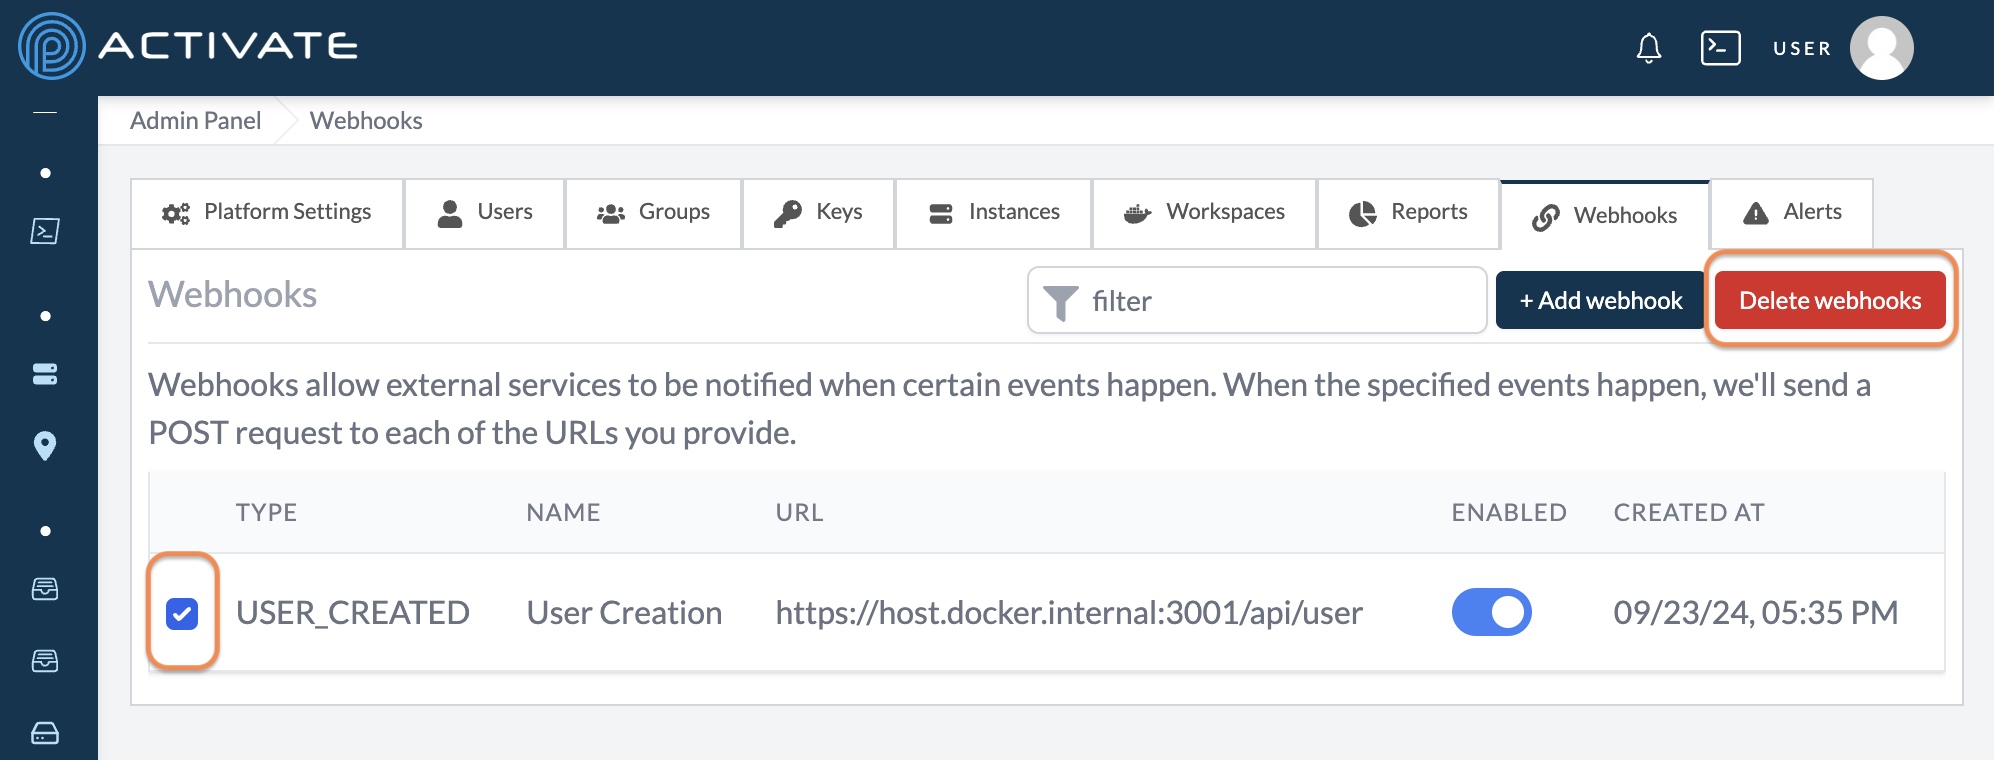
A pop-up module will appear. Click Delete.

You'll be taken back to the Webhooks tab. A dialog box with the message Webhook(s) deleted successfully will appear in the bottom right corner of your screen.
Responding to Events
To see the shape of webhooks, please see this section. Admin-level webhooks take the same shape as organizaiton-level webhooks, with one exception:
- You will not see
organizationinside thewebhookobject.
Alerts
This tab collects error messages from all users in your organization. These messages are shown for 7 days before they're automatically deleted.
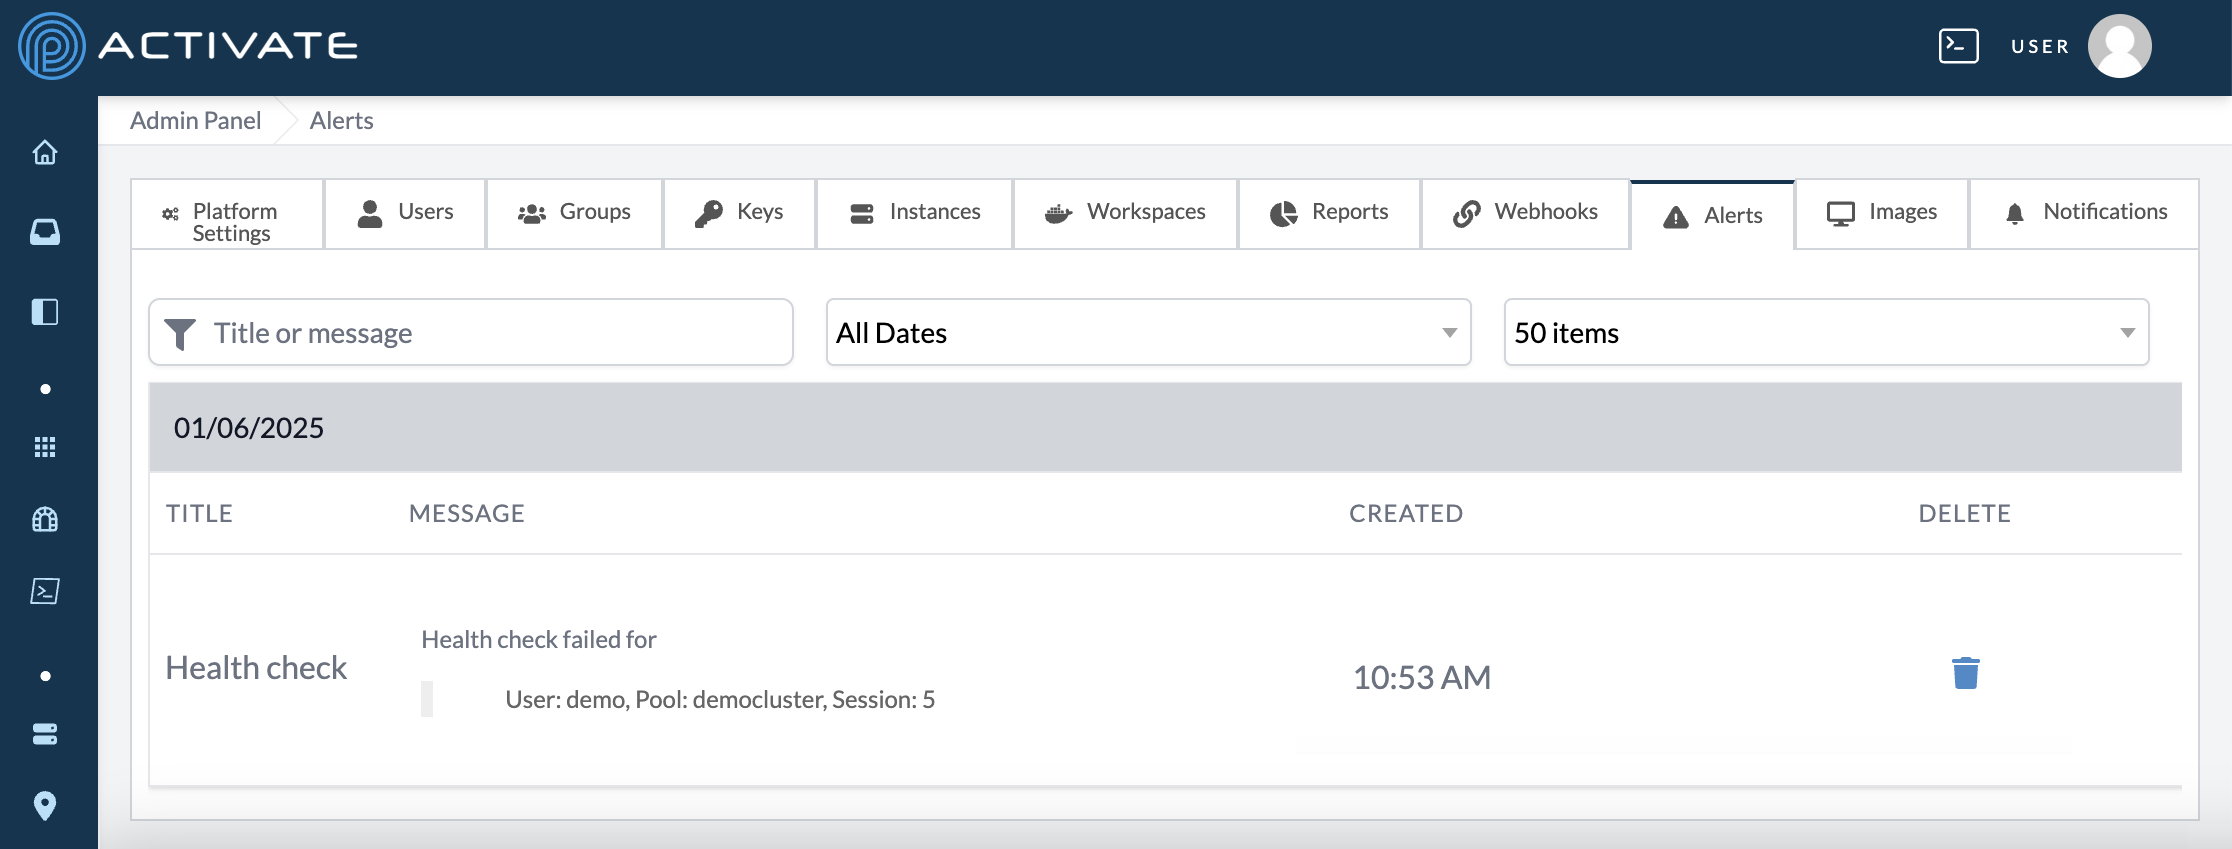
Use the Title or message field to search for alerts by keywords.

Use the All Dates dropdown menu to display alerts from a specific date.

Use the max item dropdown menu to narrow the listed users to 10, 20, 50, 100, or max items. This option is set to 50 by default.
