Navigating Clusters
Details
The Details tab displays information about your cluster’s configuration settings.
Workflows*
*Only available on active clusters
This module lets you run workflows directly from your cluster.
Observability*
*Only available on active clusters
This module displays usage graphs for CPU, memory, and root disk storage on your cluster.The x axis represents time by the minute. The y axis represents the percentage of the resource you've used. Mouse over a graph line to display exact percentages and amounts in GiB.
Click Expand on any graph to see a larger version. Click the time dropdown menu to change the interval of data between 1, 3, and 8 hours. Please note that data older than 8 hours is discarded.
Attached Storages*
*Only available on active clusters
This module displays any storage resources that are attached to your cluster, including the root disk. To add attached storage, please see Configuring Storage and Attaching Storage.
Click the monitor icon to create a snapshot of the storage resource. For more information, please see Working With Disk Snapshots.
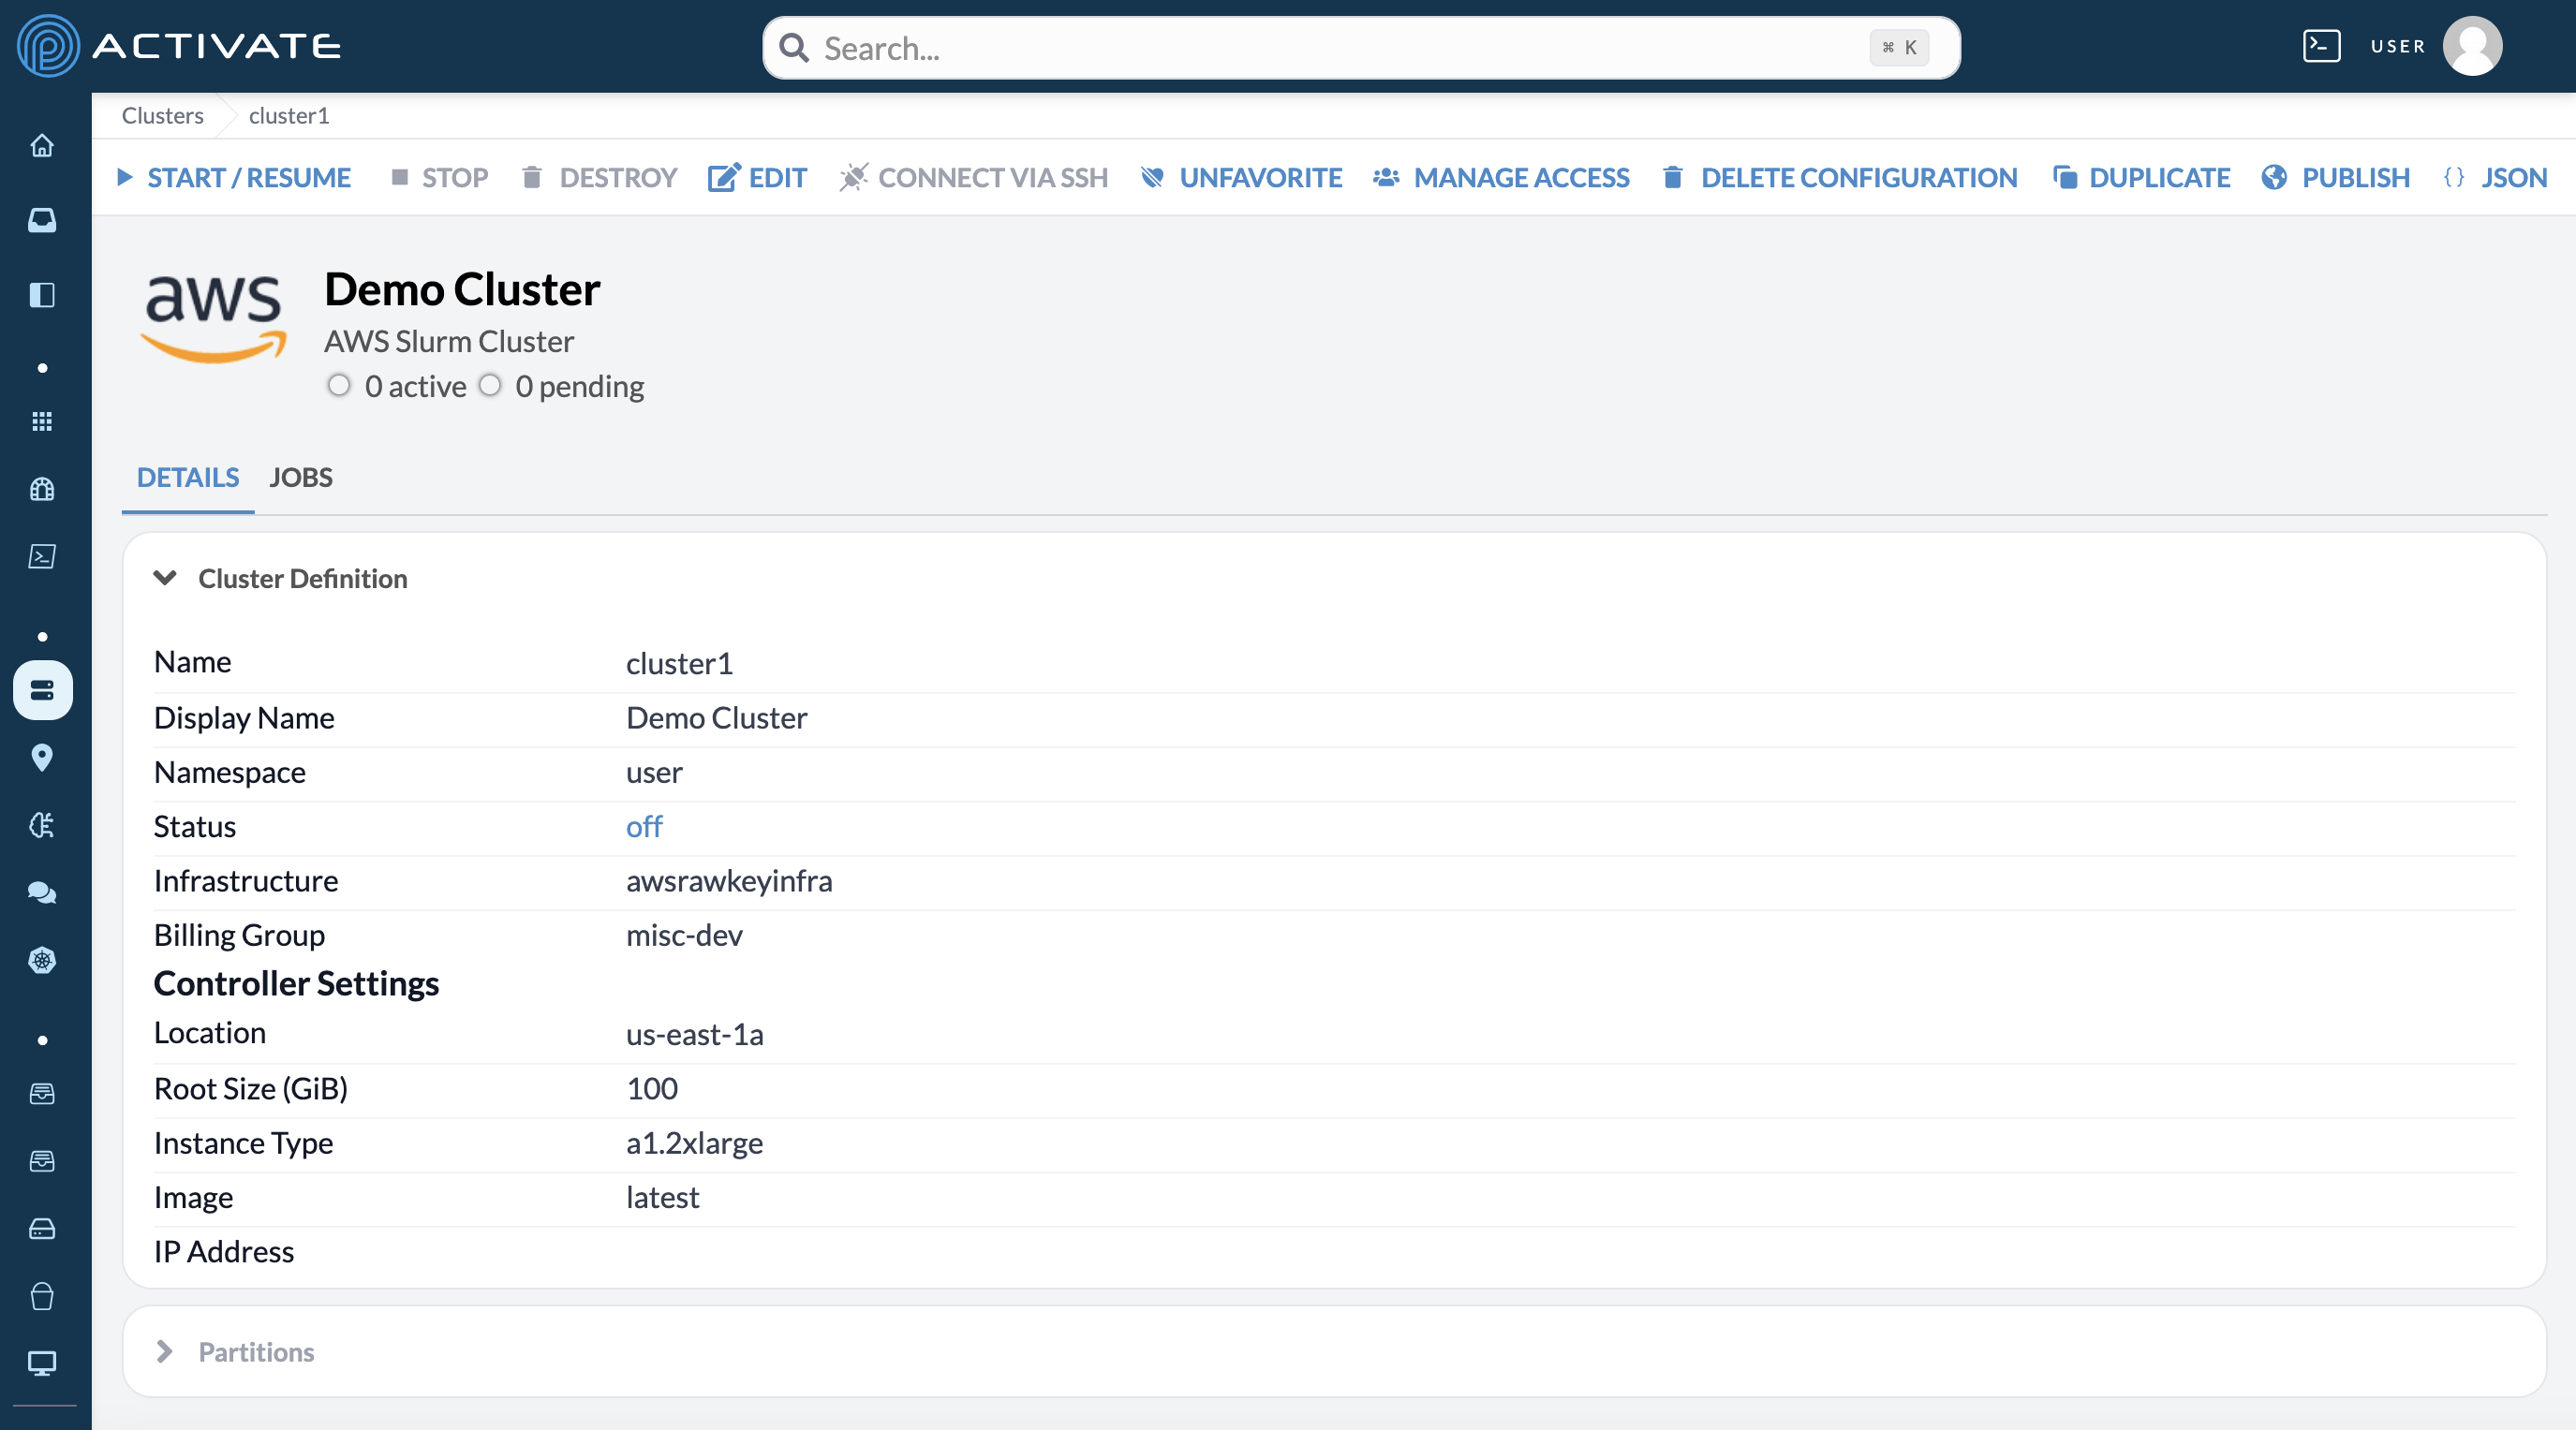
Cluster Definition
The Cluster Definition module lists the parameters and status of the controller node on your cluster. Please note that if you’ve just created your cluster, many parameters in Cluster Definition will be blank.
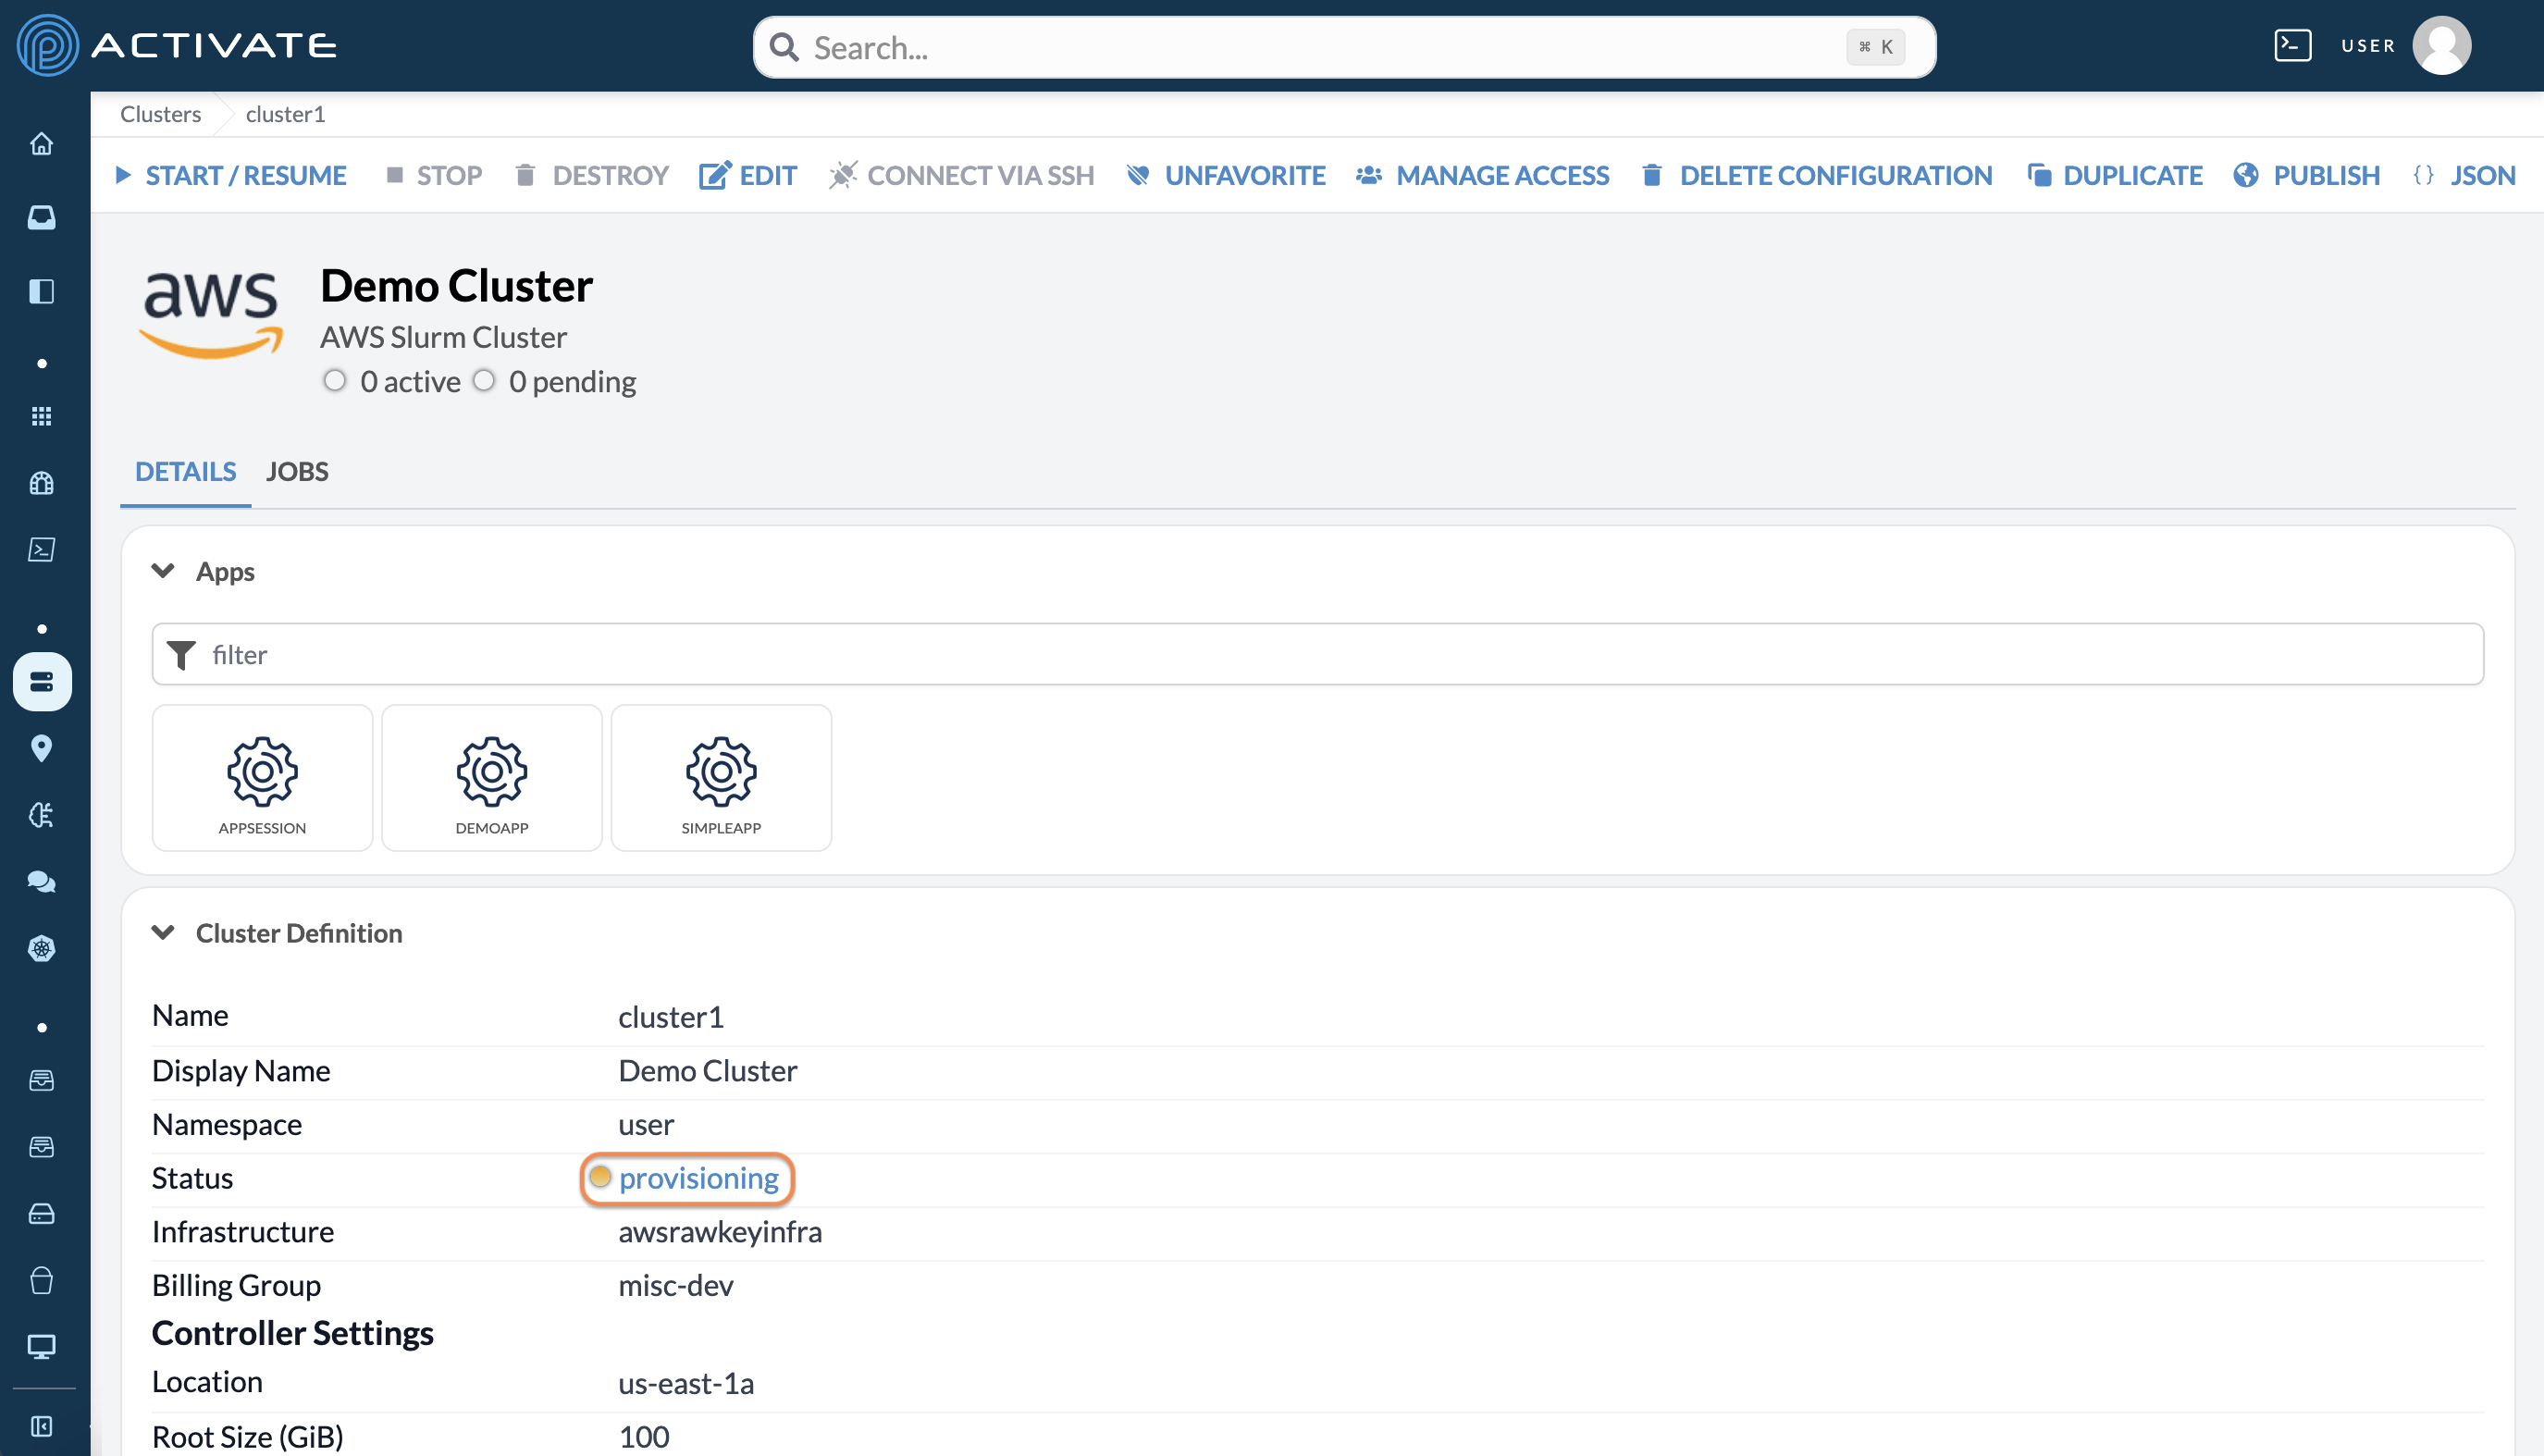
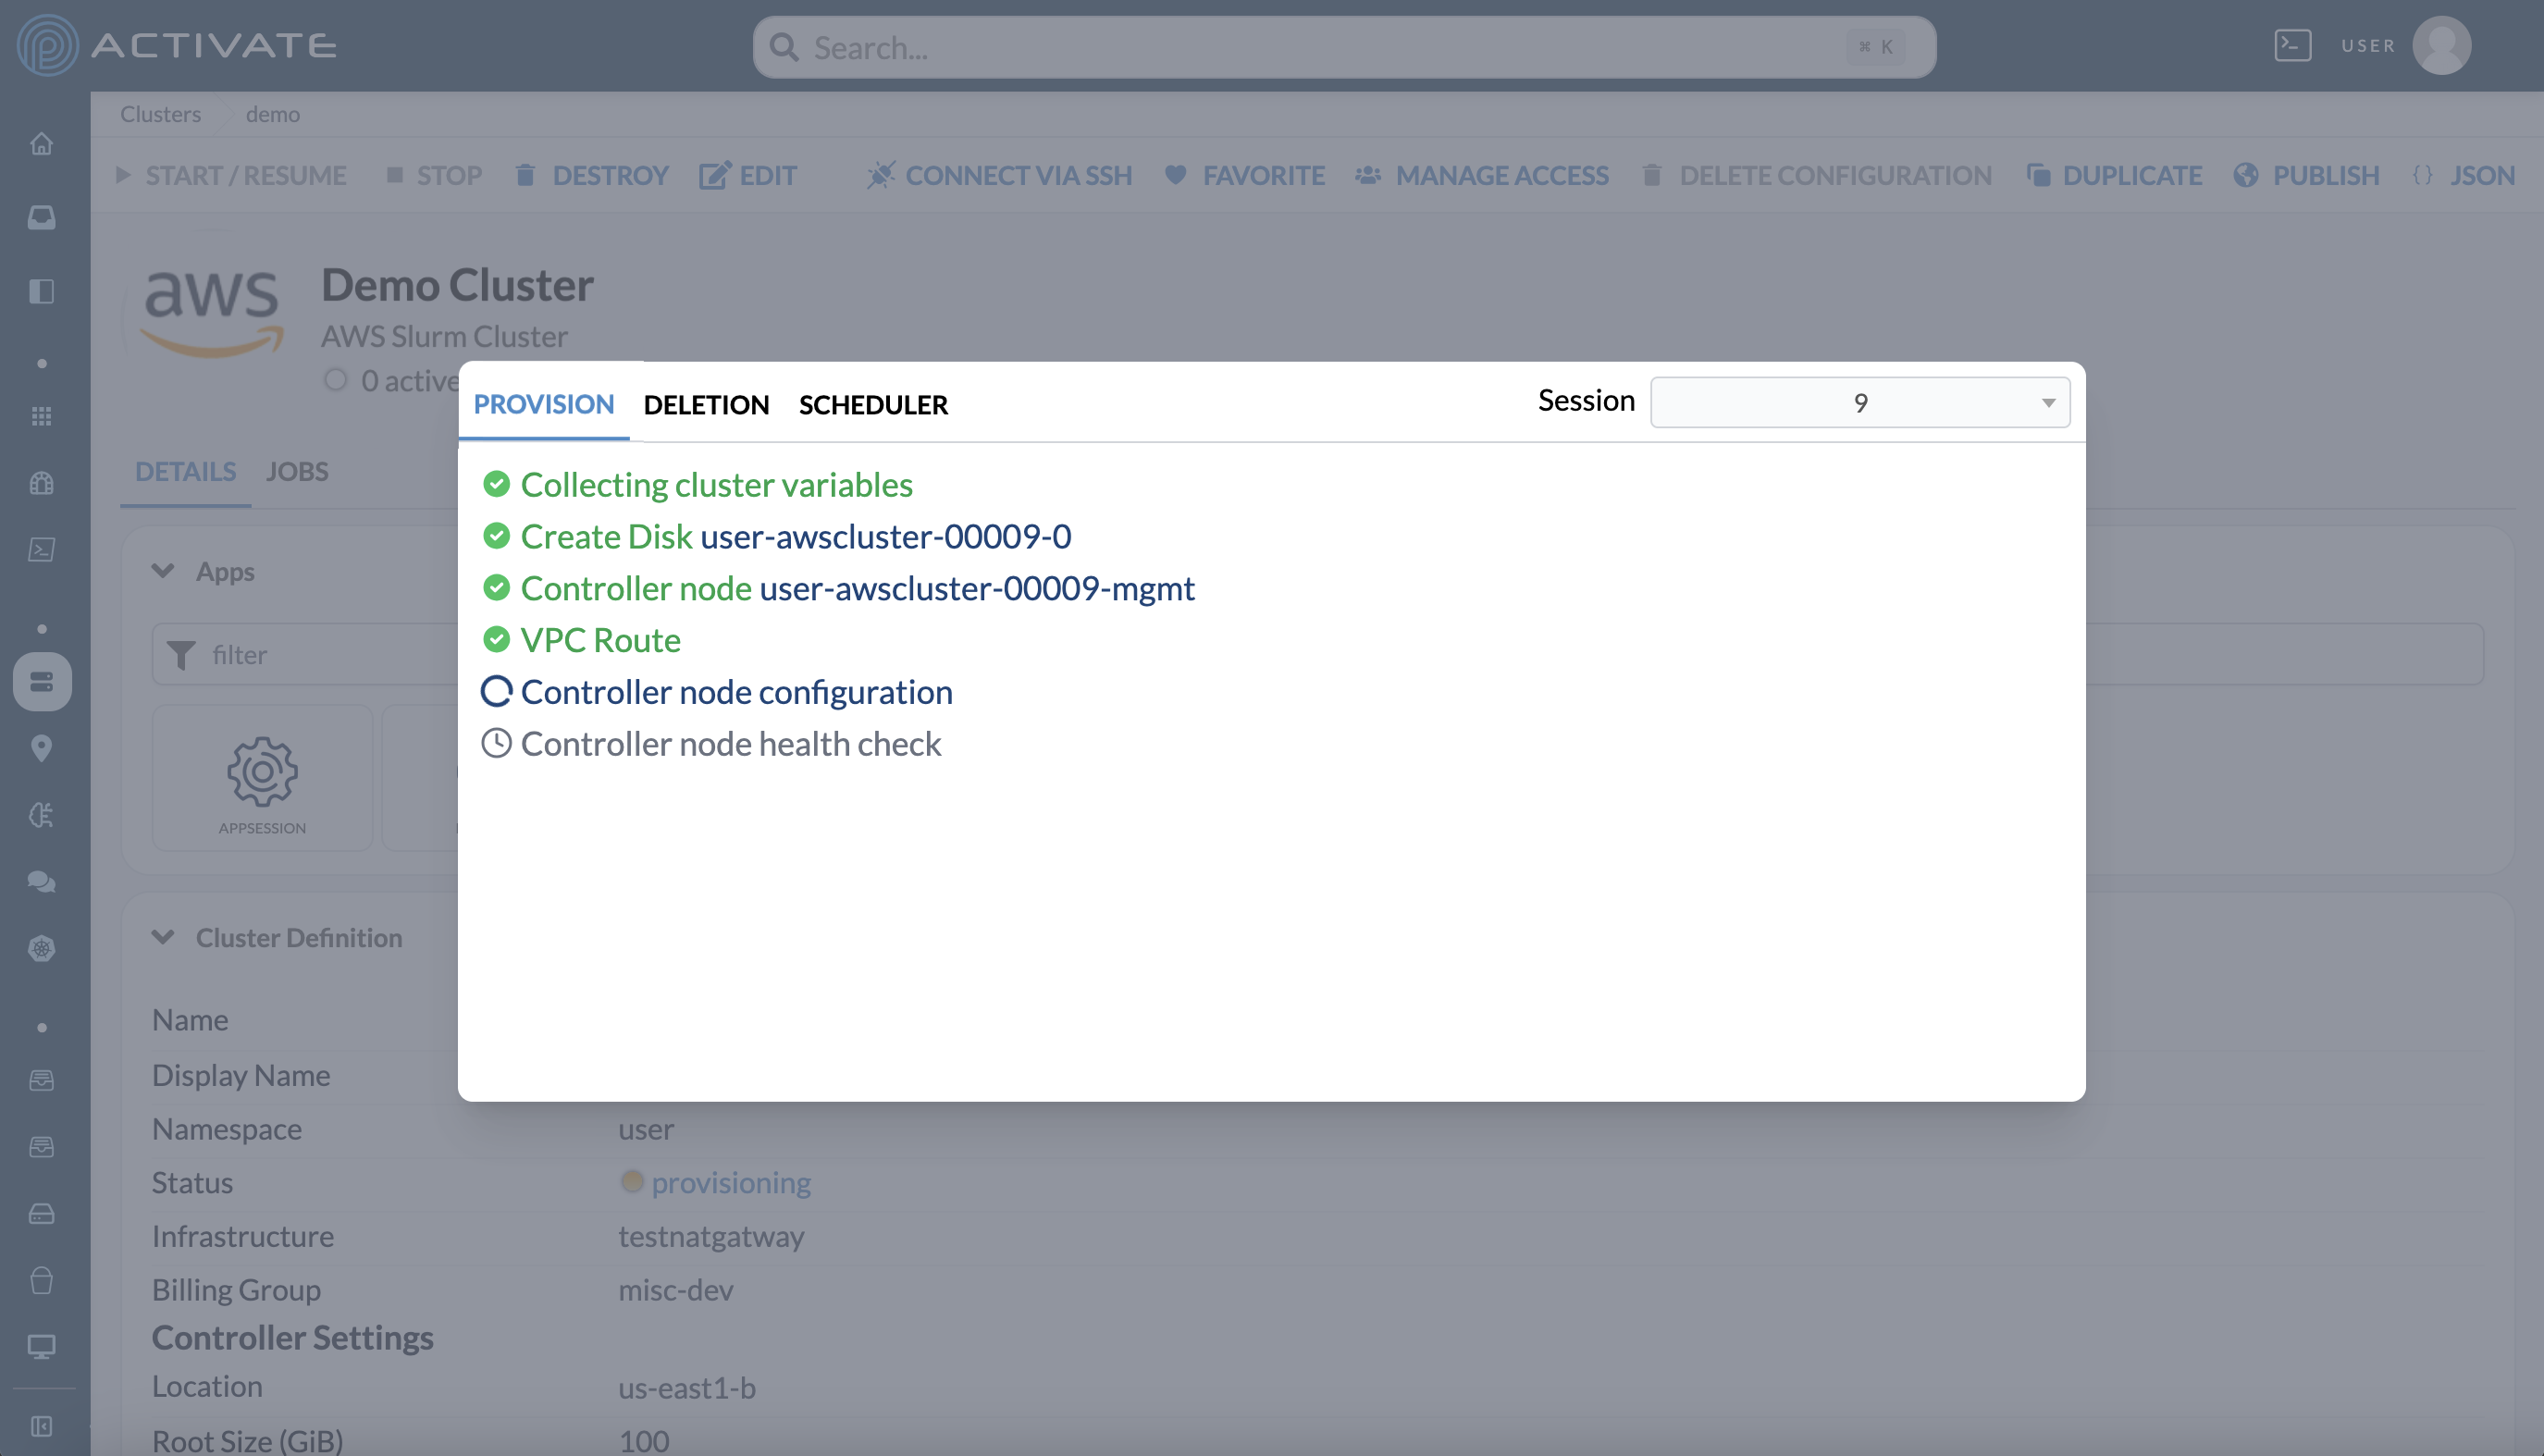
Status
You can click a cluster's Status to see detailed provisioning logs.
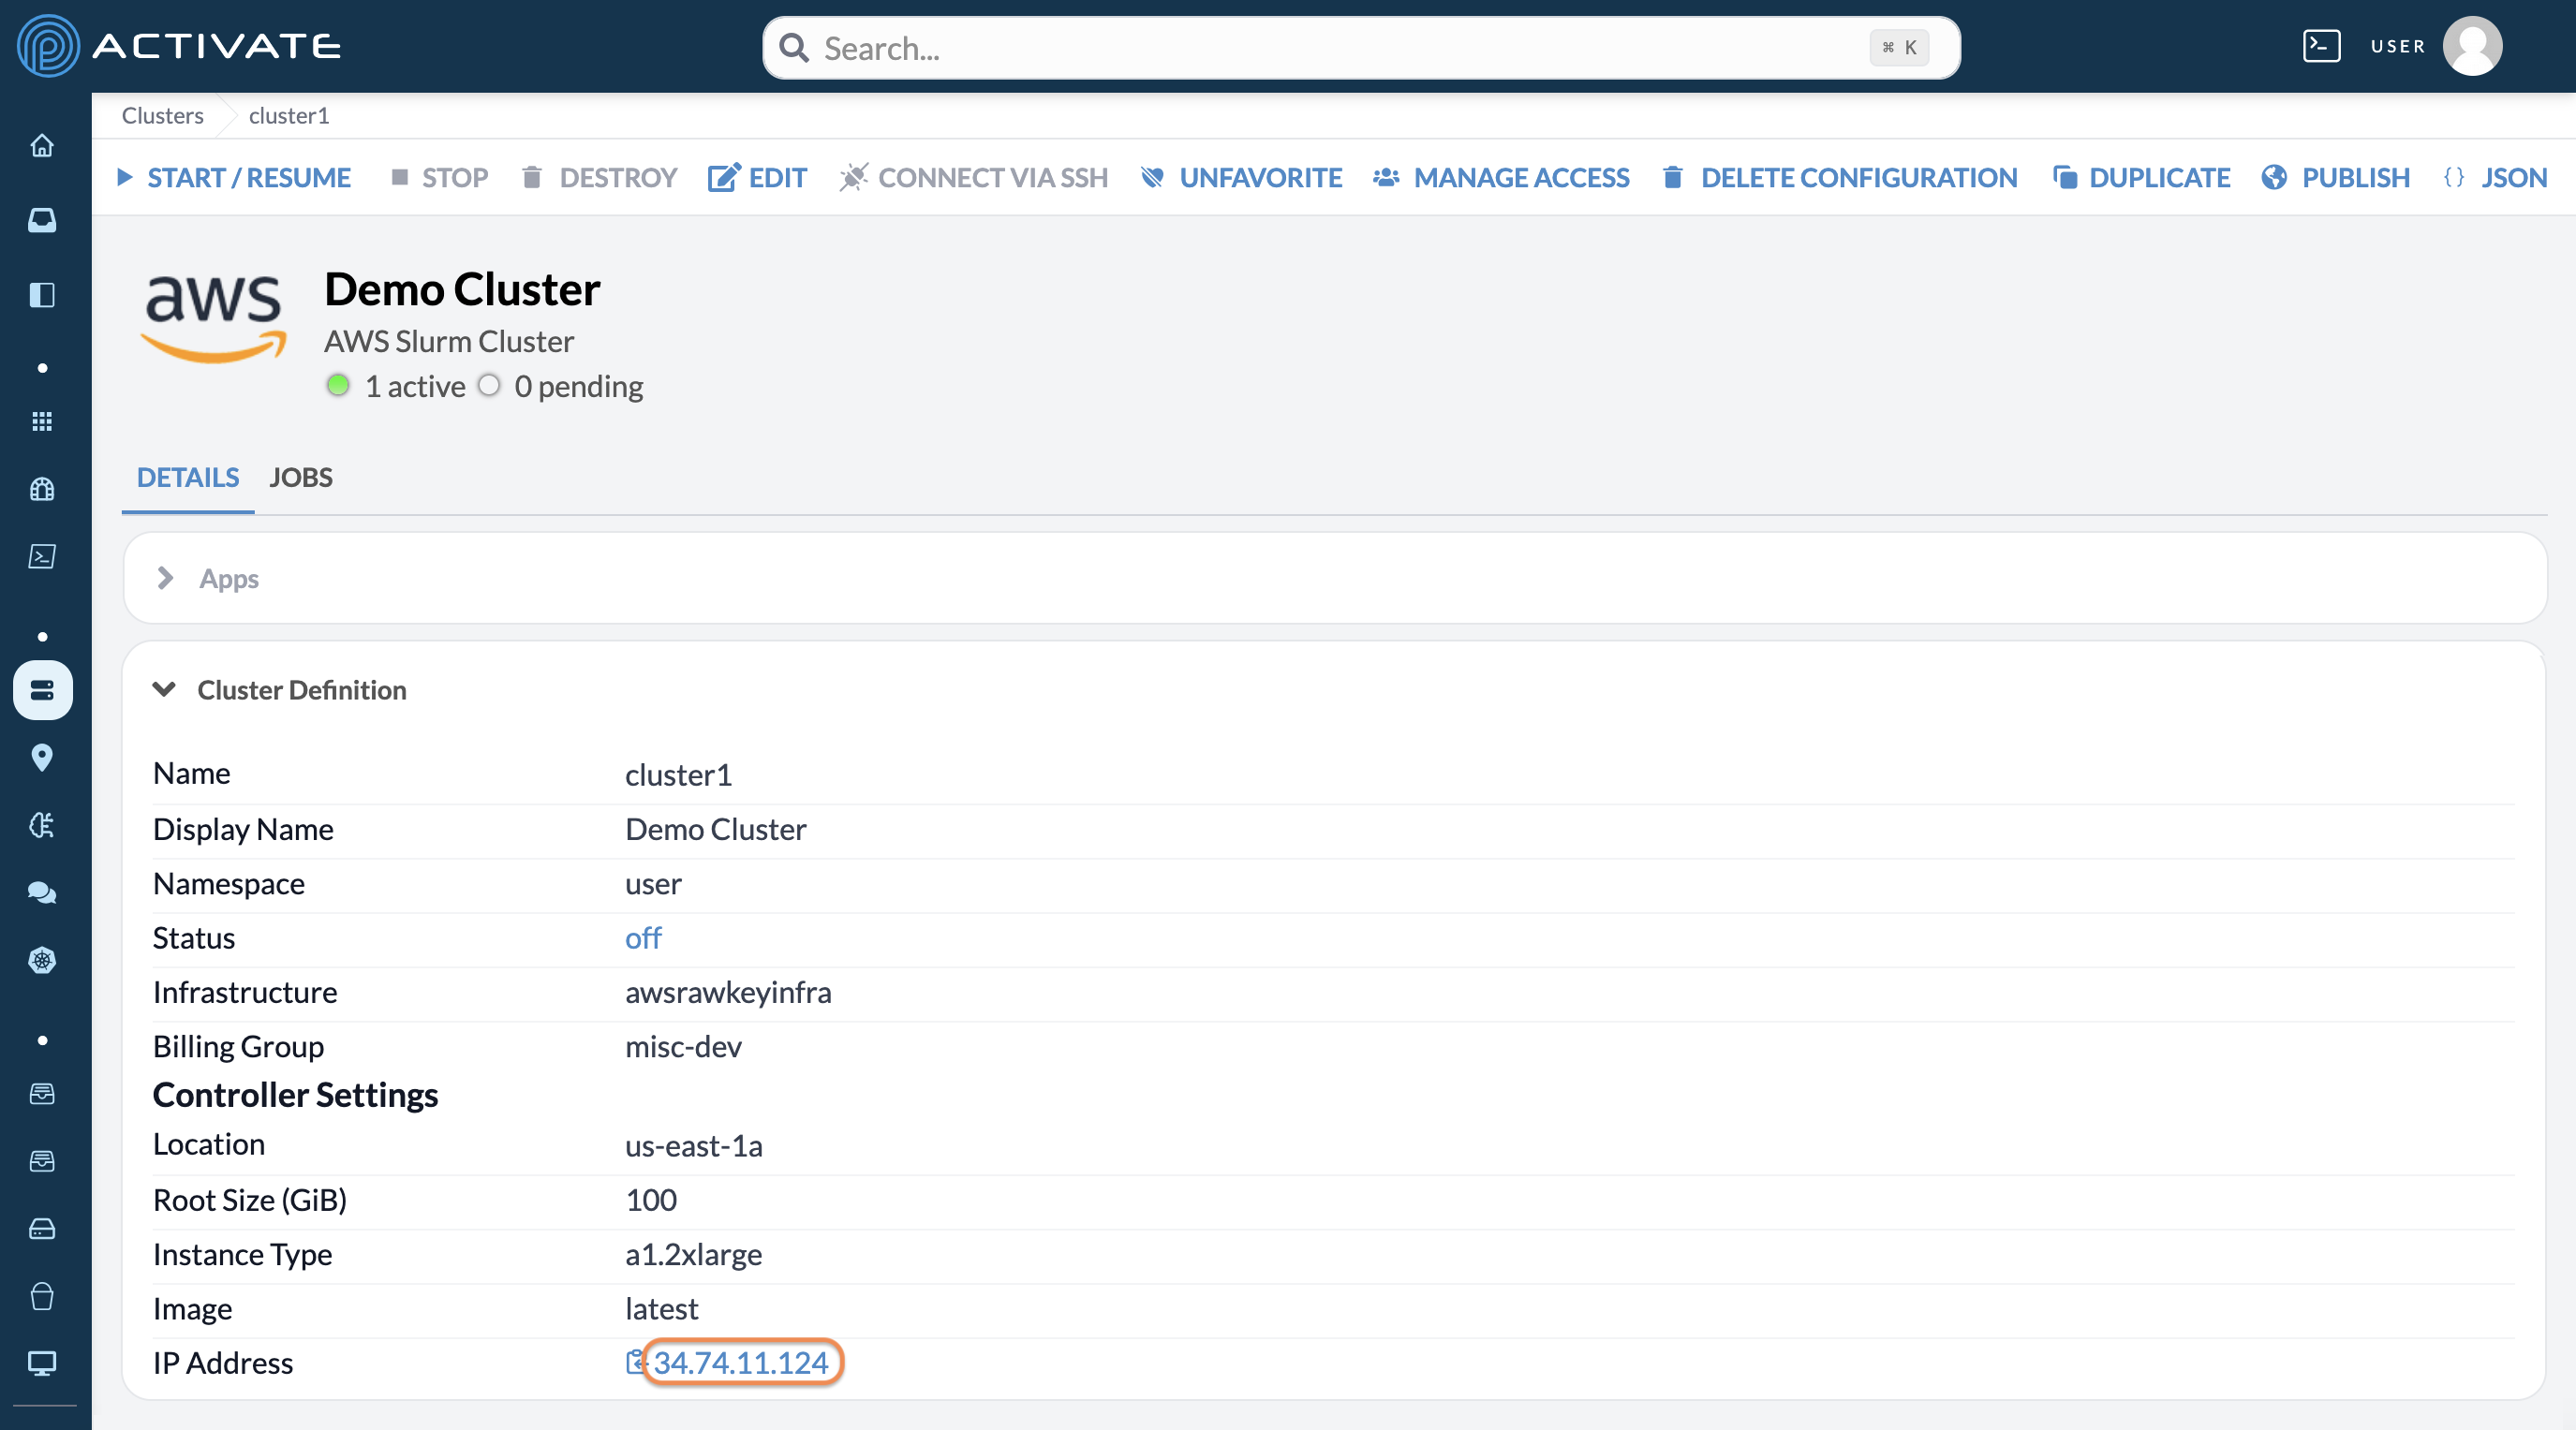
IP Address
When a cluster is active, you can click its IP Address to connect via SSH.
A terminal will appear on the bottom half of your screen, where you'll be connected to the controller node.
You can also click the copy icon to copy your IP address.
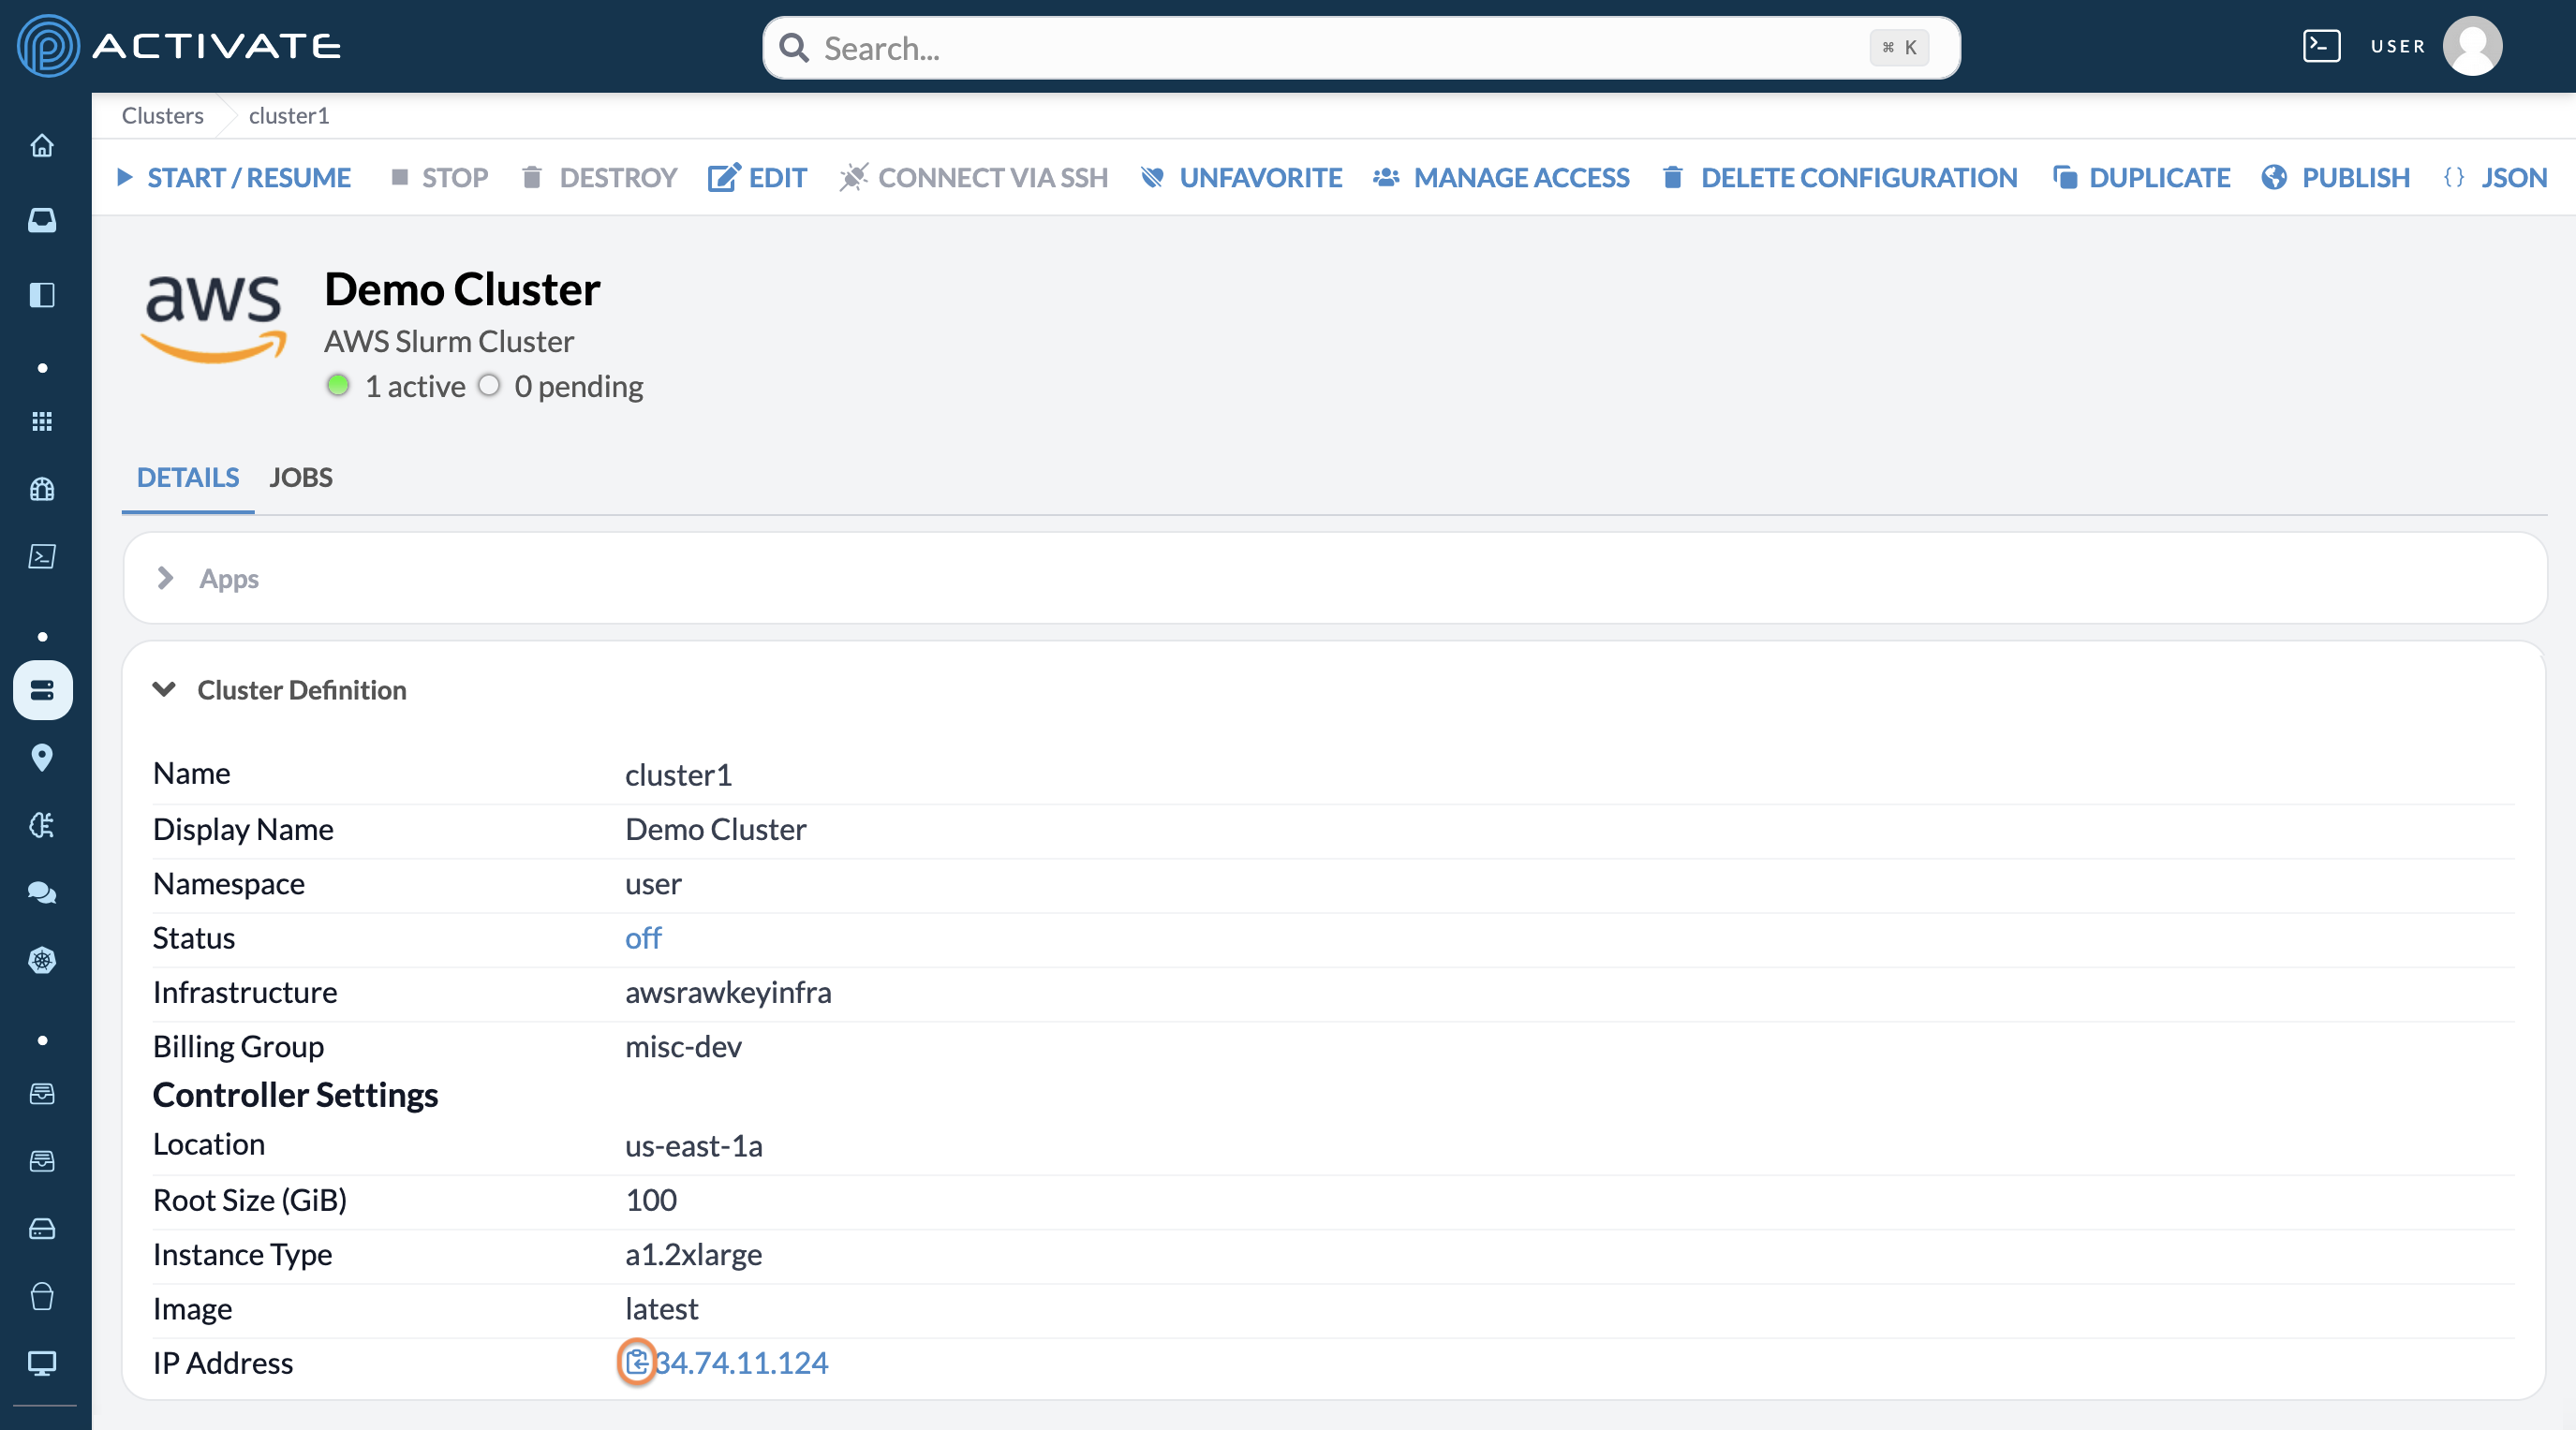
Partitions
If you have any partitions on your cluster, details about them will be listed in Partitions.
Jobs
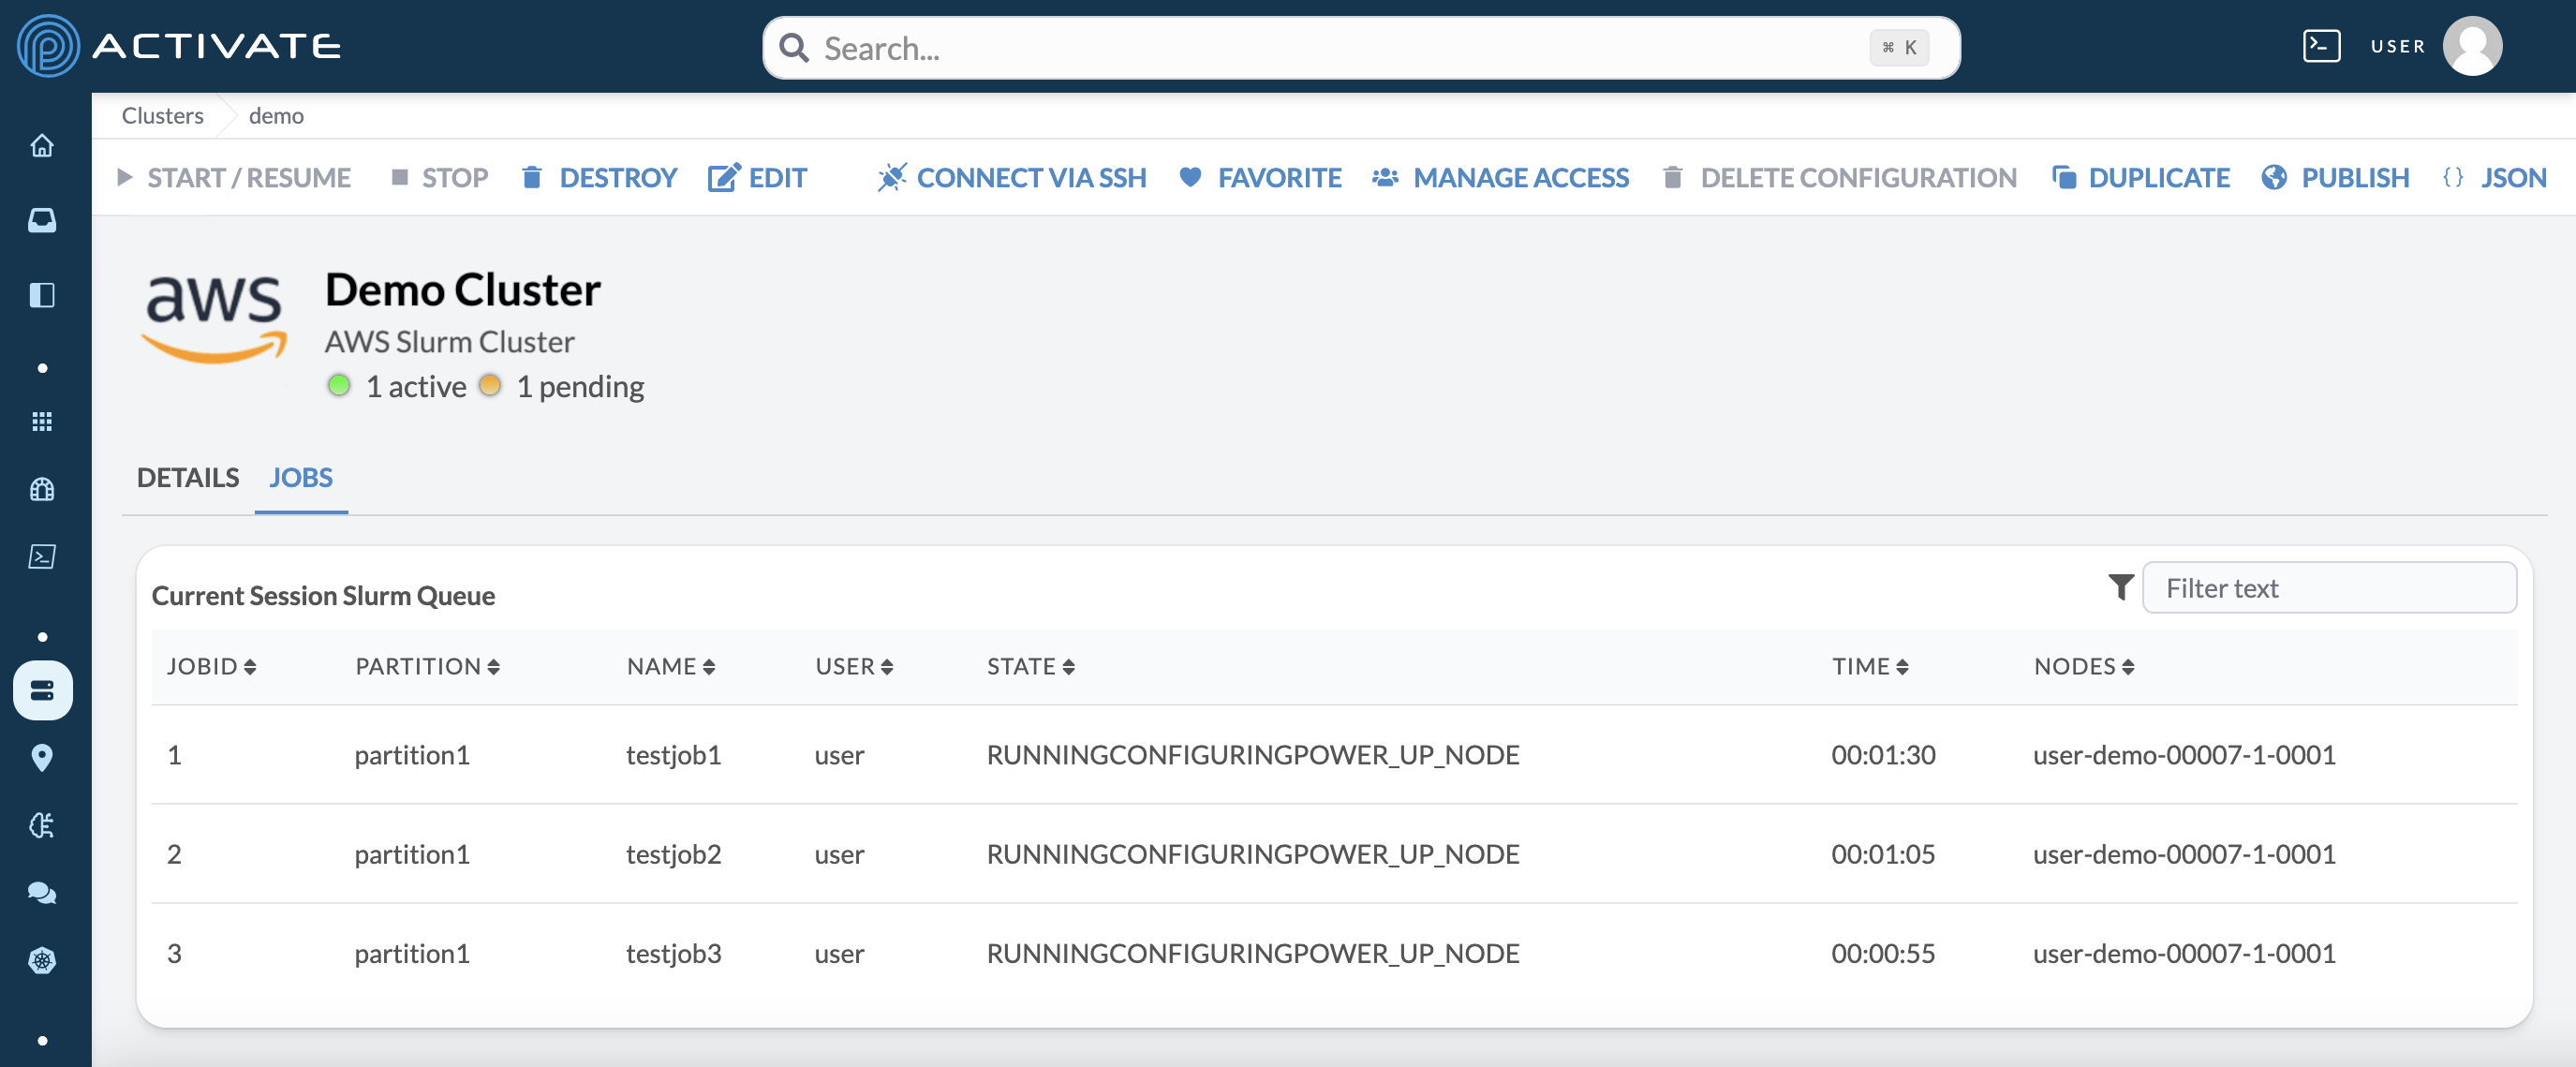
The Jobs tab displays a monitor for any running Slurm jobs on your cluster.
Action Bar
The action bar displays the major actions you can perform with your cluster.
Start/Resume
Use this button to start your cluster. You can only click Start/Resume when a cluster isn't provisioned or after you've stopped it by clicking Stop.
Stop
Use this button to stop your cluster's controller. This action is equivalent to pressing a physical power button or running the shutdown command. You can click Start / Resume to resume the controller while it's stopped.
When stopped, clusters continue to accrue costs only for attached storage resources and IP addresses. You will not be charged for compute resources.
Destroy
Use this button to destroy your cluster, which deprovisions all nodes and ephemeral filesystems. If you want to use the cluster again, it will have to start the provisioning process from the beginning when you click Start / Resume.
Edit
Use this button to edit your cluster's configuration settings. For more information, please see Configuring Clusters.
Connect Via SSH
Use this button to open a terminal and automatically connect to your cluster's controller node via SSH.
Favorite
Use this button to favorite your cluster. Favorited items appear on your Dashboard in the Compute module.
After favoriting, this button will change to Unfavorite. Click it to remove the cluster from your Dashboard.
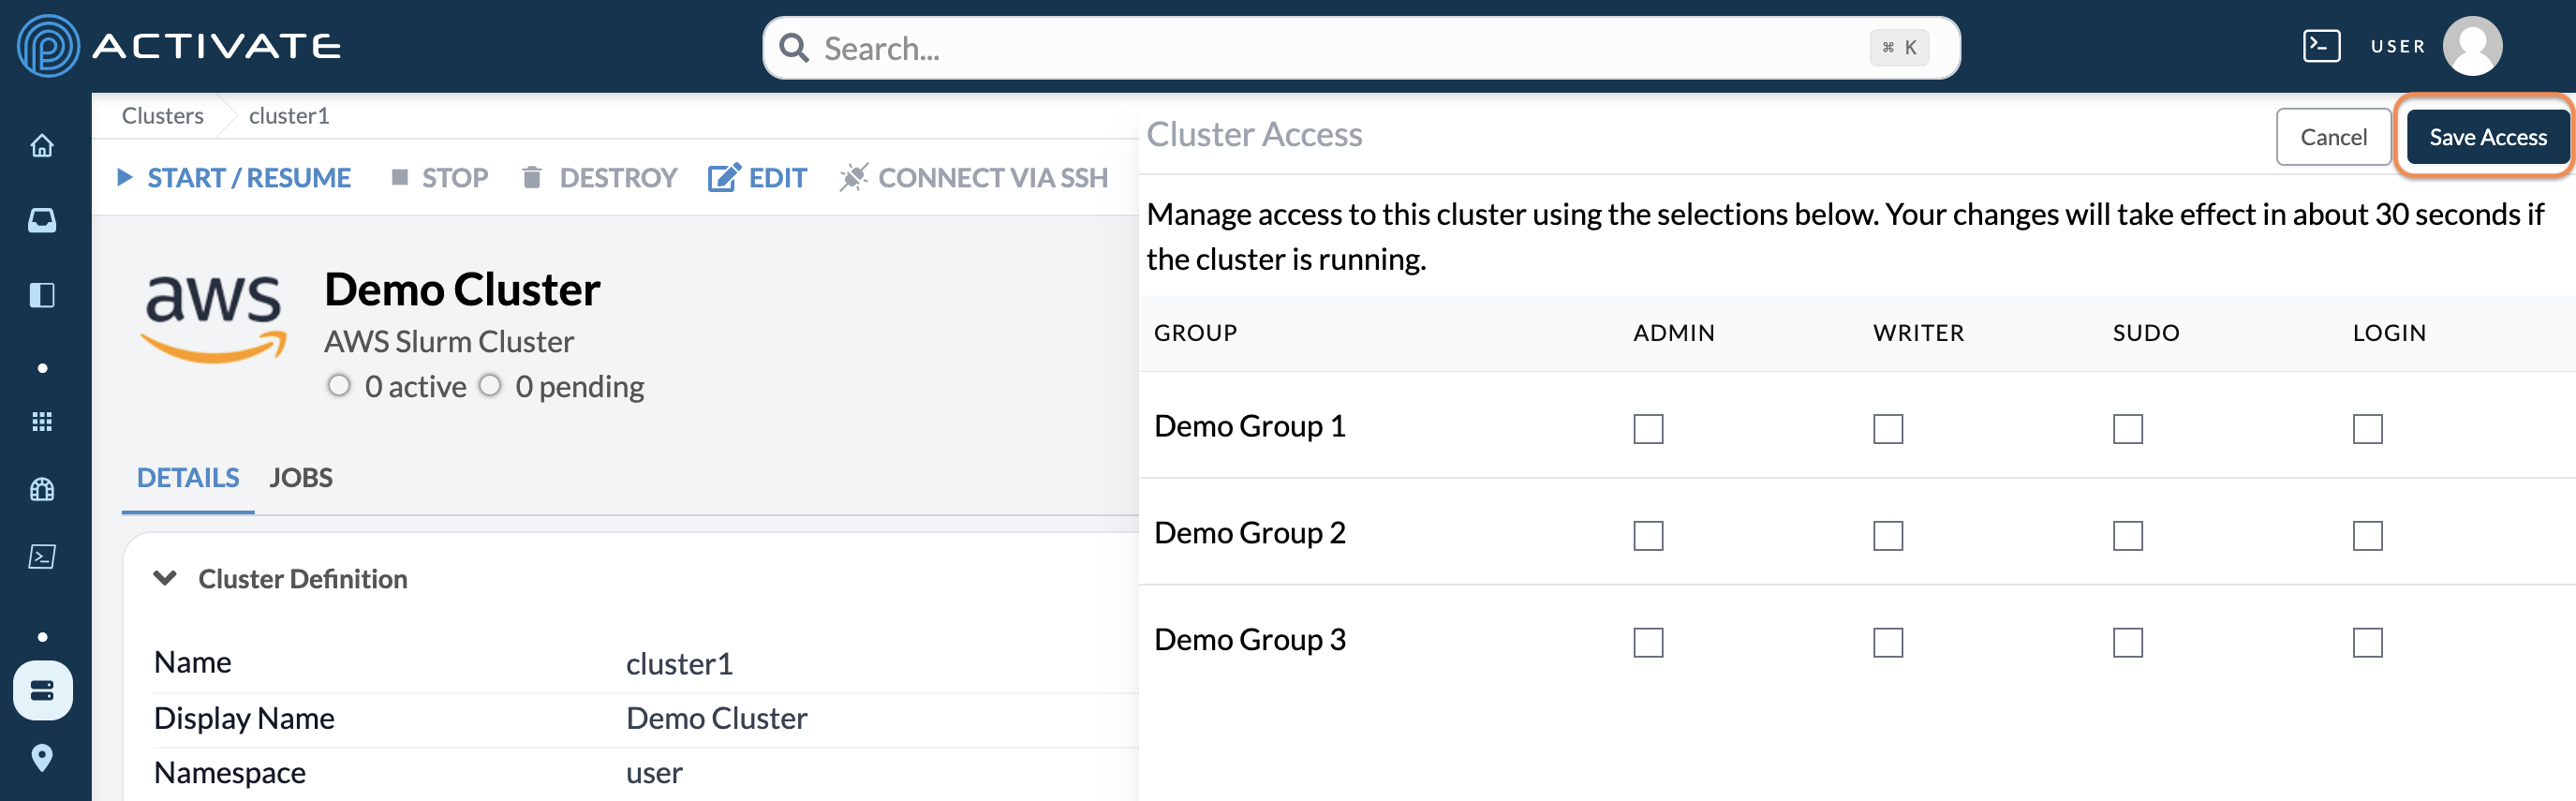
Manage Access
Use this button to manage which groups in your organization can access your cluster. Your group name(s) will be specific to your organization.
There are four levels of access:
- Admin grants users the same level of access as the owner of the cluster, including the ability to delete it.
- Writer grants users the ability to edit the cluster’s configuration as well as log in to the cluster.
- Sudo grants users the ability to log in to the cluster with root access via the
sudocommand. Root access allows users to do anything inside both the controller and compute nodes. - Login grants users the ability to log in to any compute node on the cluster by using the
sshcommand. Users' home directories are created automatically on the first login. Removing this permission revokes access after 30 seconds and kills any active sessions.
If you’re not sure which group to select, you can contact us or your organization’s ACTIVATE administrator.
About Sudo Access
Although you can remove sudo access, it is best to reprovision a cluster to ensure access is revoked. This is because once a user has sudo access, they can install software and make changes to the cluster which may not be easily reversible.
After selecting or unselecting a group, click Save Access.
Delete Configuration
Use this button to delete your cluster. After deletion, it will no longer appear on your Clusters page.
Duplicate
Use this button to make a copy of your cluster. When you duplicate a cluster, you'll be asked to name it. The copy will appear on your Clusters page.
Publish
Use this button to publish a copy of your cluster in the Marketplace. Other users in your organization will be able to use the published version in their own ACTIVATE accounts.
For more information, please see Publishing an Item.
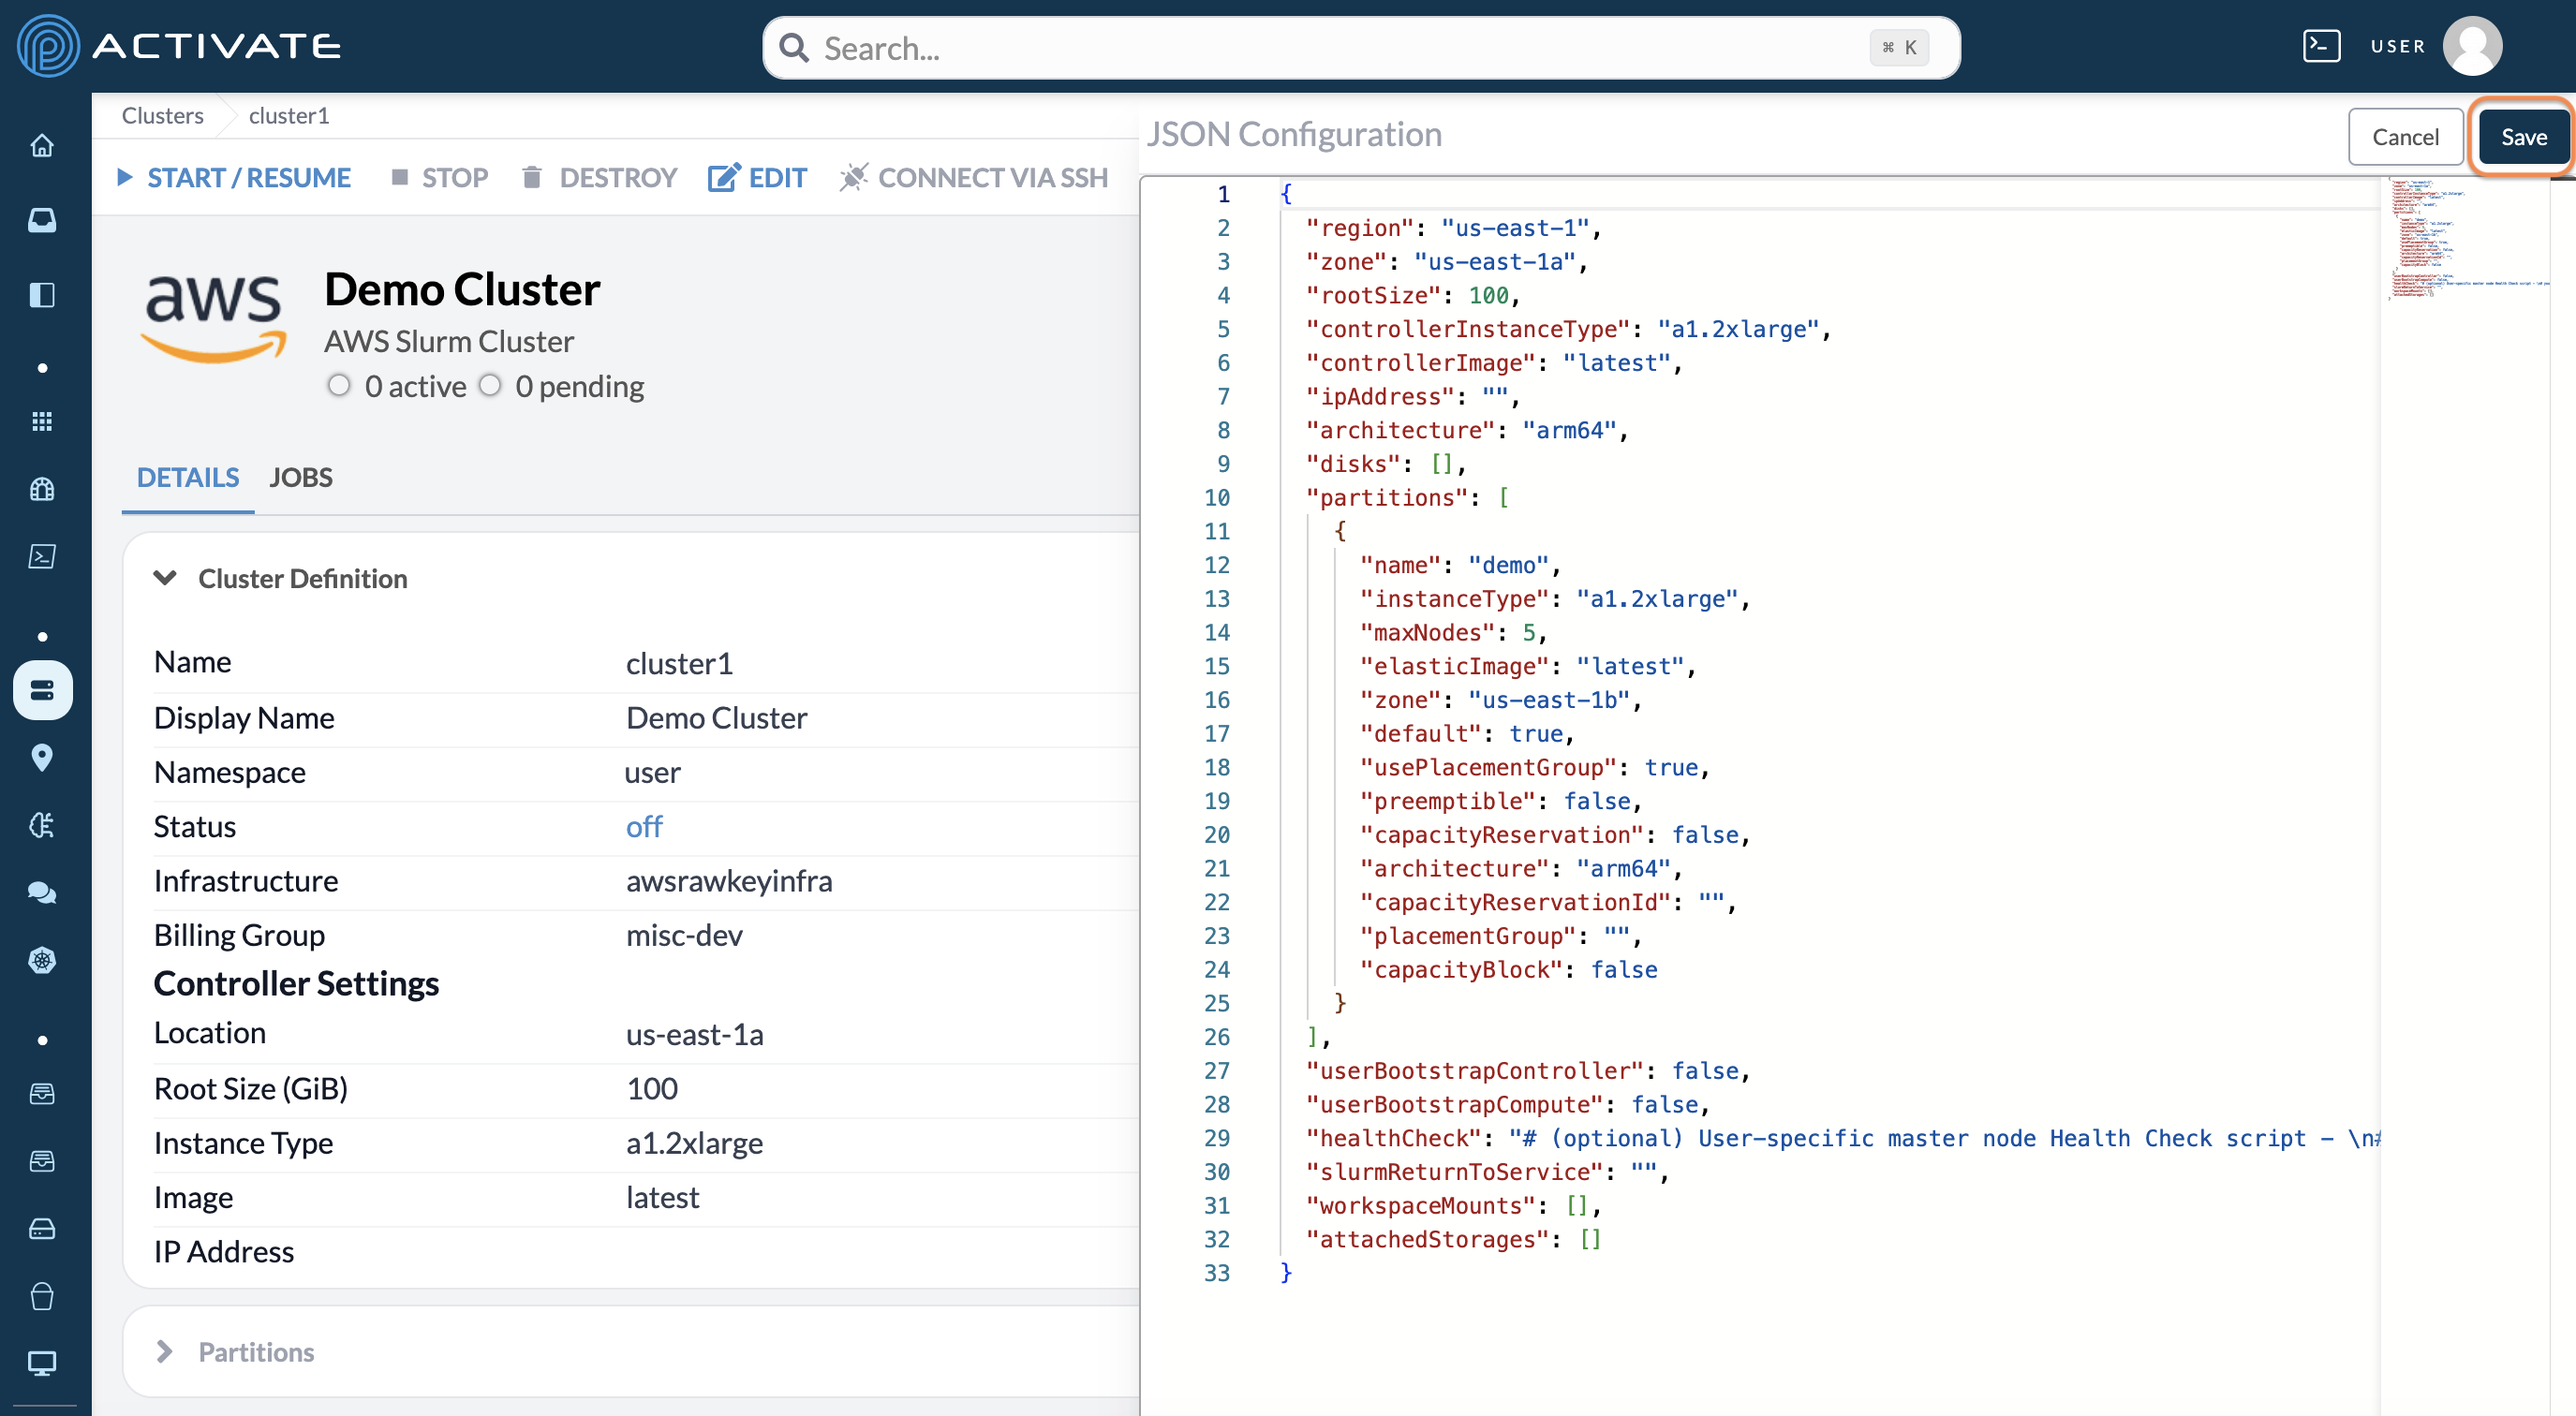
JSON
This button shows the JSON code version of your resource’s configuration settings.
You can manually adjust these settings, then click Save.
What's the difference between stopping, destroying, and deleting clusters?
Stopping a cluster shuts down the controller node, preventing some costs from accruing. While stopped, you will not pay for the controller node compute costs, but you will continue to pay for any filesystems and storage.
If you spent time customizing the controller but do not need to use it for a period, you can stop the cluster instead of destroying it. As an alternative, you may consider snapshotting the controller and then when you're ready to resume, you can start the controller back up.
Another reason to stop the controller can be for troubleshooting. Anytime the system would benefit from rebooting, you may stop and then resume the controller to achieve that effect.
Destoying a cluster completely deprovisions it from the cloud. This deletes all ephemeral filesystems, all disks, the controller node, and all compute nodes are immediately deleted. Any running or pending jobs will be lost as resources are deleted.
Deleting a cluster configuration removes it entirely from your account. There are no costs incurred for having cluster configurations in your account.
More succinctly:
- Stopping temporarily shuts down the controller.
- Destroying completely removes all provisioned resources, including ephemeral filesystems and compute nodes.
- Deleting a configuration completely removes that configuration from our platform.