Working With Disk Snapshots
If you want to save a disk's configuration, you can create a snapshot to re-use later.
Please note that you can only create snapshots of persistent disks.
Creating a Snapshot
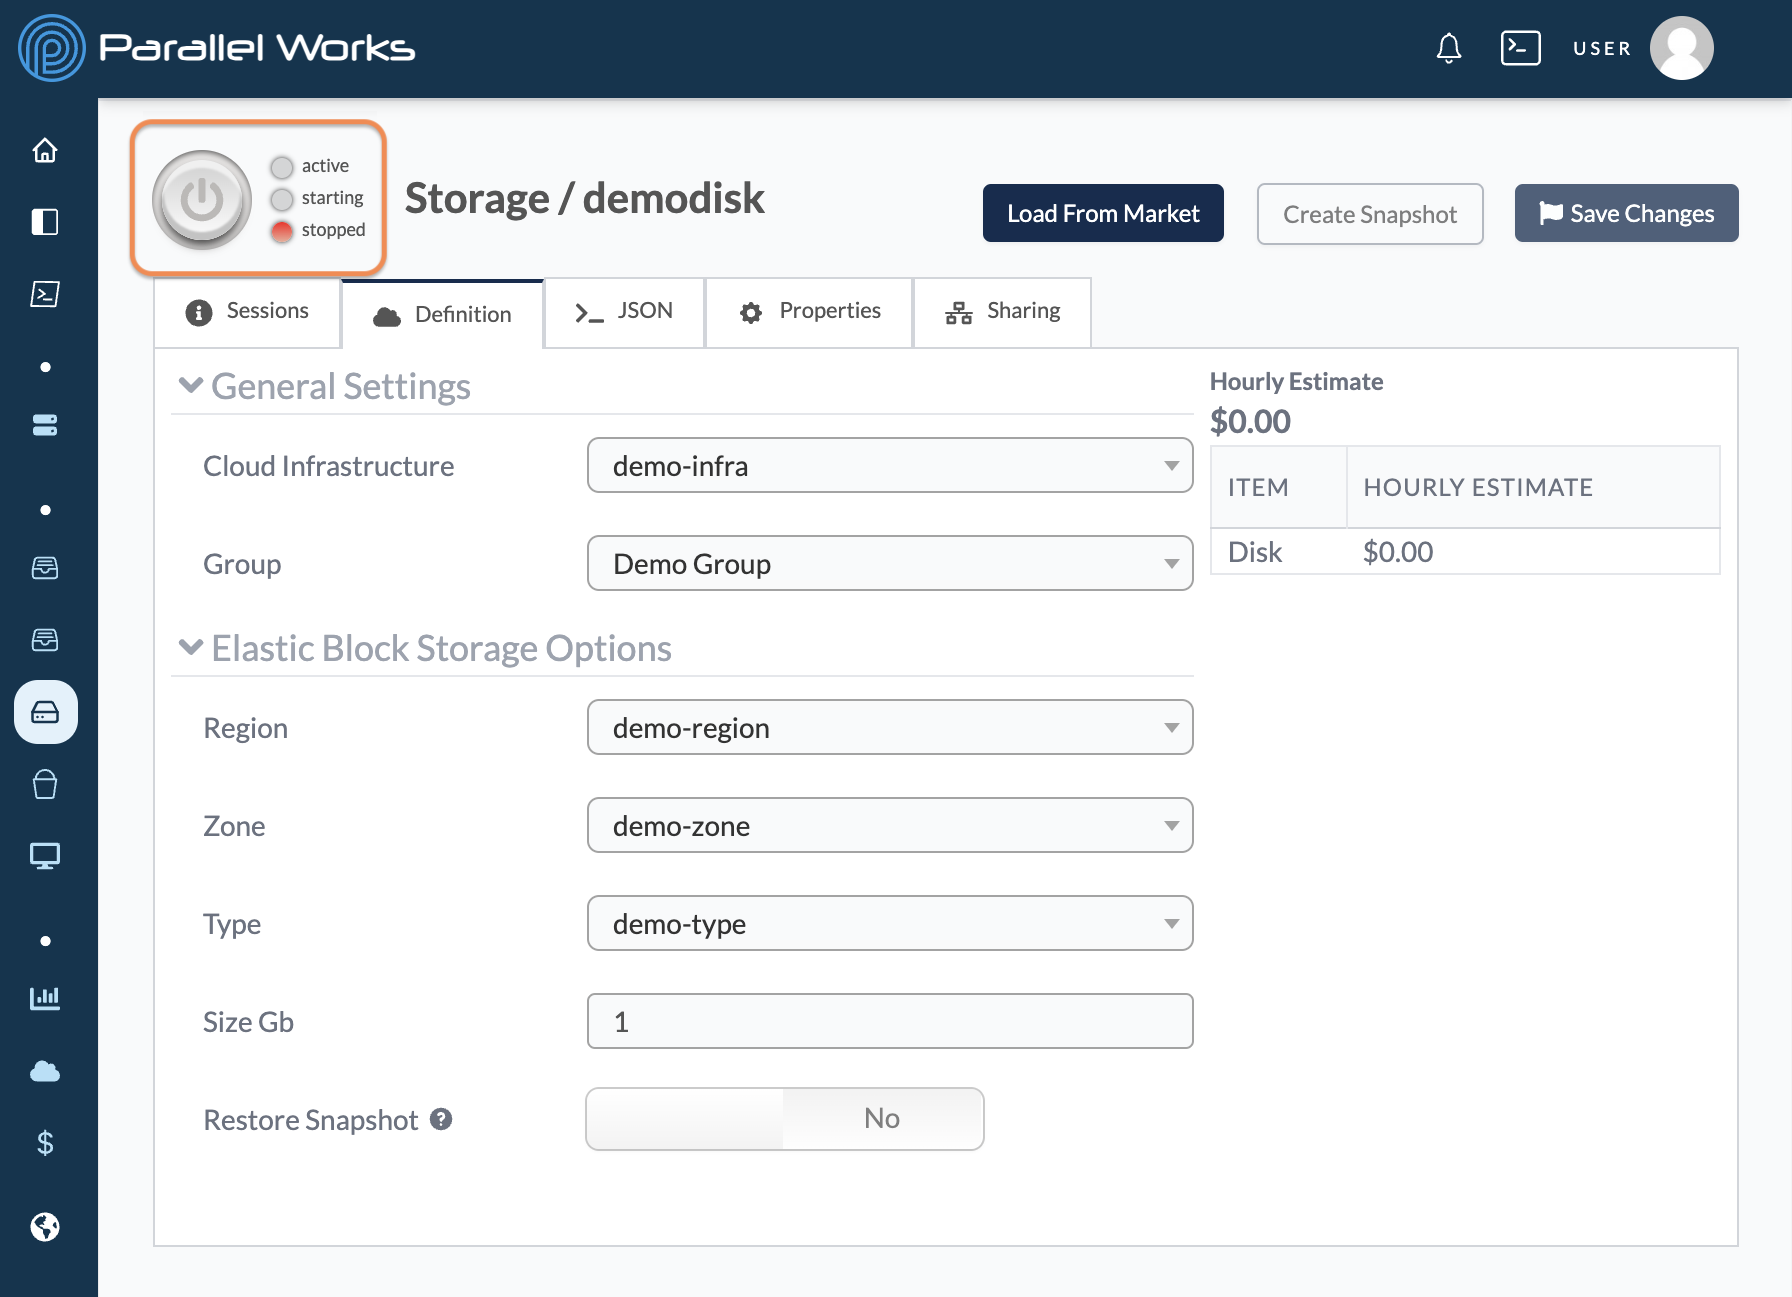
After configuring your disk, click the start button.
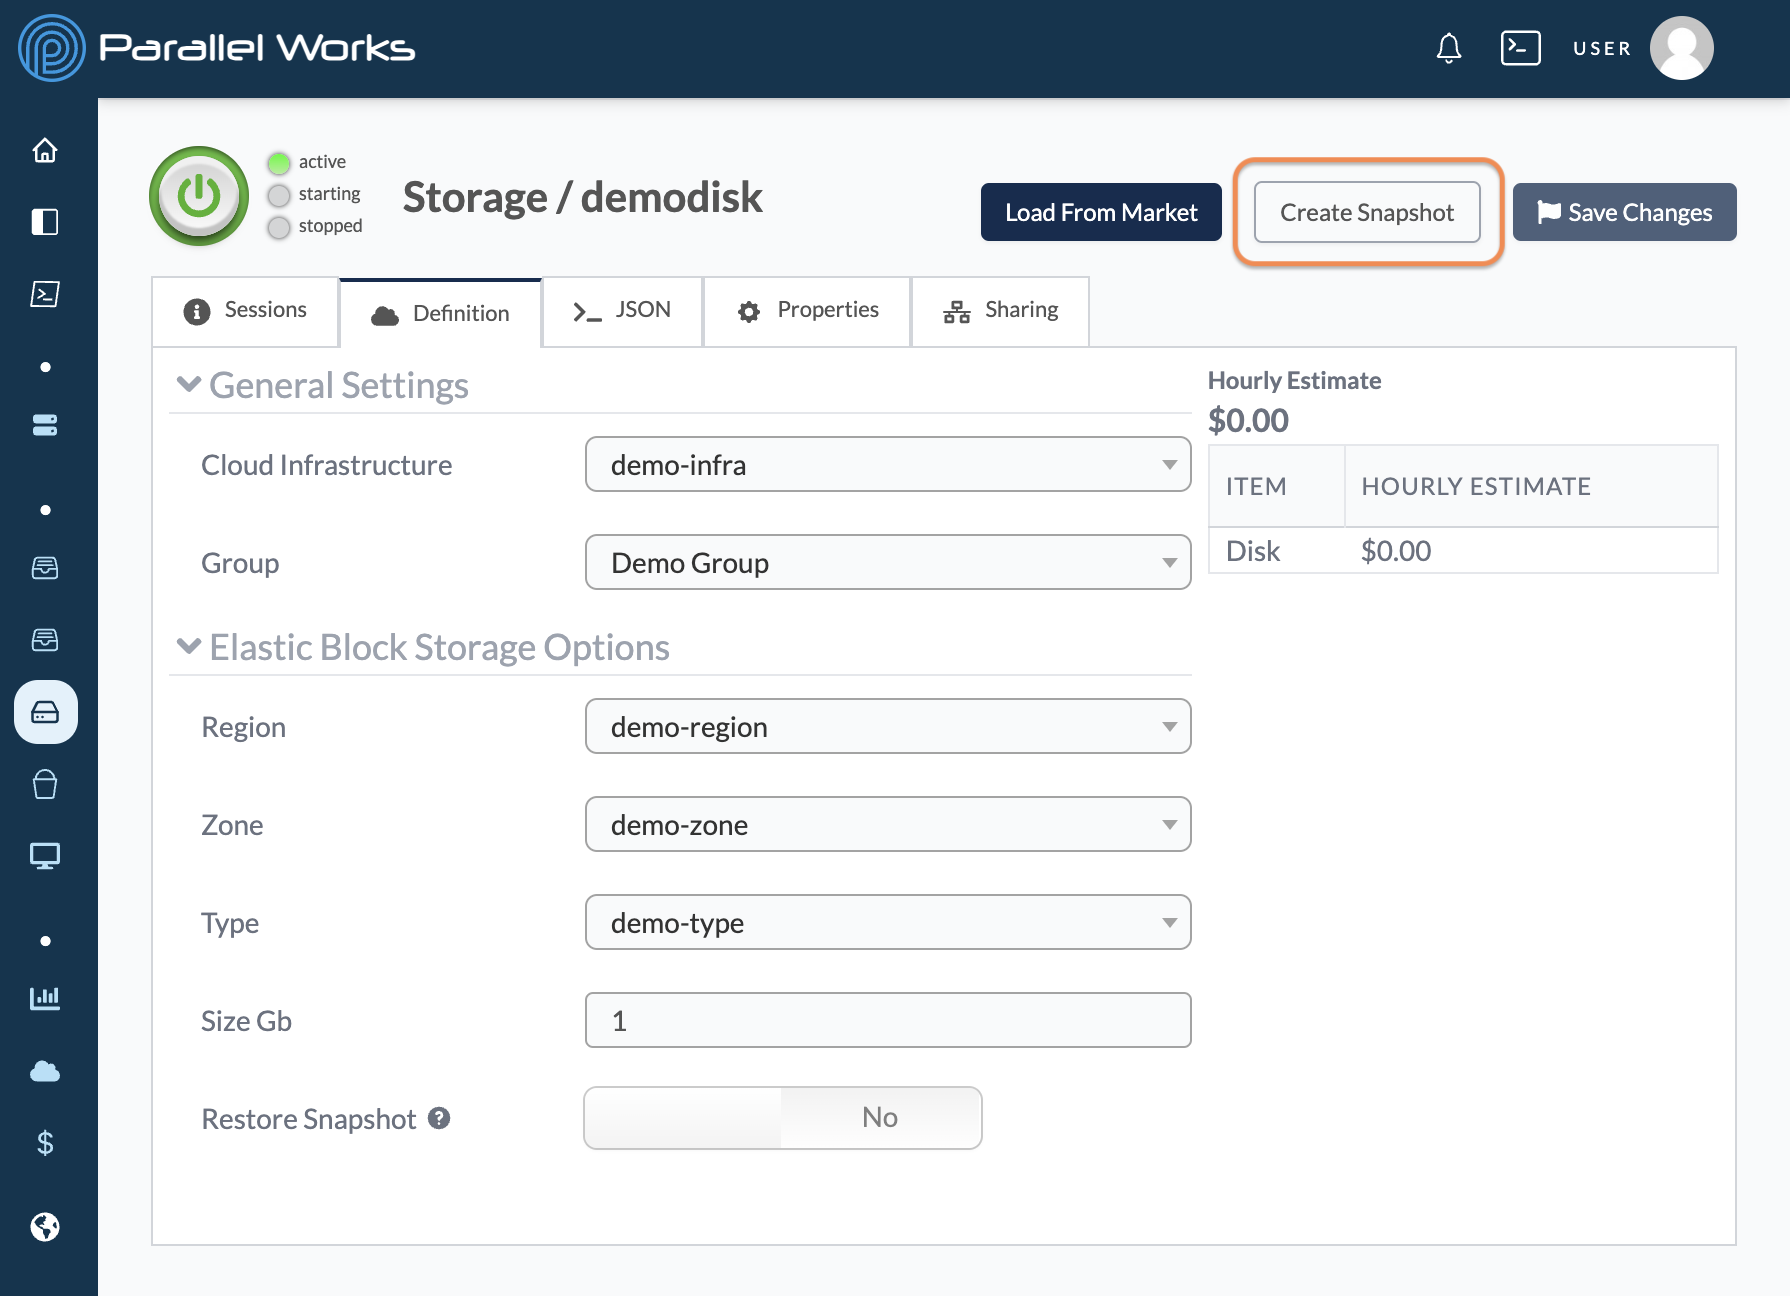
After the disk has started, click Create Snapshot.
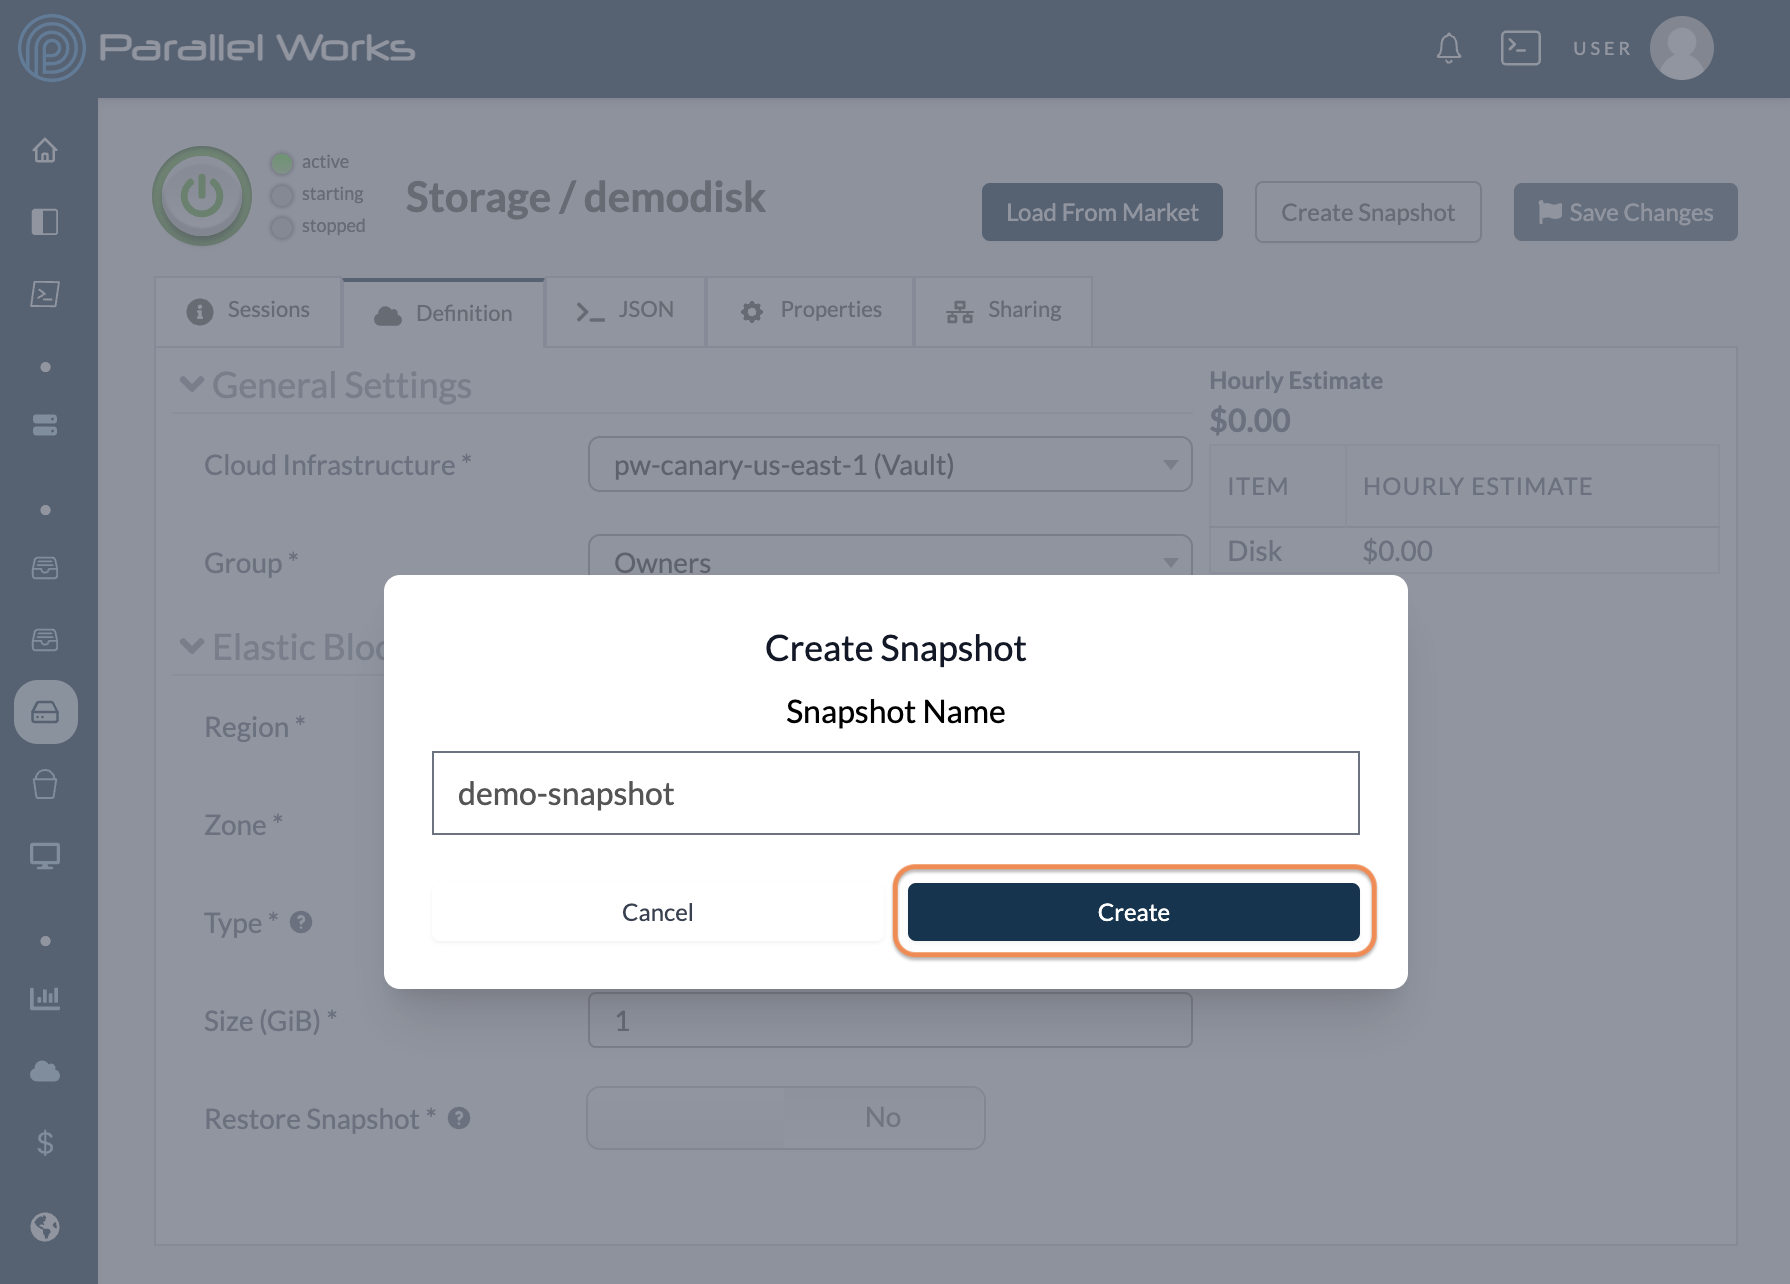
A new dialog box will appear. Enter a Snapshot Name. This field can only include lowercase letters, numbers, and single dashes.
Click Create.
You'll see the message The snapshot is being created. This process may take a few minutes.
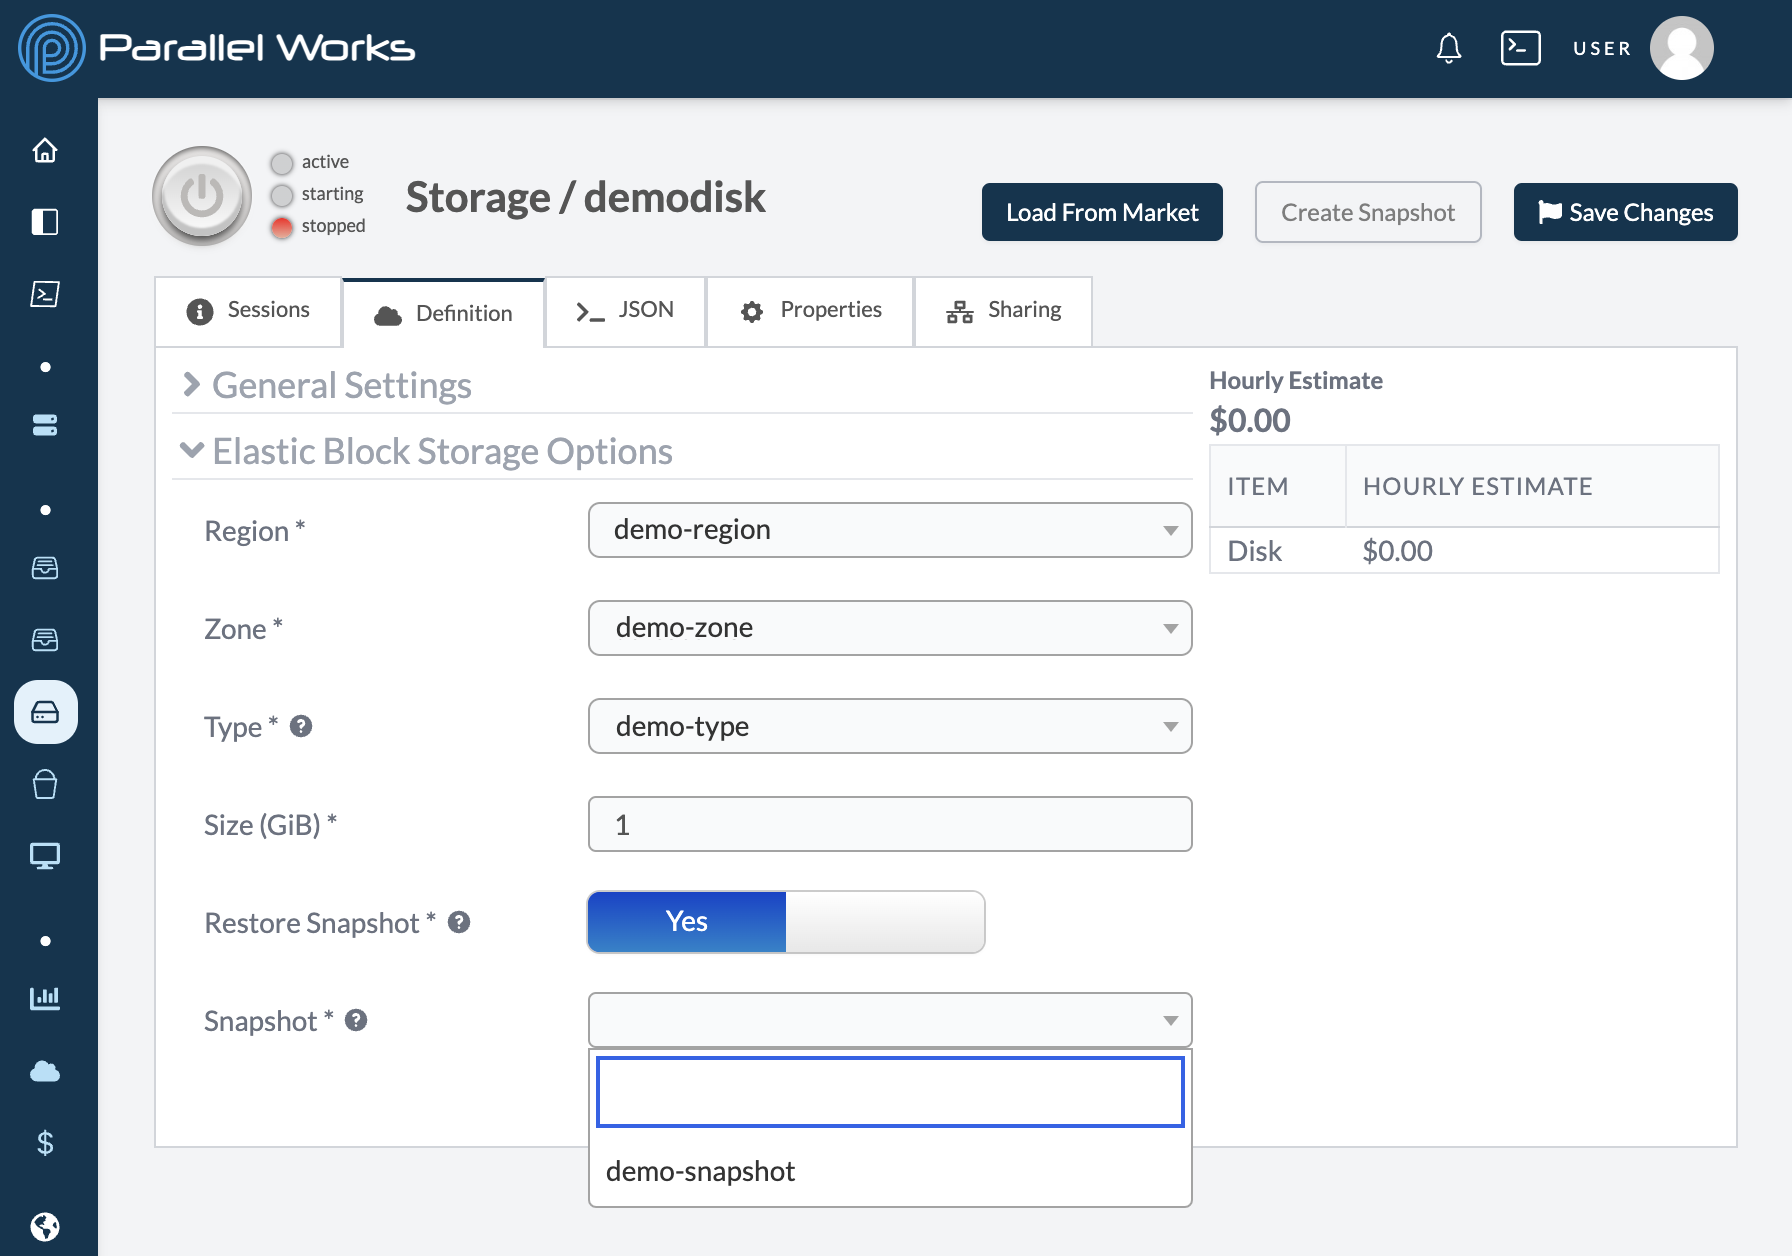
You'll be able to load your snapshot when configuring a disk of the same type (Azure Disk snapshots can only be loaded on other Azure Disks, for example). Click Restore Snapshot, then select a saved configuration from the Snapshot dropdown menu.
Your snapshot will also appear on the Snapshots page.
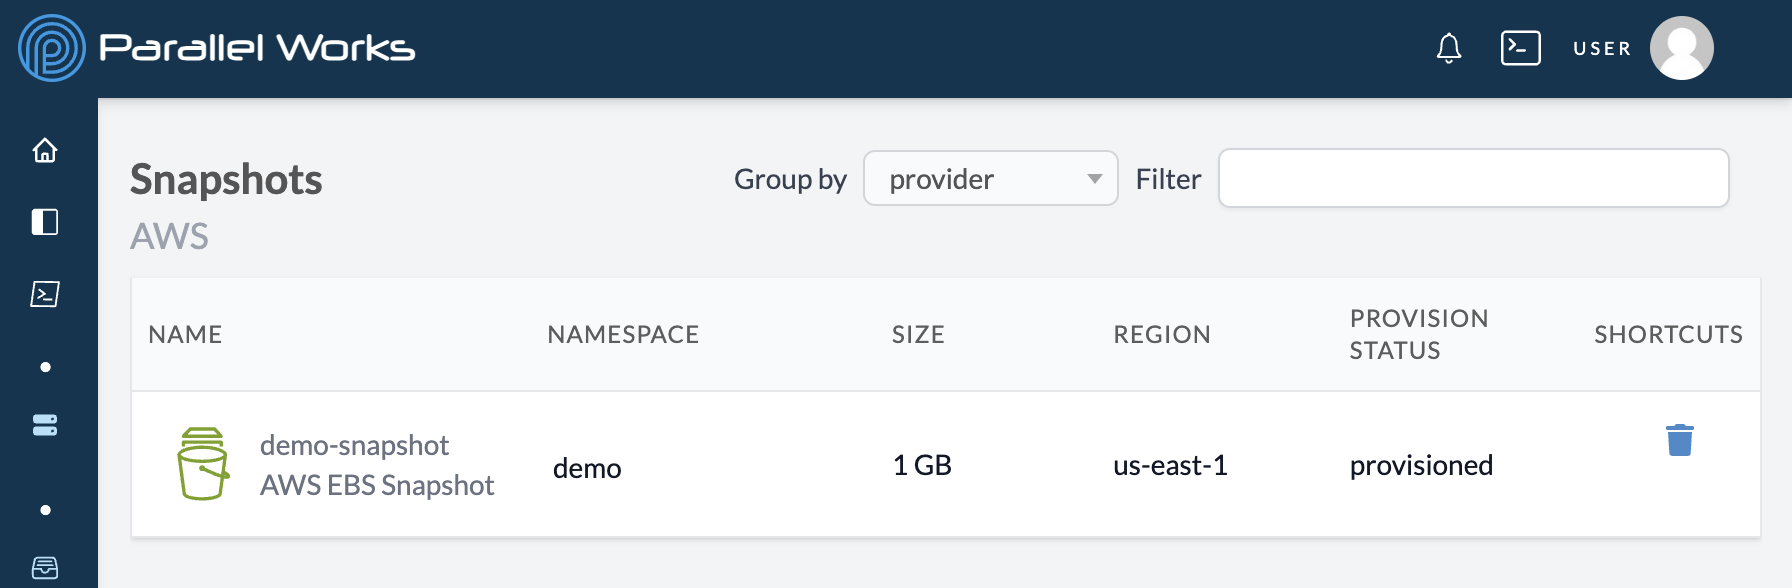
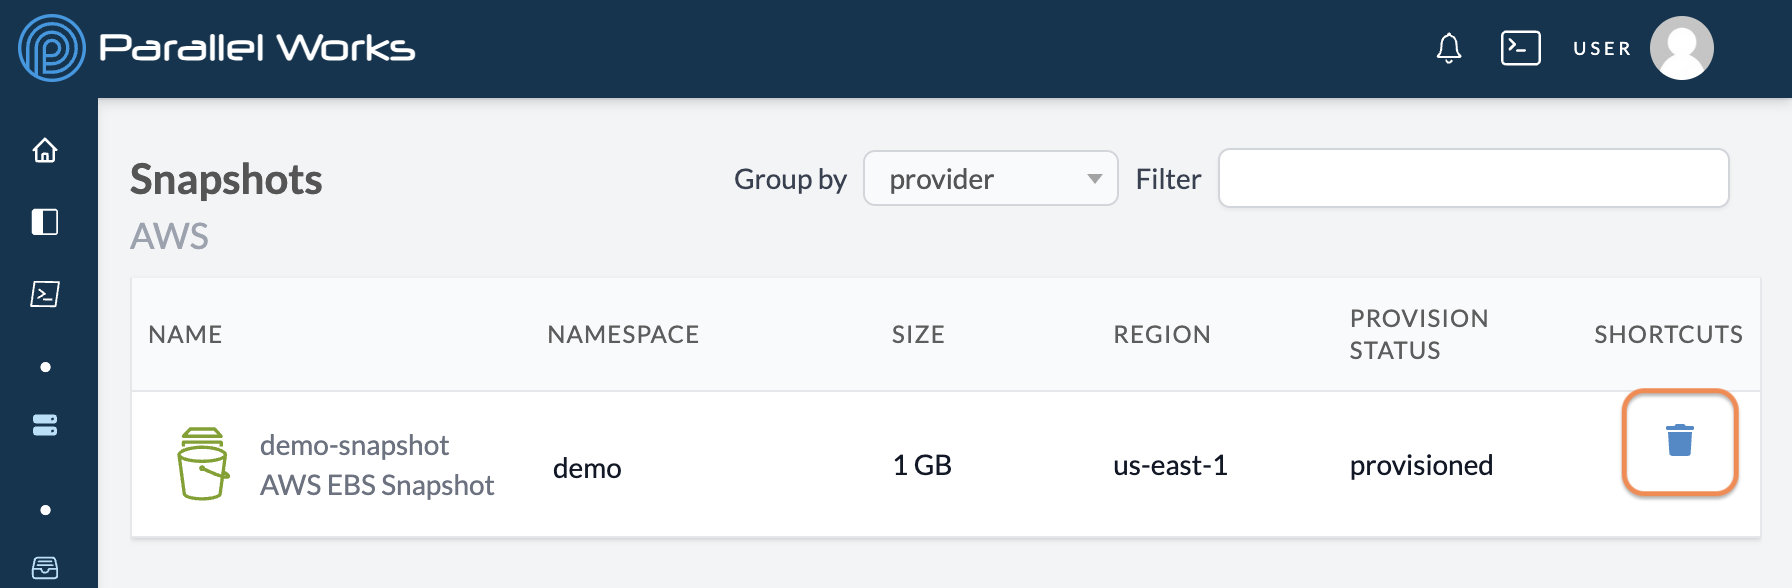
Deleting a Snapshot
Navigate to Shapshots. Click the delete icon for the snapshot you'd like to remove.
You'll see the message The snapshot is being deleted. This process may take a few minutes. The snapshot's Provisioned Status will display as Deleted. After one hour, the snapshot will be removed from your dashboard.
Sharing a Snapshot
Navigate to Snapshots.
Click the access icon.
On the next page, select the group(s) you want to share the snapshot with. You'll see the message Permission updated successfully.