Creating OS Snapshots
After configuring a cluster, you may wish to save its data for later use on other clusters. You can create a snapshot of the cluster's root disk, which saves its operating system, data, and any applications you've installed. When you start a new cluster and select your snapshot as the image, the saved data will appear on the cluster.
OS snapshots are different from cloud snapshots in that cloud snapshots do not contain an operating system. This means that cloud snapshots cannot be used as your root disk.
Creating a Snapshot
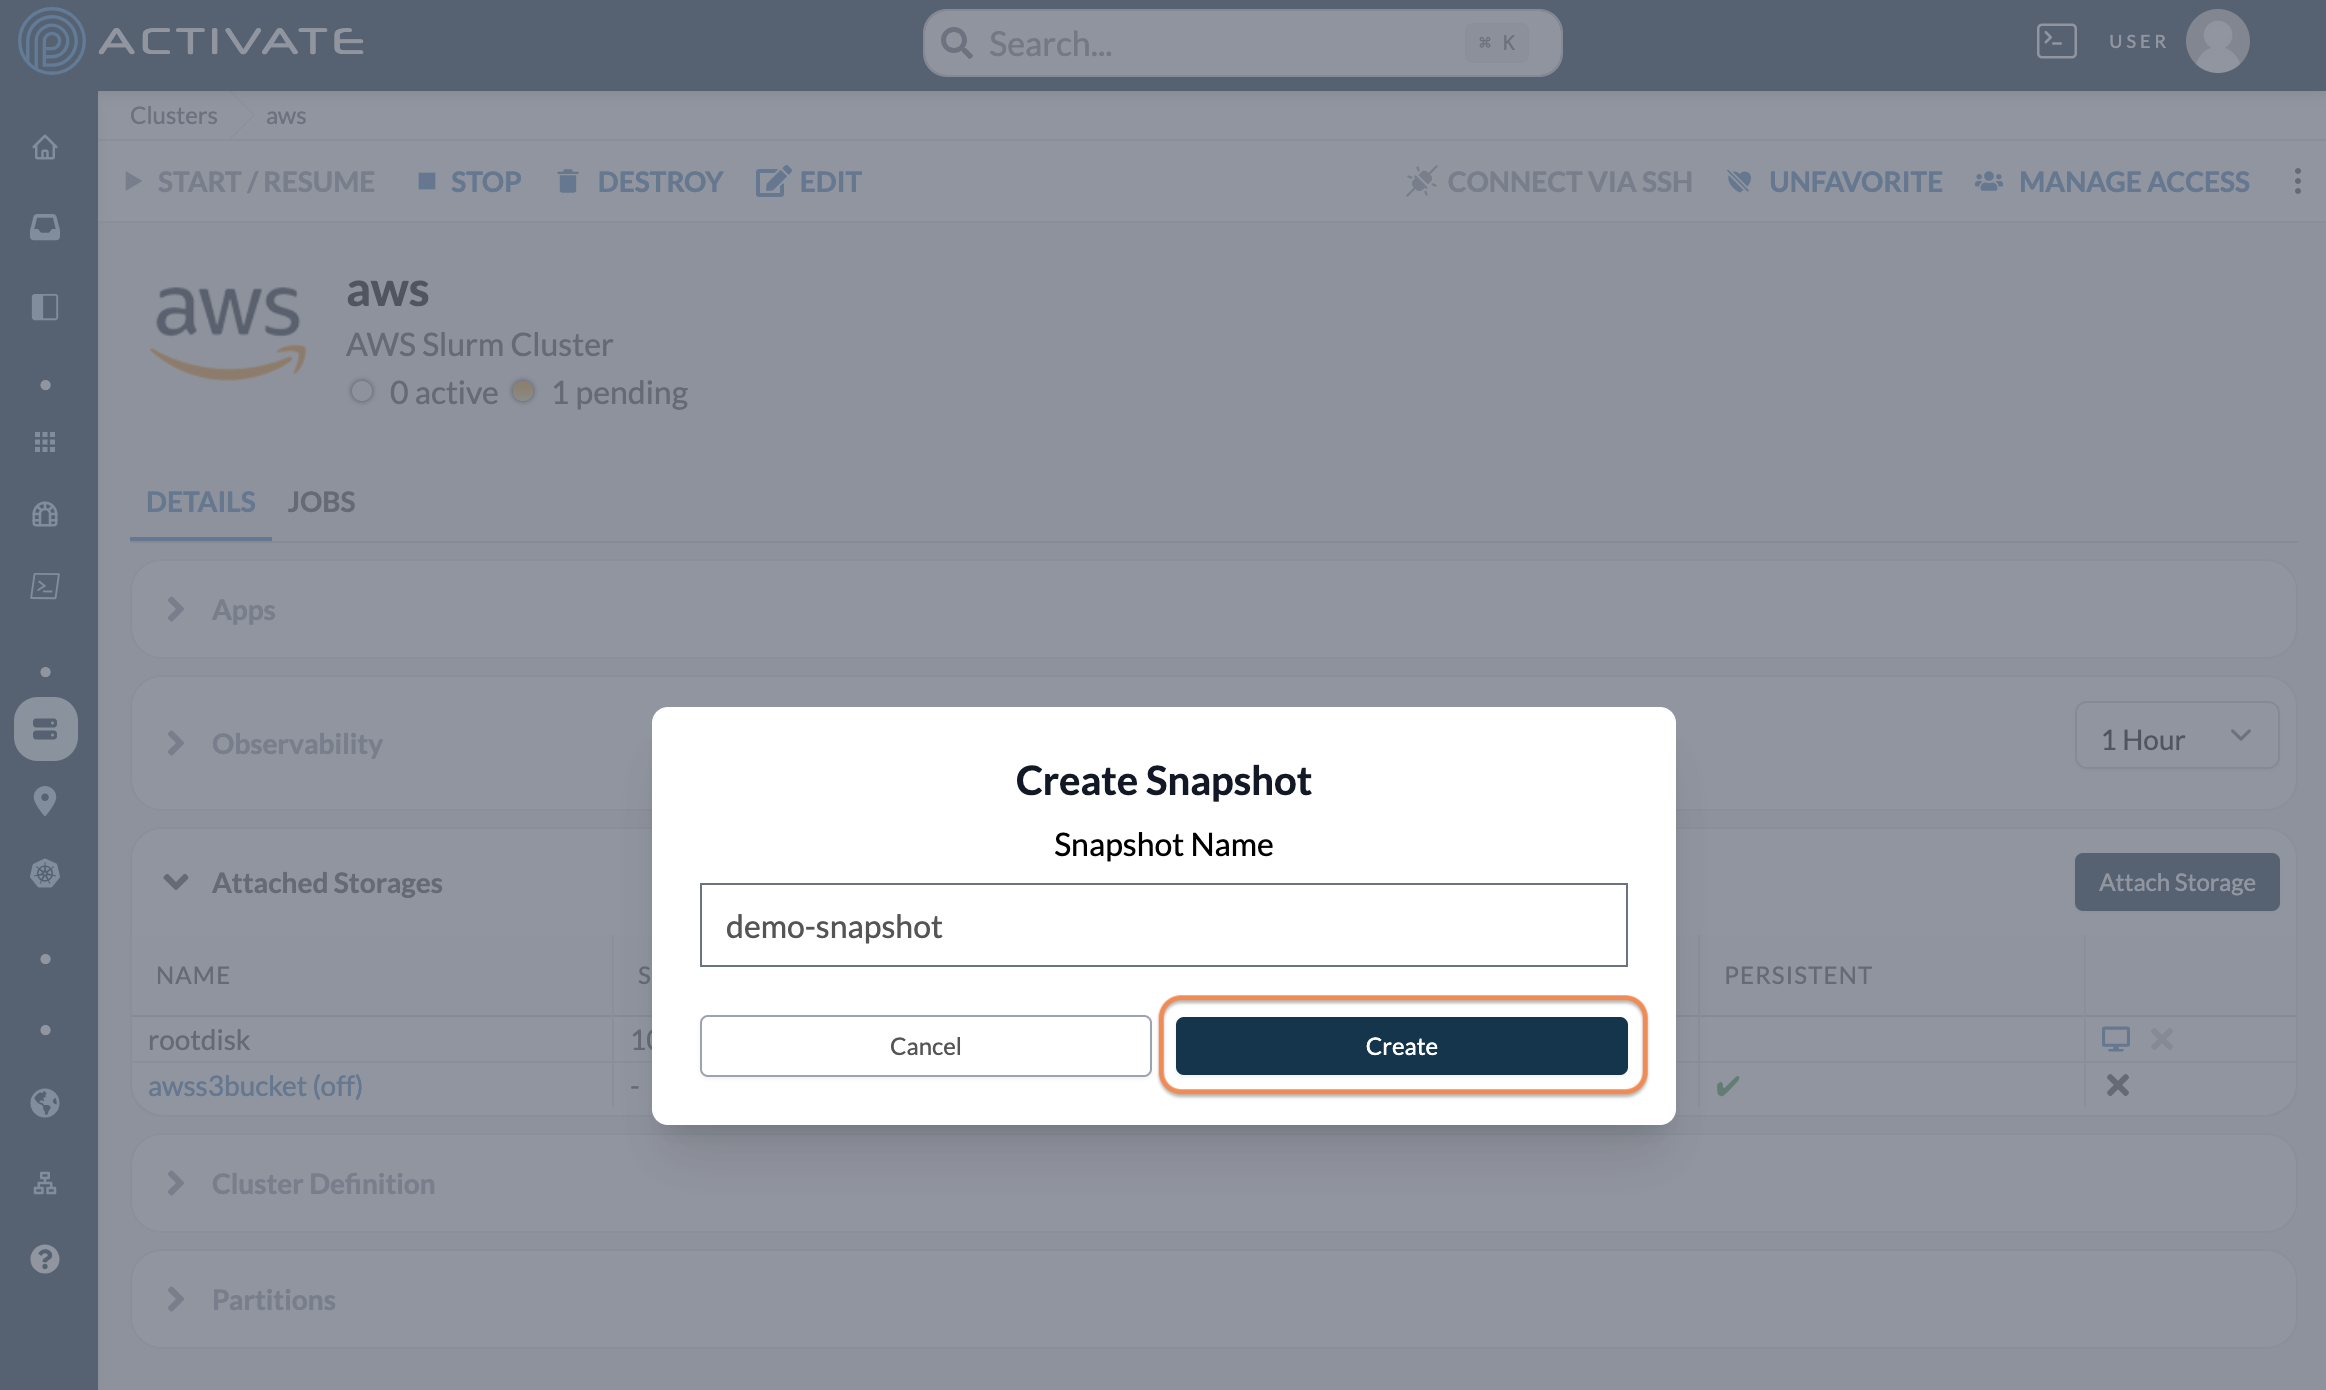
After starting a cluster, navigate to its Sessions page. In Attached Storages, click the snapshot icon.
Name your snapshot. Please note that the name must:
- begin with a letter.
- be between 3 and 36 characters.
- use only numbers, hyphens, and lowercase letters. Spaces are not accepted.
Click Create.
The snapshot will begin the provisioning process, and you'll be redirected to the Snapshots page.
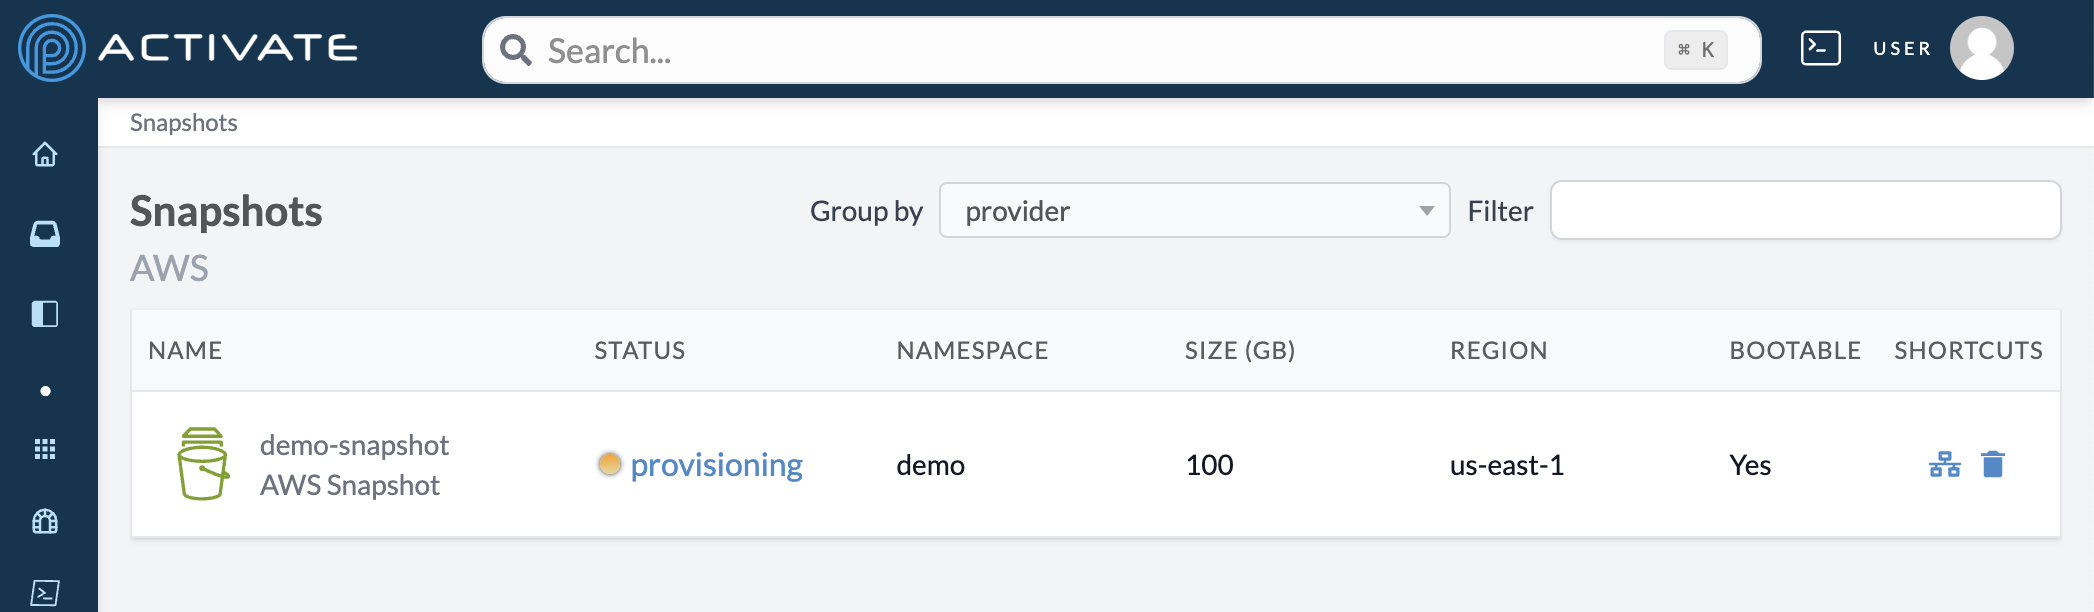
Click provisioning if you'd like to see the steps of the process.
When the snapshot has been created, its status will change to provisioned.

Sharing a Snapshot
If you share a snapshot with a group in your organization, users in that group will be able to restore their own disks' settings from your snapshot. This is useful if, for example, you and another group's users are conducting similar types of work.
On the Snapshots page, click the share icon.
On the next page, select the group(s) you want to share the snapshot with. You'll see the message Permission updated successfully.
Deleting a Snapshot
On the Snapshots page, click the delete icon.
A dialog box will appear with the message Are you sure you want to delete this snapshot?
Click Delete.
A notification will appear with the message Snapshot is waiting to be destroyed. This may take a few minutes.
When this process is finished, the snapshot's Status will display as deleted for the next hour.
Note
Please note that deleting a snapshot does not stop the cluster it was created from. You must stop the cluster separately.